Watchlist Management
The Watchlist Management feature in Video Processing Platform Station empowers you to maintain an accurate and current record of individuals of interest, a crucial aspect of security management. The Watchlist Management enables you to manage watchlists and watchlist members.
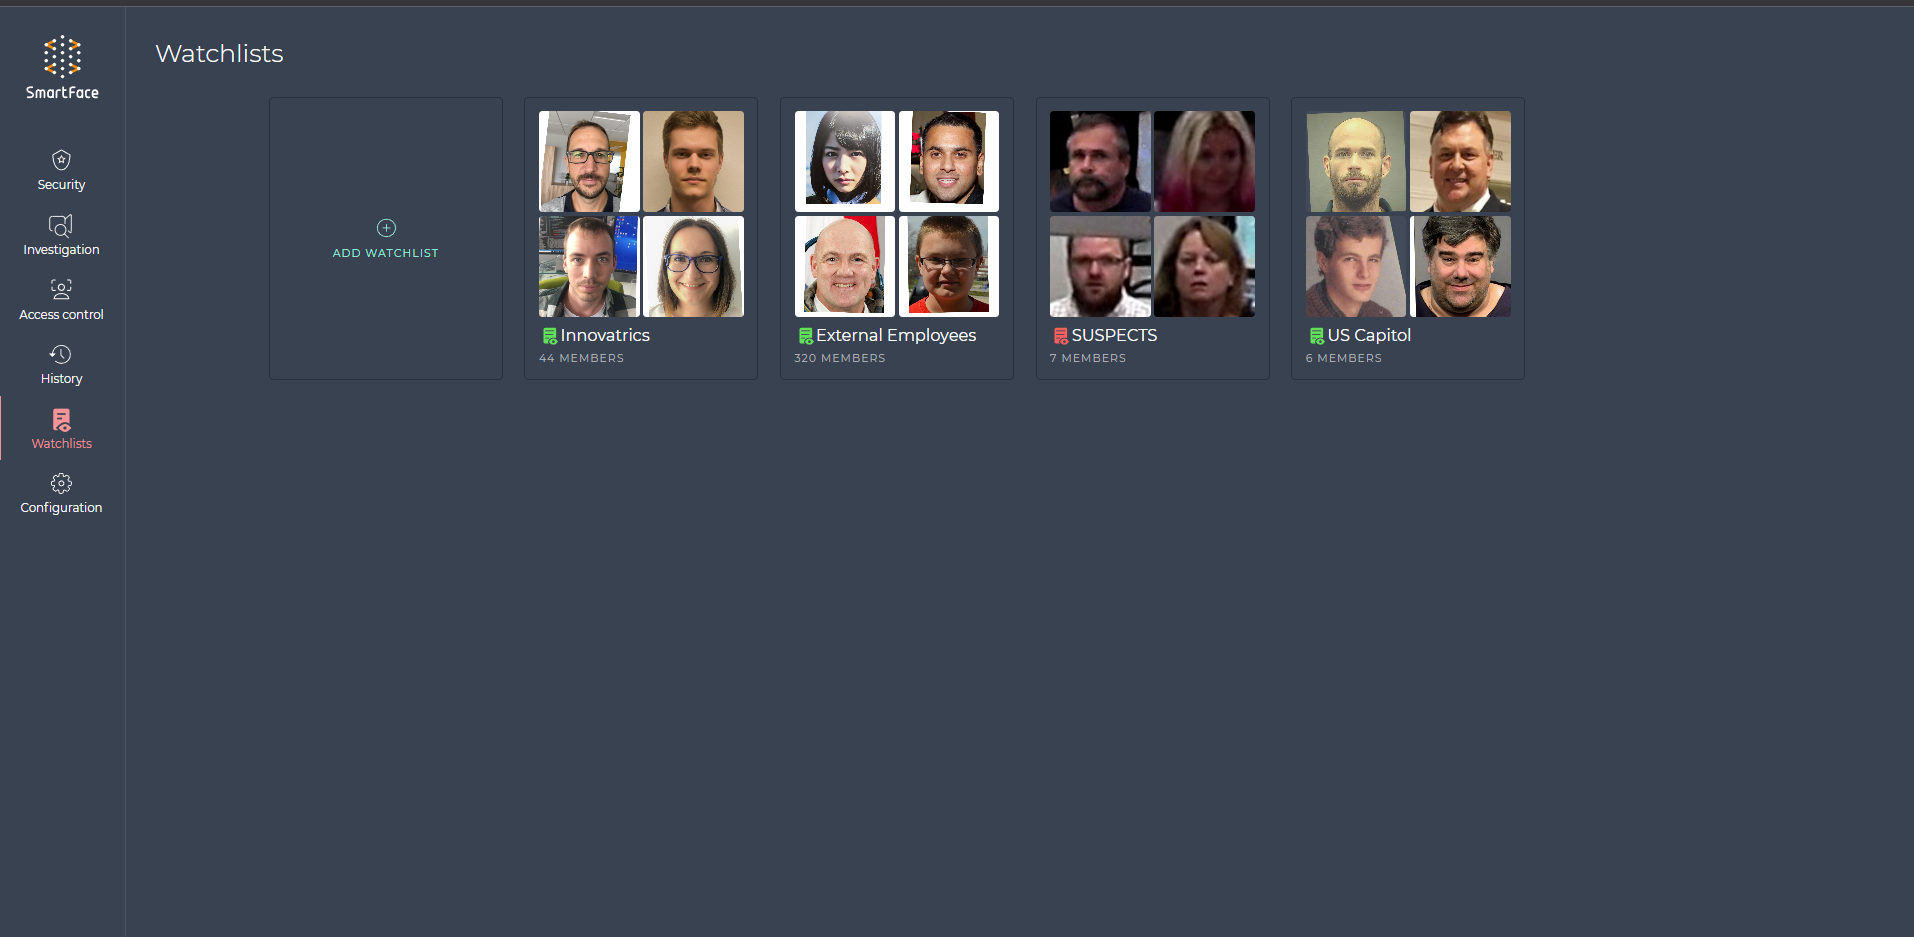
The Video Processing Platform Station - The Watchlist Management
Once you’ve registered members into your watchlists, Video Processing Platform continually scans and matches individuals in real-time, comparing their faces to the watchlist members. If a match is detected, you will receive immediate notifications, allowing you to take appropriate actions promptly. This matching capability is a fundamental component of proactive security and ensures that you are alerted to the presence of individuals of interest.
Manage a watchlist
in the Video Processing Platform Station you can create watchlists, edit their name, color, matching threshold or delete them. Video Processing Platform STation also allows you to easily register, edit and delete members from these watchlists.
Create a watchlist
To create a watchlist, you have to name the watchlist, add watchlist members and specify a matching threshold. Please follow these instructions:
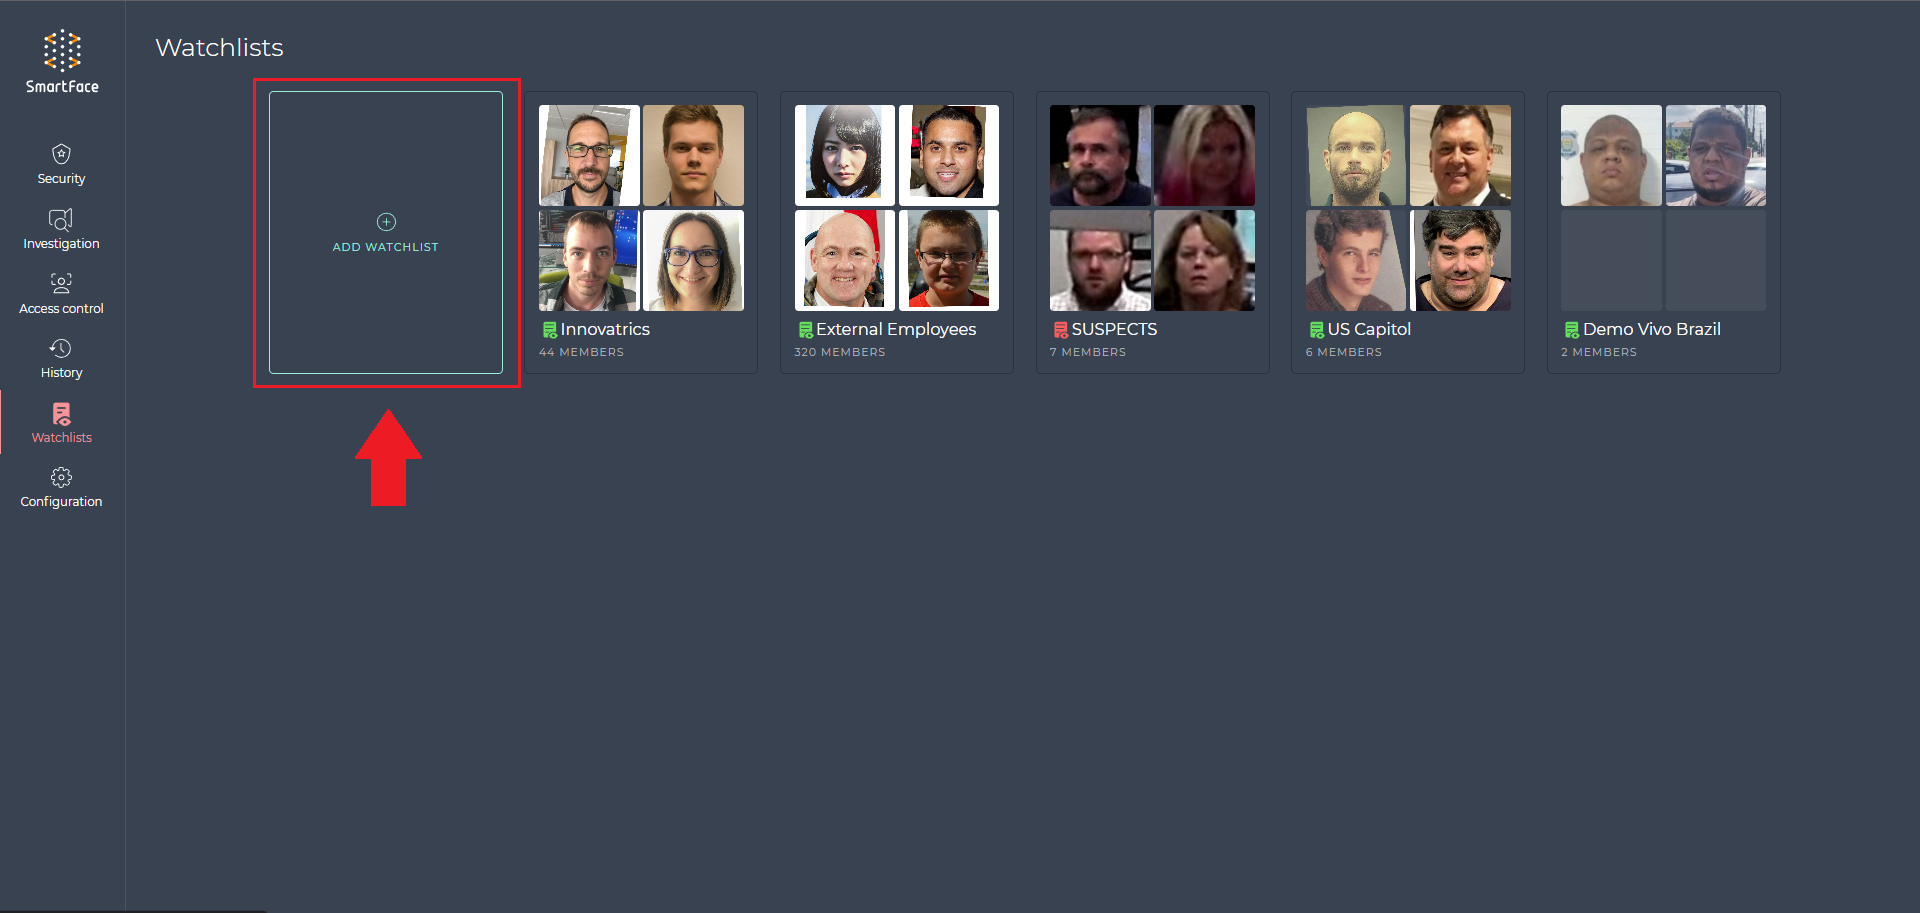
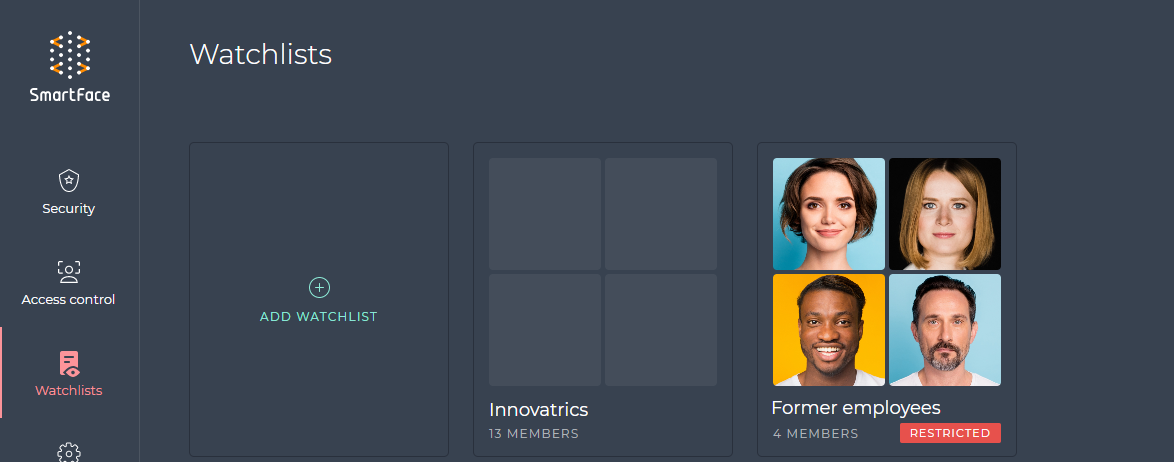
- Go to Watchlists in the left panel.
- Select ADD WATCHLIST.
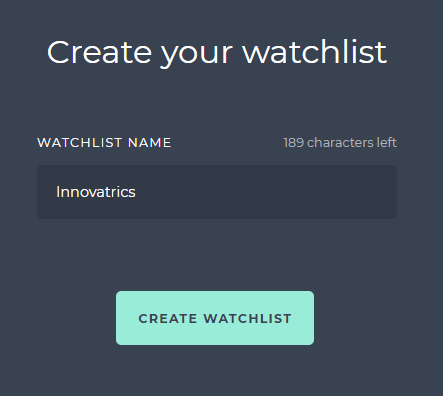
- Type the name of your watchlist and confirm with CREATE WATCHLIST.
- You can register one or more Watchlist Members during this step.
- Specify the MATCHING THRESHOLD depending on your use case and CONFIRM. For more information what is the matching threshold, see Matching and Edit the watchlist matching threshold.
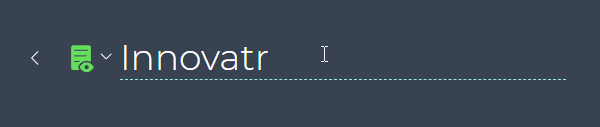
Edit the watchlist name
Select the specified watchlistBegin by selecting the watchlist whose name you wish to change. You can find a list of available watchlists on the main screen of the watchlist management.
Click on the Watchlist Name and editAfter clicking on the watchlist name, it should become an editable text field. Then click outside the text box or press Enter on your keyboard.
Edit the watchlist color
- Select a specified watchlistStart by choosing the watchlist you want to modify. You can find a list of available watchlists on the main screen of the watchlist management.
- Click on the watchlist IconNext to the name of the selected watchlist, you’ll see a watchlist icon. Click on this icon.
- Choose from the color paletteOnce you click on the watchlist icon, a palette of colors will be displayed. You can choose a color from this palette to change the watchlist’s color. By default, the watchlist’s color is green.
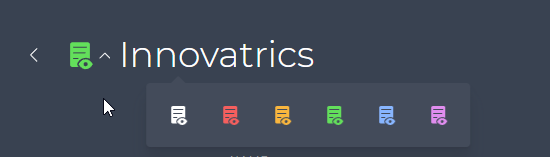
Please note that the color of the watchlist can also be customized using the REST API endpoint PUT /api/v1/watchlists.by specifying the previewColorattribute. This allows you to have further control over the appearance of the watchlist to suit your preferences and needs.
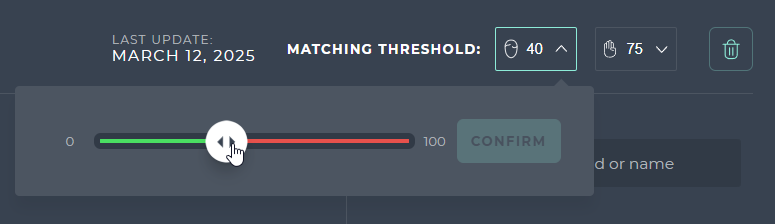
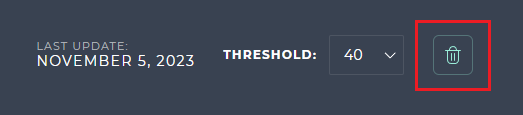
Edit the watchlist matching threshold
For more information what is the matching threshold, see chapter about matching.
- Click on a specific watchlist.
- Select the MATCHING THRESHOLD depending on your use case for both face and palm modalities. The default value for the matching threshold is
40for faces and75for palms.

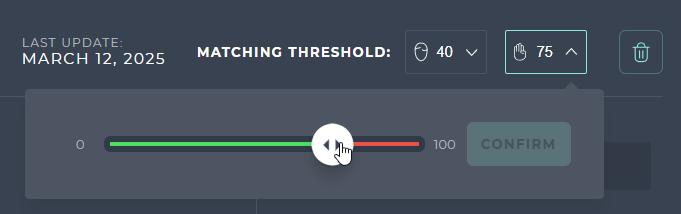
- CONFIRM.
Delete the watchlist
To delete the watchlist:
- Go to Watchlists in the left panel.
- Then, you may either:
- hover the mouse over the specific watchlist and select DELETE,
- or select the watchlist and click DELETE in the right upper corner in watchlist detail.
Mark a watchlist as restricted
A restricted watchlist is created by marking a regular watchlist as restricted. In the current version of Video Processing Platform Station it is not possible to mark a watchlist as restricted directly in the web application. This step requires manual changes in the configuration files on the web server.
The change needs to be done in two places:
- configuration file for Video Processing Platform Station
- configuration file for Access Controller.
It is possible to mark multiple watchlists as restricted.
To change the watchlist into restricted - Video Processing Platform Station
- Go to the location where you installed the Video Processing Platform Station. For example,
C:\Program Files (x86)\Video Processing Platform Station\. - Open the
.envconfiguration file.
  CORE_API_ROOT=http://localhost:8098/api/v1
  ACCESS_CONTROLLER_ADDRESS=localhost:5050
  HOST=0.0.0.0
  PORT=8000
  BLACKLIST_WATCHLIST_IDS=8cb4a672-25b4-475f-bd94-2f8a31c760e1,0794ff0c-9de6-49fb-877d-24bb46dc806e
  ENABLE_AUTHENTICATION=false
  KEYCLOAK_ADMIN_URL=http://localhost:8080/auth/admin
Add the ID of the watchlist into BLACKLIST_WATCHLIST_IDS variable. You may specify multiple blacklists at once by entering watchlists' IDs separated with a comma (BLACKLIST_WATCHLIST_IDS=ID1, ID2, ID3).
To change the watchlist into restricted - Access Controller
- Go to the location where you deployed Access Controller.
- Open the
appsetting.jsonconfiguration file, which can be found in the folder where it was extracted. - In the configuration section under the
FilterConfiguration.BlacklistsConfigurationkey, set theBlacklistattribute to the watchlist IDs, which you want to mark as blacklists. Note that this attribute is a JSON string array.
  "BlacklistsConfiguration": {
	"Enabled": true,
	"Blacklists": [ "8cb4a672-25b4-475f-bd94-2f8a31c760e1", "0794ff0c-9de6-49fb-877d-24bb46dc806e" ]
  },
- After you completed the changes, restart the Video Processing Platform Access Controller and Video Processing Platform Station services:
- Go to the Task Manager and select the Services tab.
- Right-click on the specific service (SFAccessController or SFStation) and choose Restart.
Restricted Watchlists
When watchlist is marked as restricted it is displayed in overall list of watchlist and also in watchlist details.
Restricted watchlist in list of watchlists
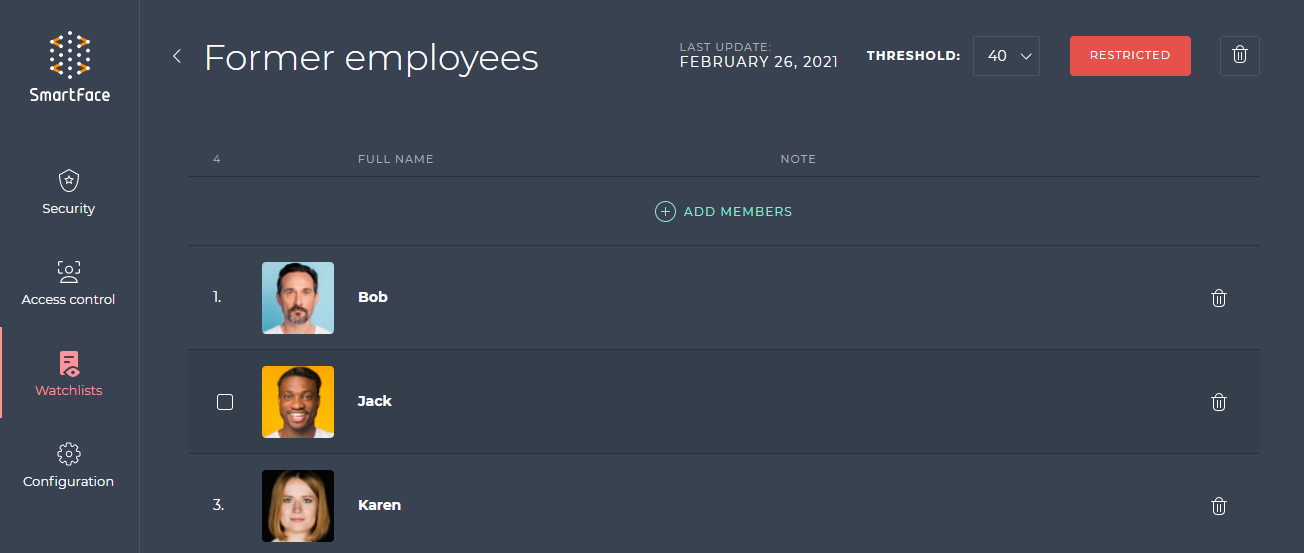
Restricted label in watchlist details
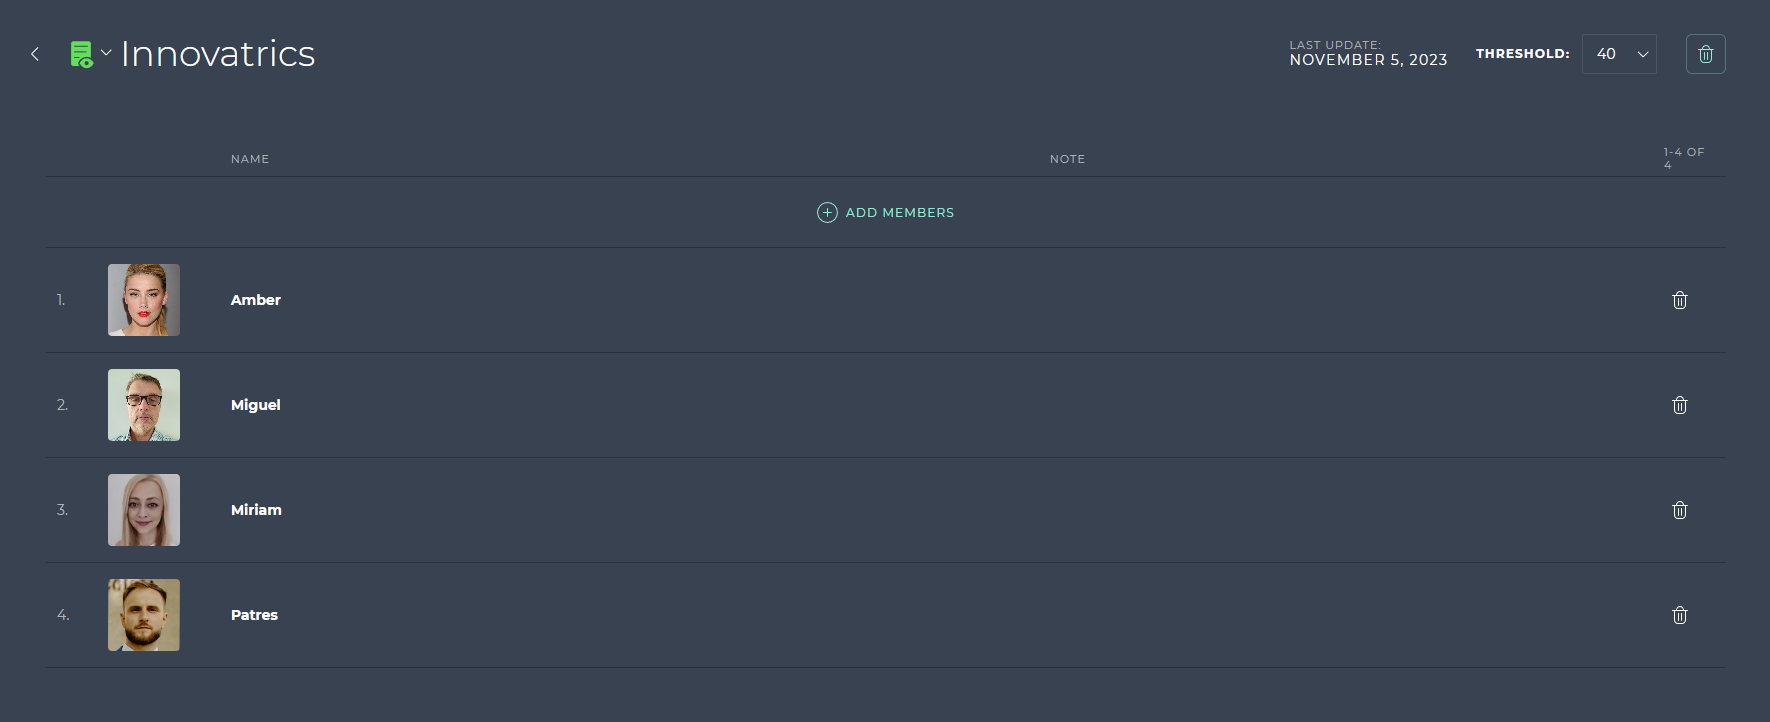
Manage watchlist members
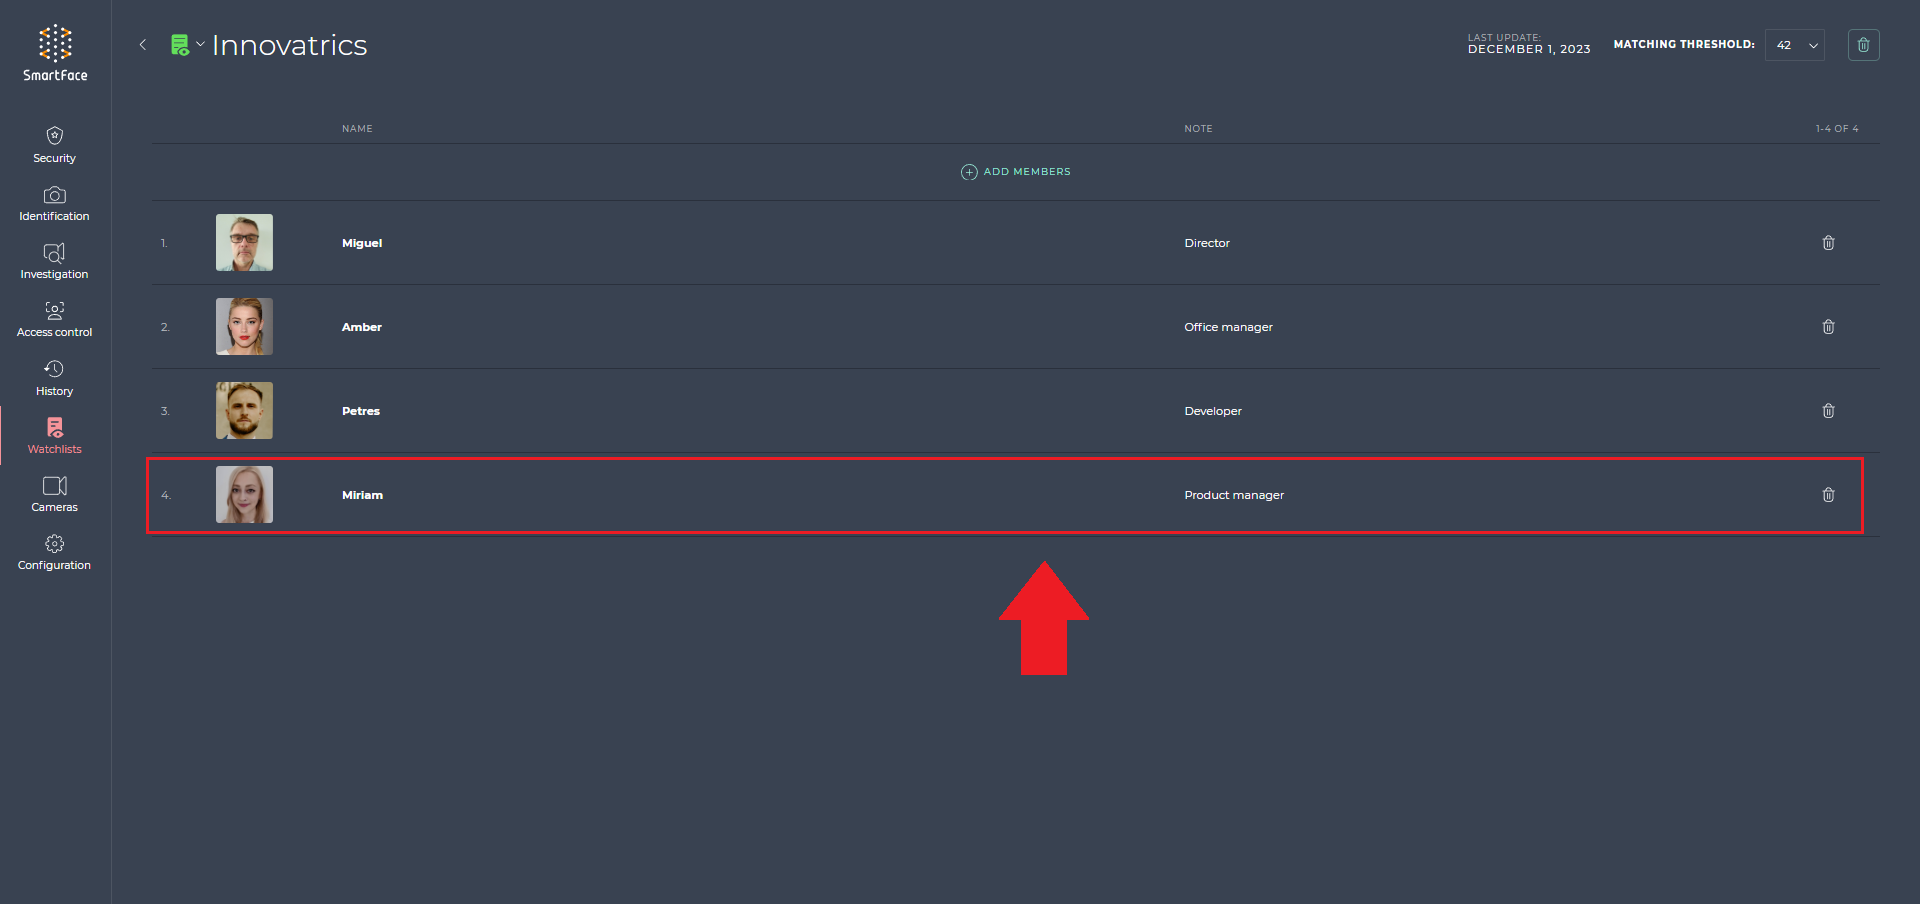
Watchlist members can be accessed by opening a respective watchlist. Members are listed in a plane table which is divided into discrete pages that are limited to display maximum of 100 members. When the limit is reached, members are displayed on the next page and the pages numbers are shown on the bottom of the page. The pagination helps you to navigate among multiple members.
Each Watchlist member has now icons representing available modalities ![]() for the member. This includes faces, palms and QR codes. These modalities can be used for a quick filter in the right panel when looking at a watchlist.
for the member. This includes faces, palms and QR codes. These modalities can be used for a quick filter in the right panel when looking at a watchlist.
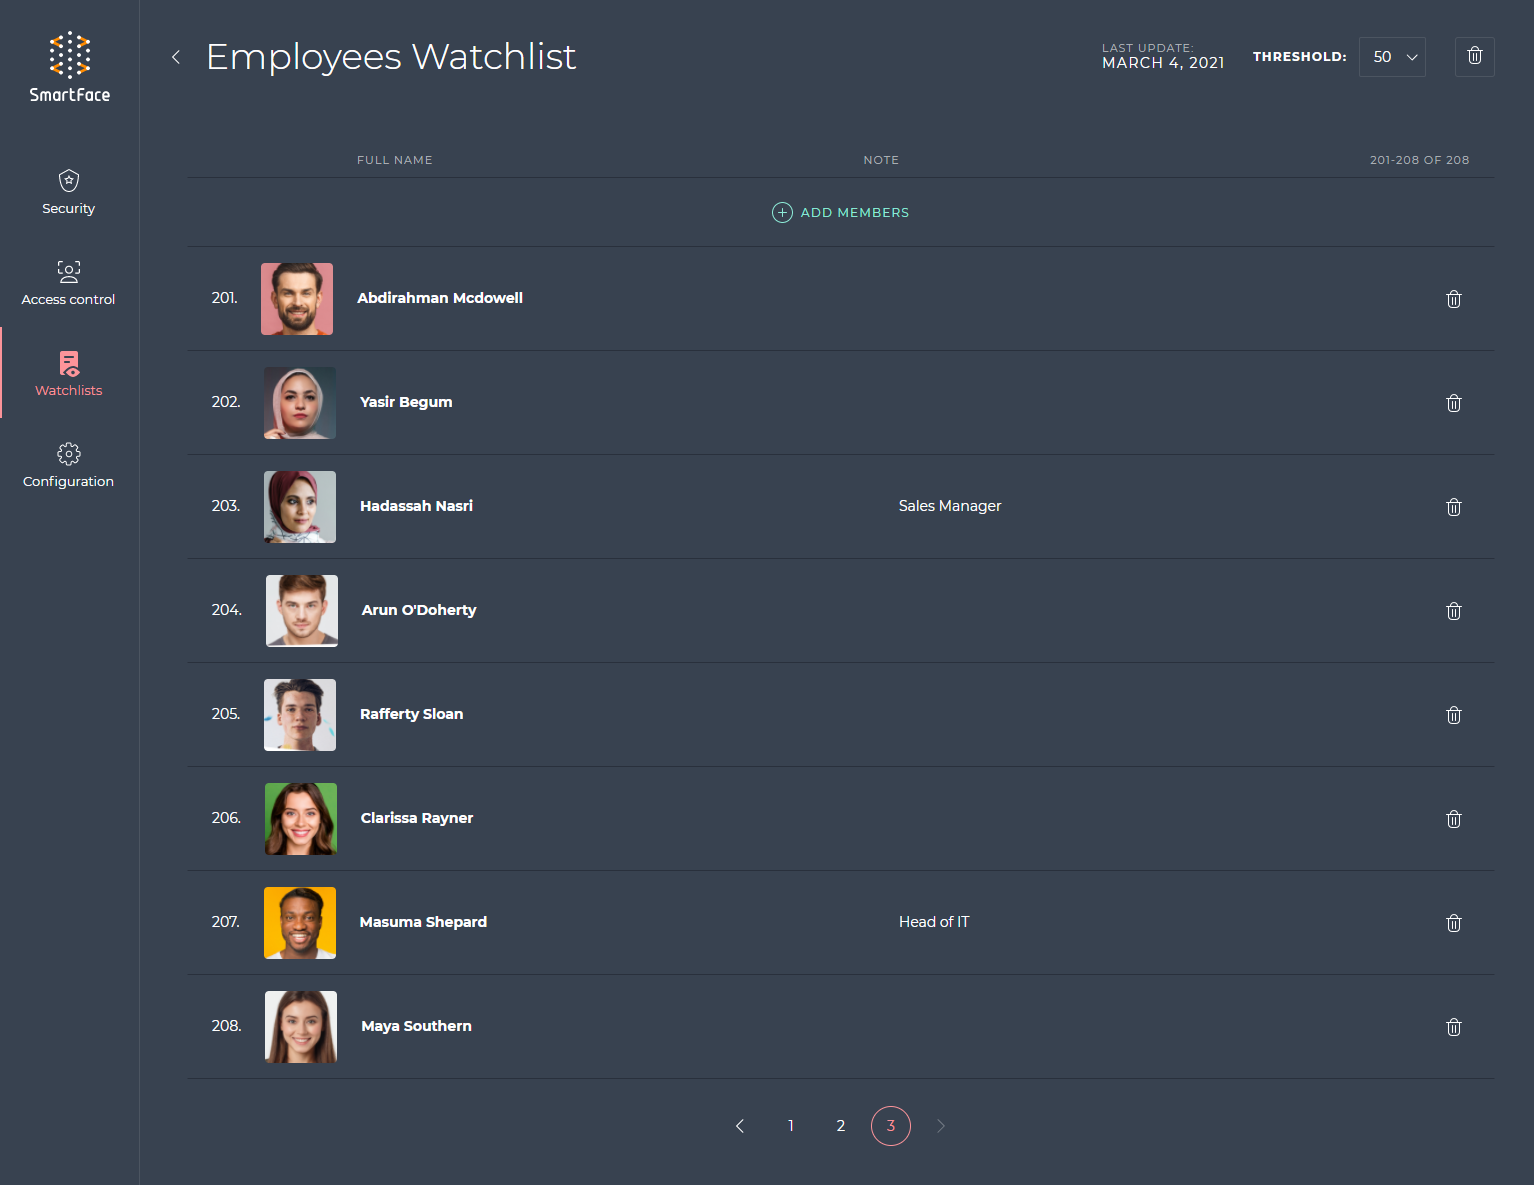
List of watchlist members with 320 items separated into 4 pages.
Register the watchlist member
There are 3 ways to add new member(s) into existing watchlist:
- registration in the watchlists section
- registration from No-match notification detail
- bulk registration in the watchlists section
Register new watchlist member in the watchlists section
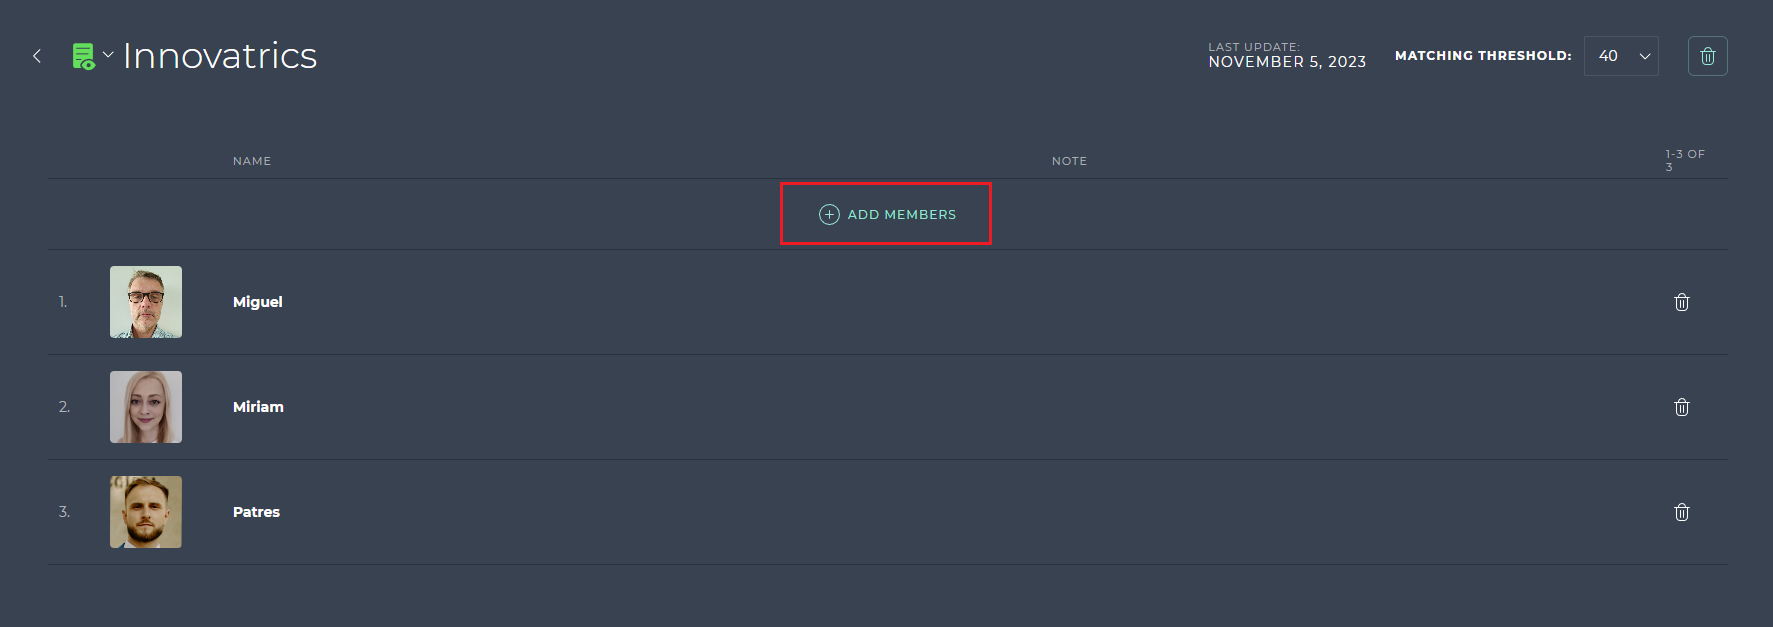
- Open the watchlist.
- Then, click on the +ADD MEMBERS button.
- Decide whether to create new watchlist members with face, palm or without photos
3A. Choose “Faces and upload one photo per one watchlist member by dropping the photos directly on to the marked area, by choosing the photos on your computer or by taking a photo with the camera on your device. It’s only possible to add maximum 30 facial photos of watchlist members at the same time.
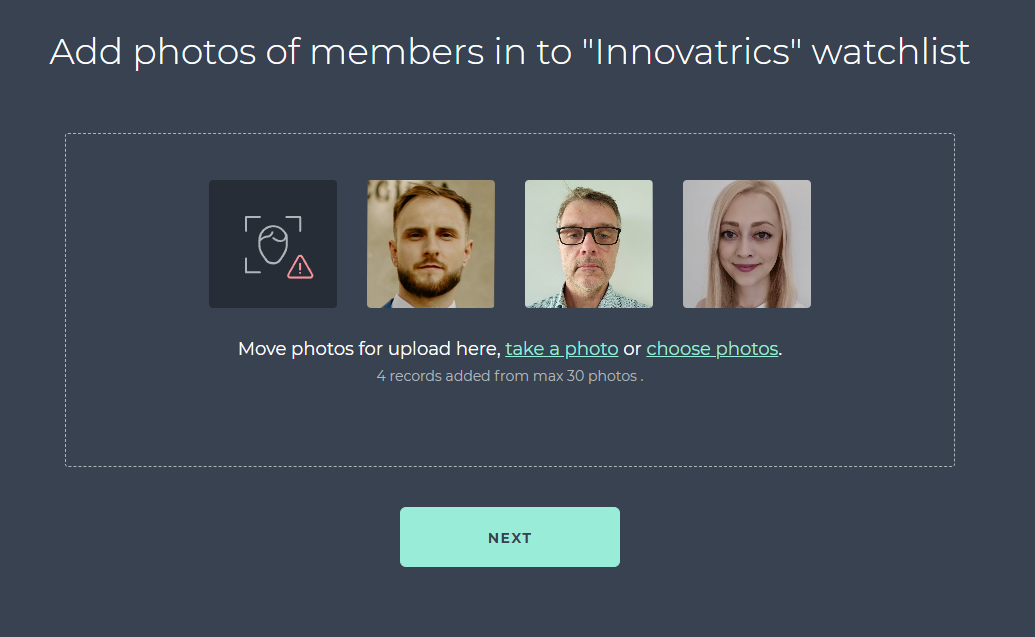
After you uploaded photos of watchlist members, click NEXT.
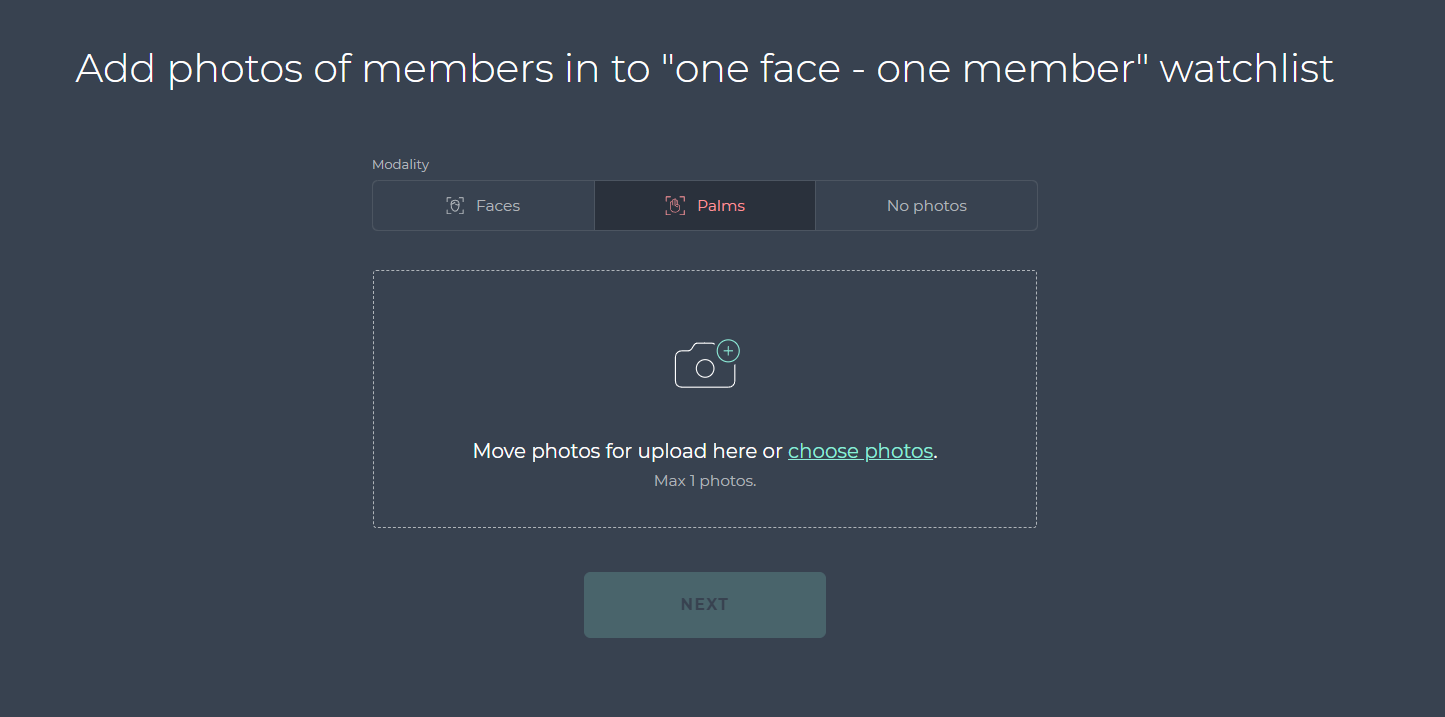
DOT_FACE_CAMERA_ENABLED during the Video Processing Platform deployment and setup secure (HTTPS) connection to the Video Processing Platform Station. If “take photo” feature is not available for you, please contact your Video Processing Platform system administrator3B. Choose Palms and upload one photo of one watchlist member by dropping the photo directly on to the marked area, by choosing the photos on your computer. It’s only possible to add maximum of 1 palm photo of one watchlist member at the same time.
3C. Choose Without photos. You can set a number of new members to be created. Click NEXT.
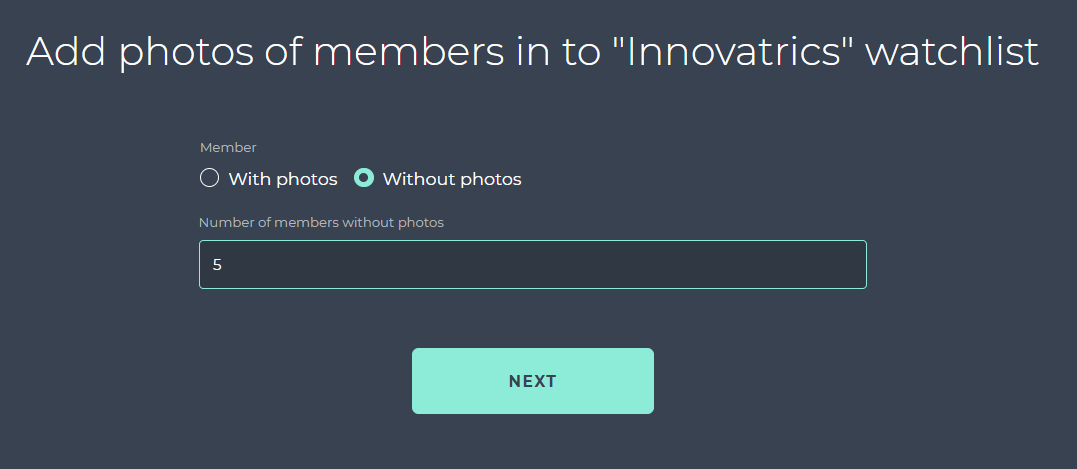
New members will be created based on the number used.
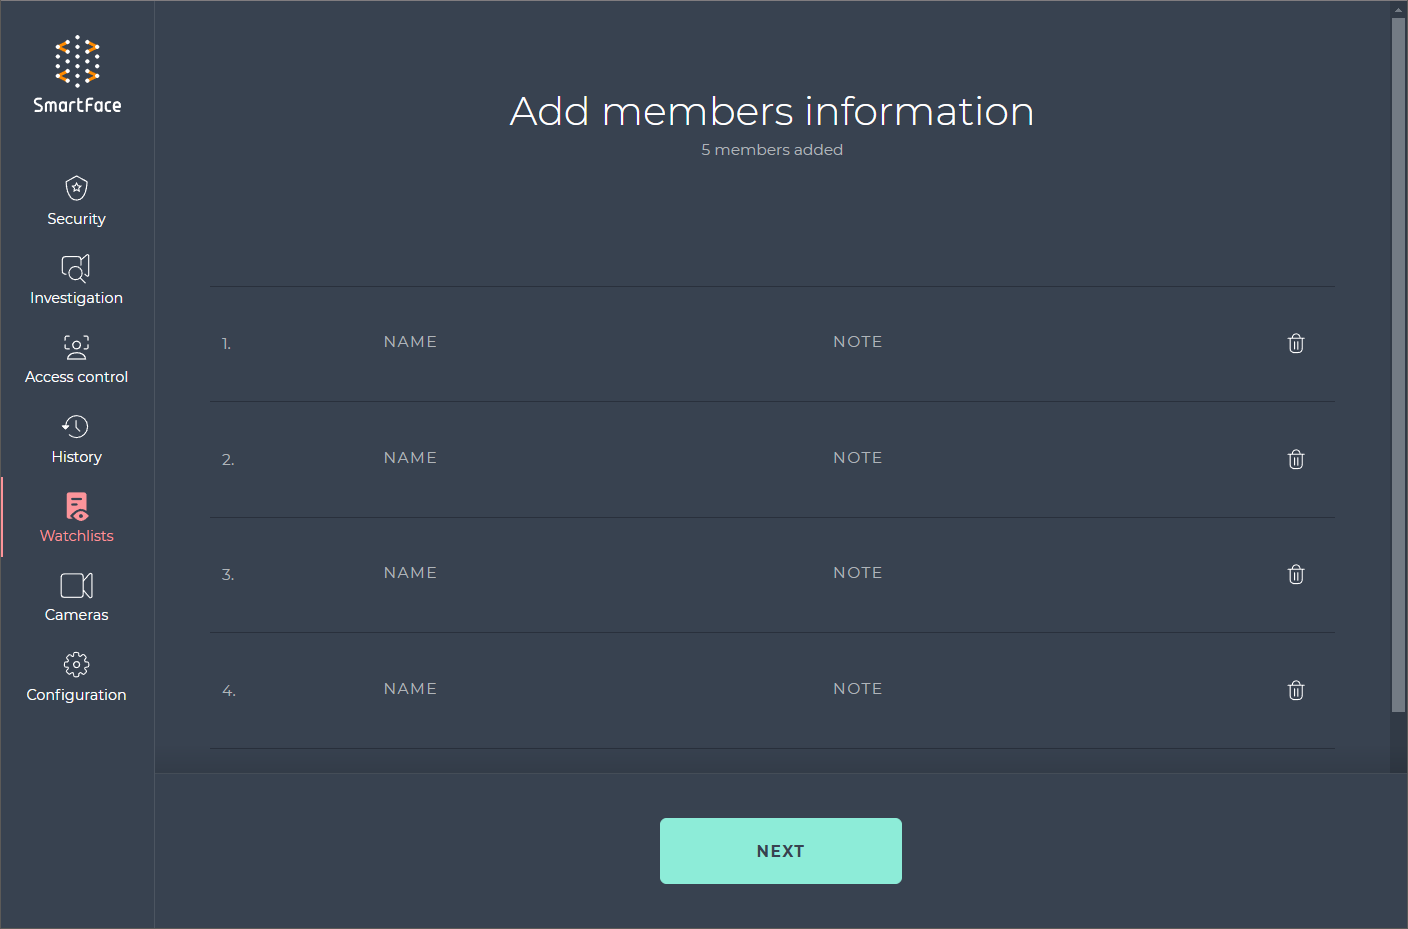
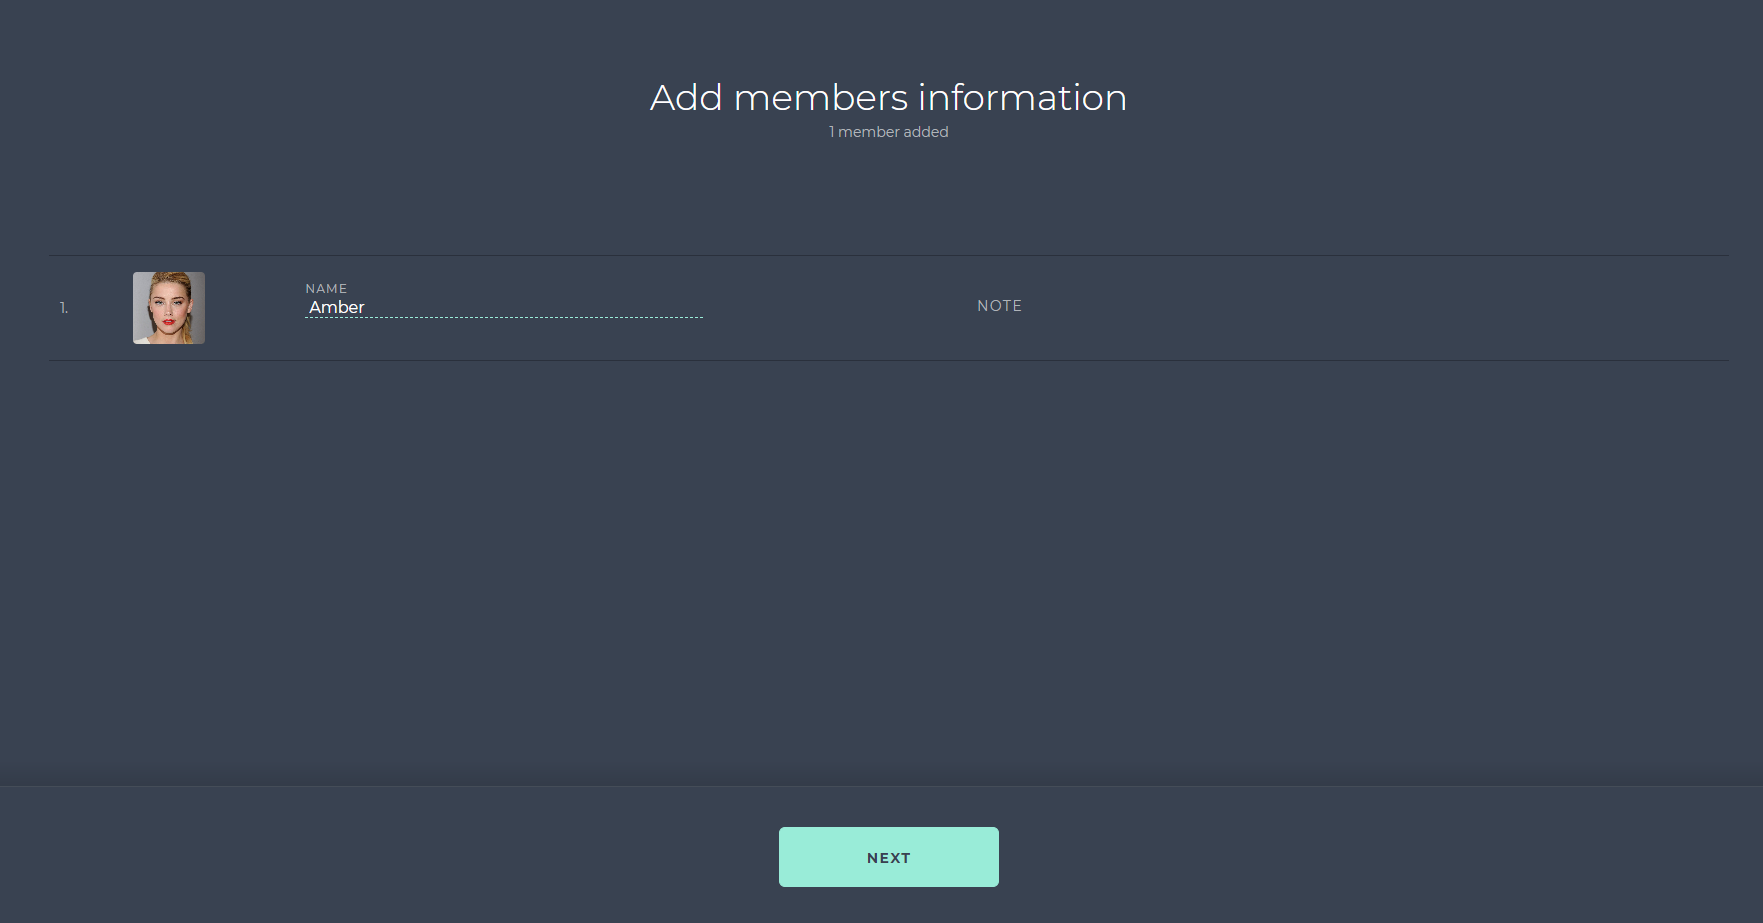
- You can enter the FULL NAME for every uploaded watchlist member. You may also add a note by specifying the NOTE field.
- Click NEXT to confirm. The members are added.
⚠️ Face not found on the uploaded image
It is possible that Video Processing Platform does not detect a face on the uploaded image due to the bad conditions for facial recognition (insufficient lightning, wrong angle, small size of the face on the image etc.). In such case, the system will inform you that the face is not detected on the image.
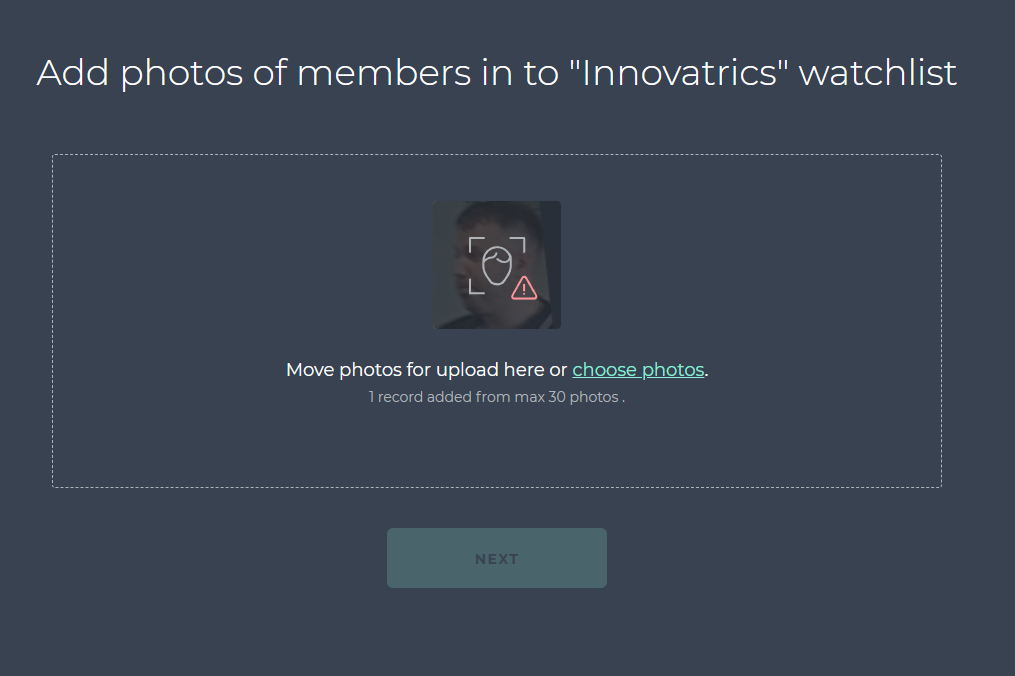
Video Processing Platform does not detect a face on the uploaded image.
Bulk registration
To initiate bulk registration click on the REGISTER NEW MEMBERS button within the Watchlists section.
On the Register new members screen you can pick either the Simple and Advanced registration options.
Simple registration
The simple registration matches the common registration method, however it adds the possibility to directly link the registered Watchlist Member with 1 or more Watchlists.
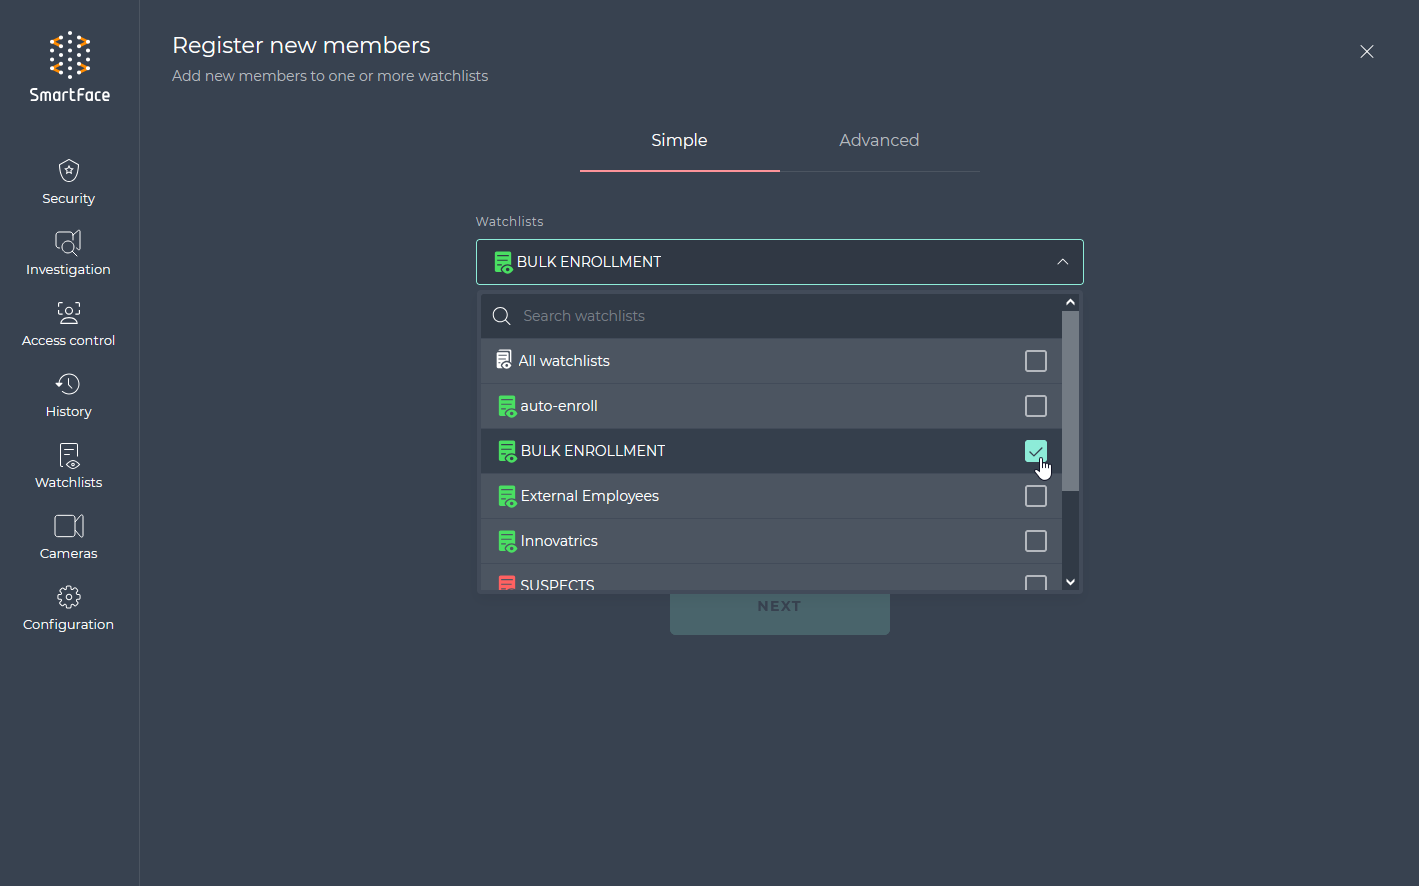
Once the watchlist(s) is selected, you can continue the registration process as per the common registration method.
Advanced registration
Within the advanced registration method you can select one or more Watchlists to be linked with the newly registered Watchlist Members.
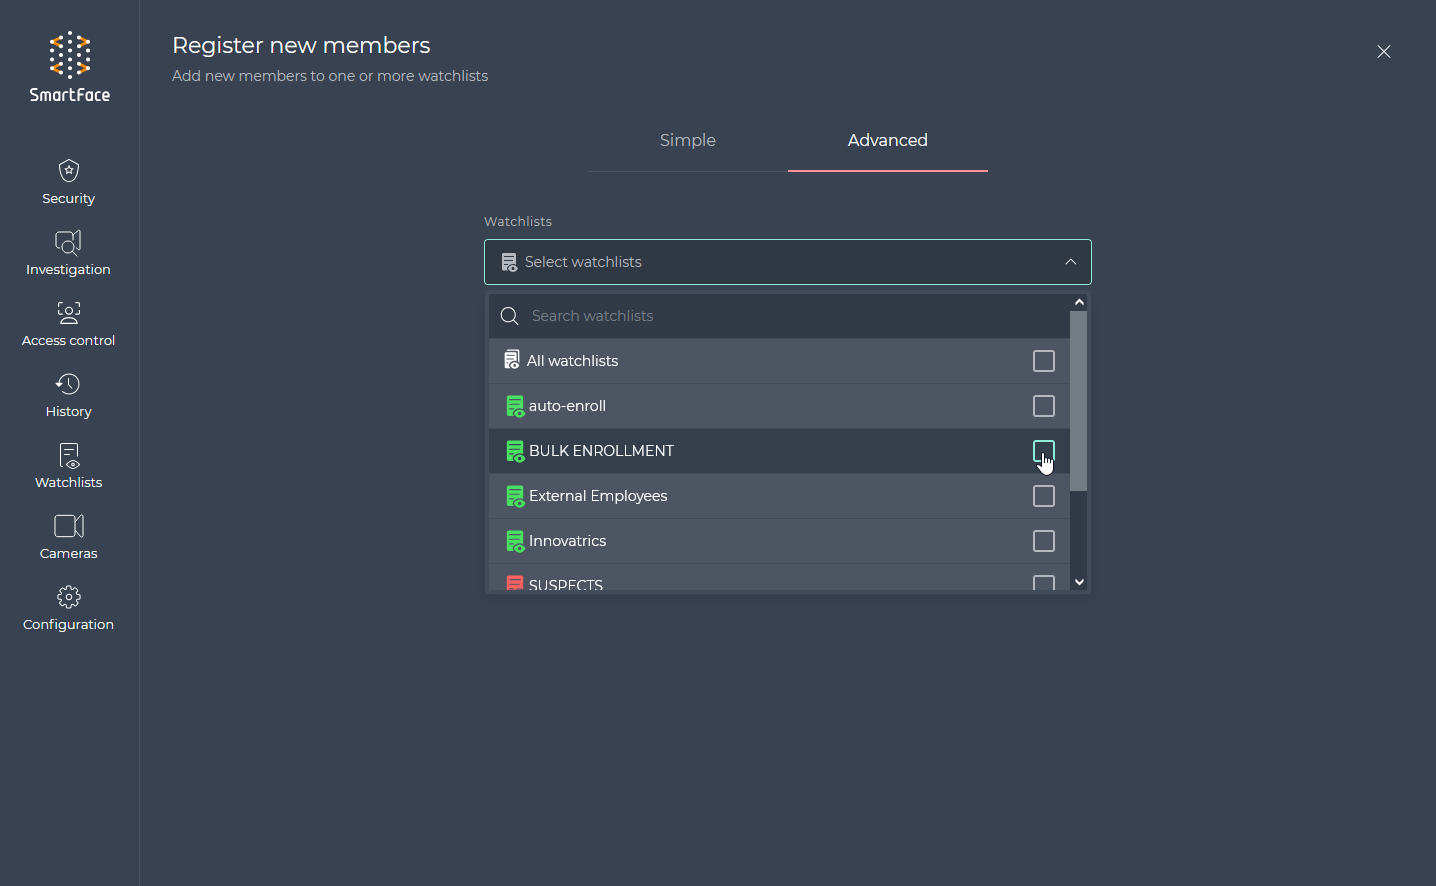
Once at least one Watchlist is selected additional options are available
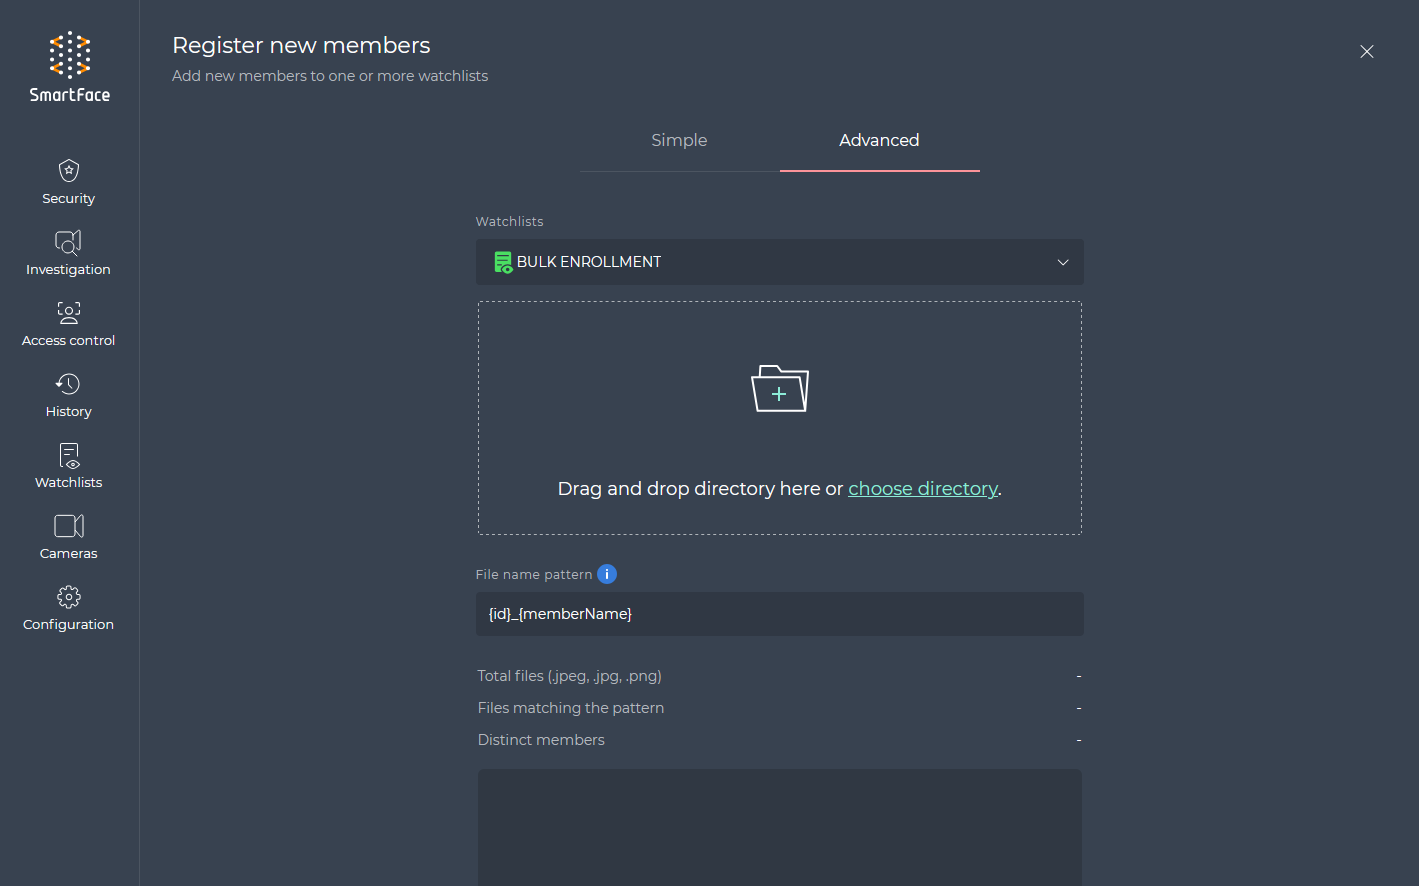
You can choose the directory with registration images either using the drag’n’drop panel or by clicking on the choose directory.
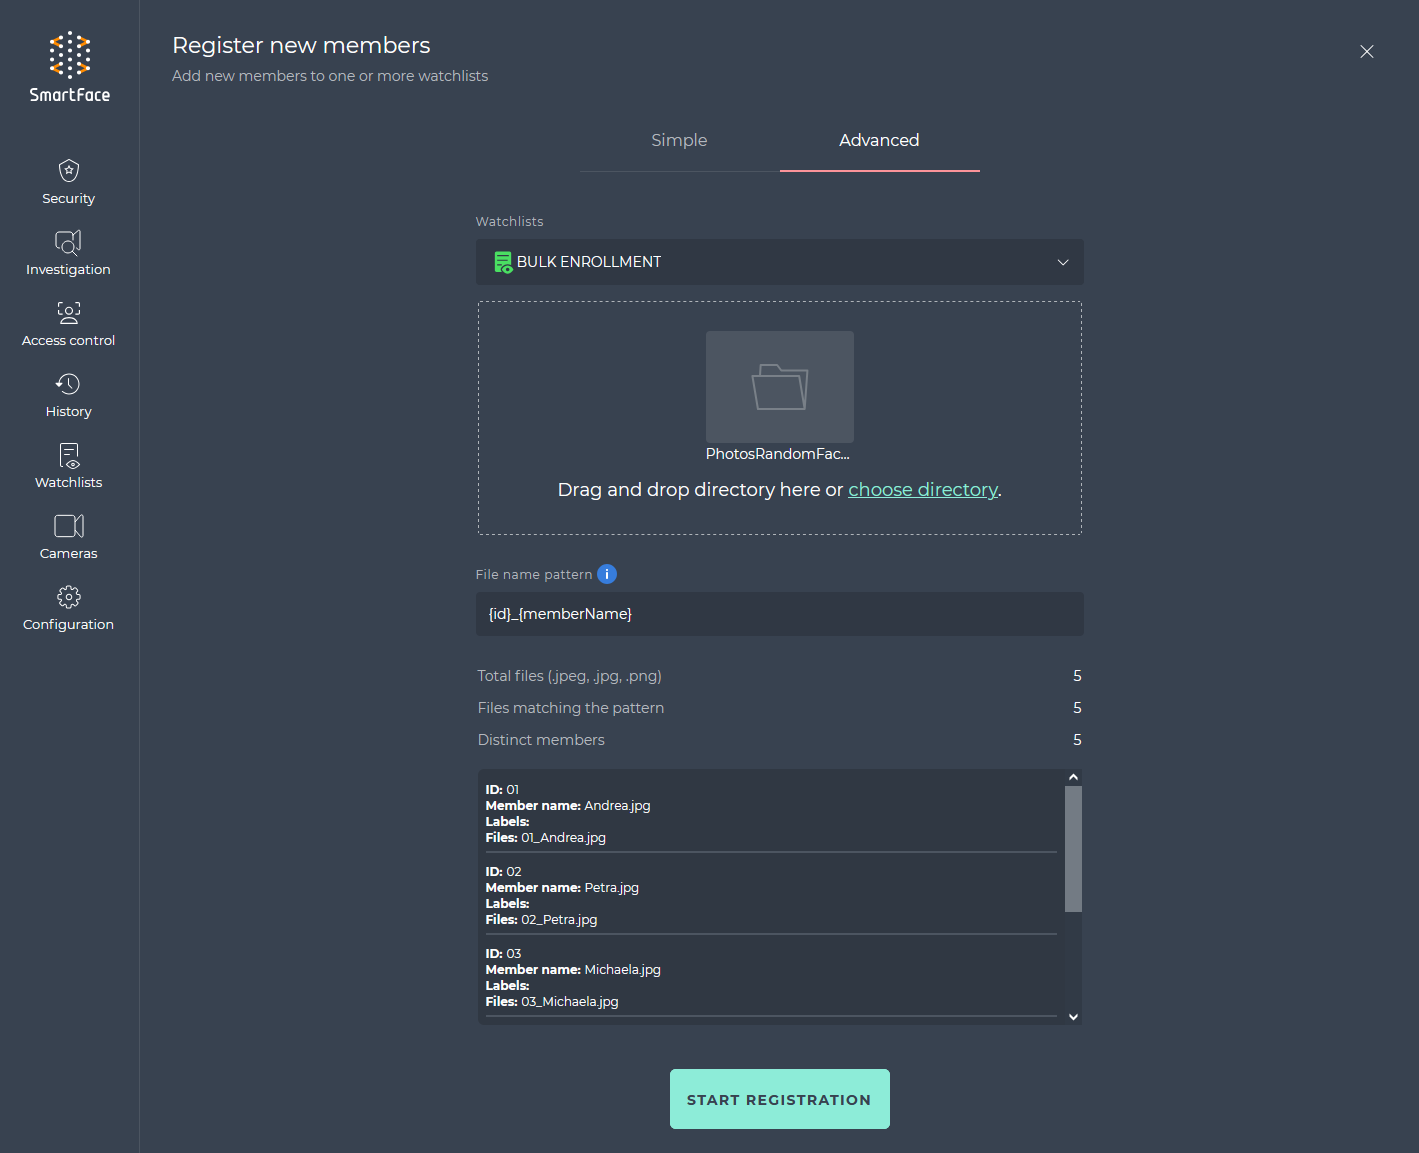
If there are applicable images within the chosen directory, the Video Processing Platform is looking for images matching naming patterns. If there are images matching the pattern, the amount of such files will be presented.
You can set up the file name pattern as below:
{id} - identificator of wl member - pictures with same id will be grouped under one wl member
{memberName} - display name of wl member - could be empty
{label:KEY} - placeholder for passing value to label with key KEY
* - wildcard
{ext} - extension of file e.g: jpg, png, etc…
Example #1
{id}-{memberName}-*.{ext}

3-john_doe-1.jpg
3-john_doe-2.jpg
3-john_doe-3.jpg

id - 3
memberName - john_doe
Example #2
{memberName}-{label:date}.{ext}

john_doe-20240101.jpg

id - will be generated by system
memberName - john_doe
label:date - 20240101
If you are happy with the found and matched images, click on the START REGISTRATION button.
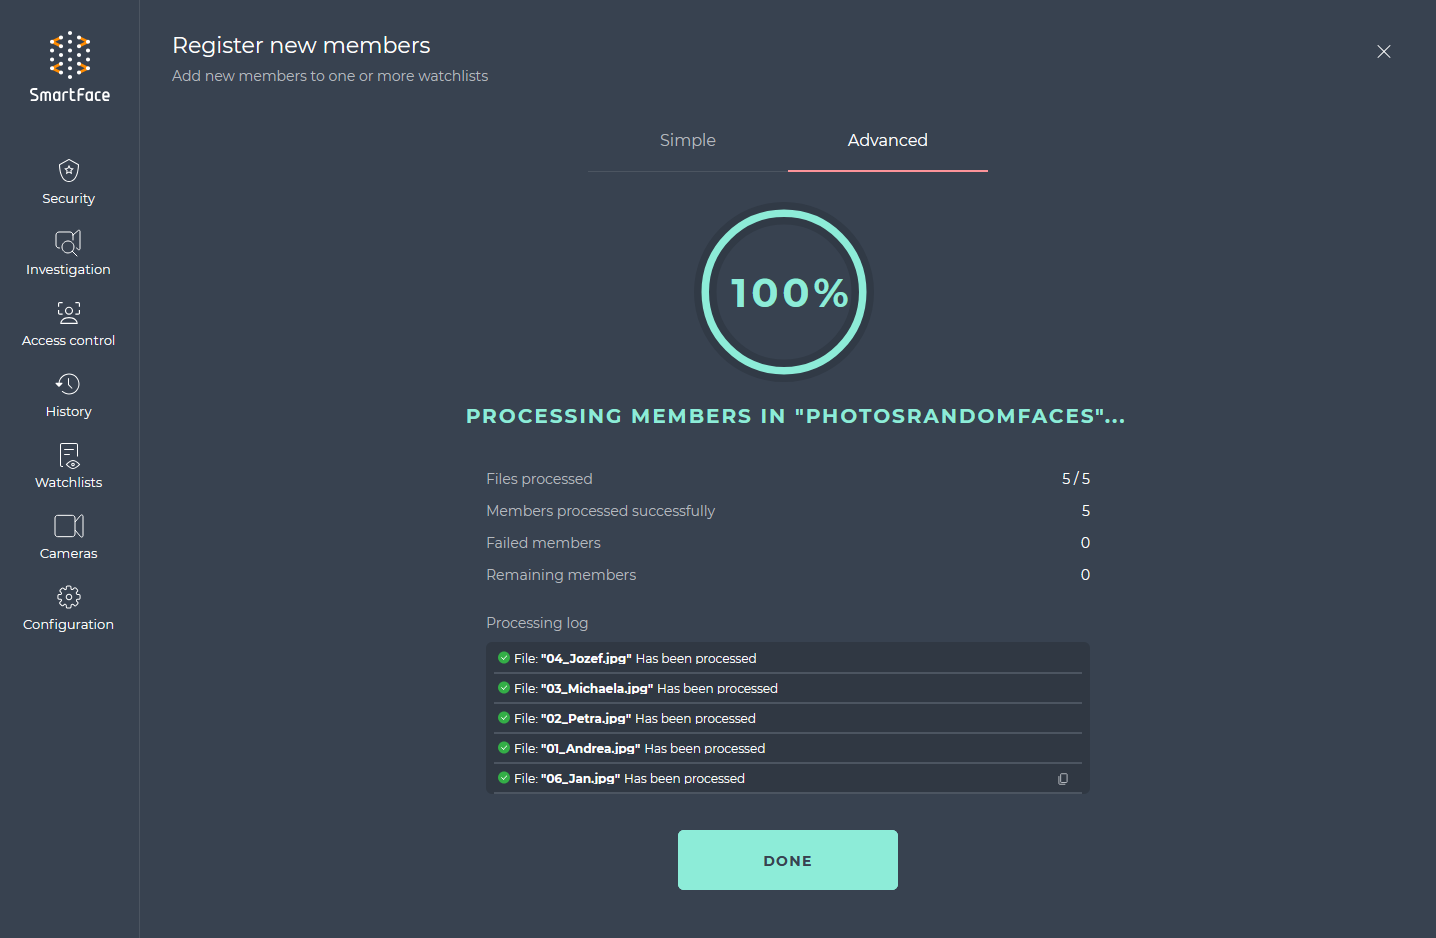
Setup or confirm the Detection settings. Click Confirm
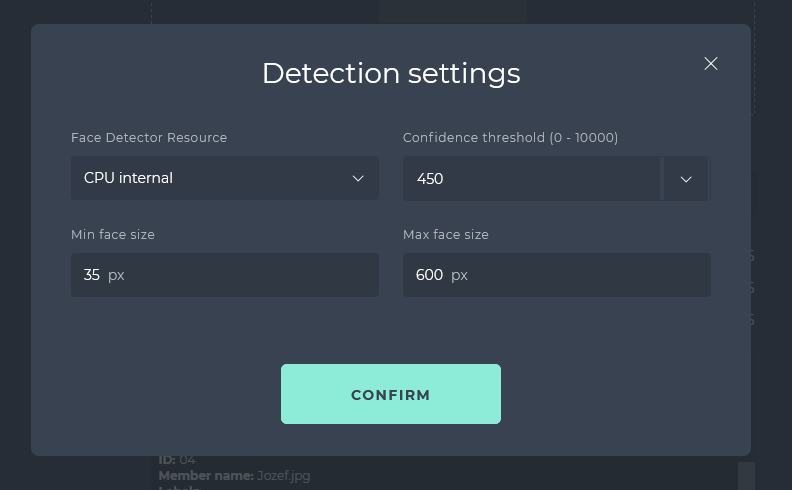
Files are being processed. After the process the results table is presented. The table contains information about the amount of files being successfully registered and processed (including the processing log). It also provides information about the failed and remaining files. You can rerun the process with different Detection settings and file patterns.
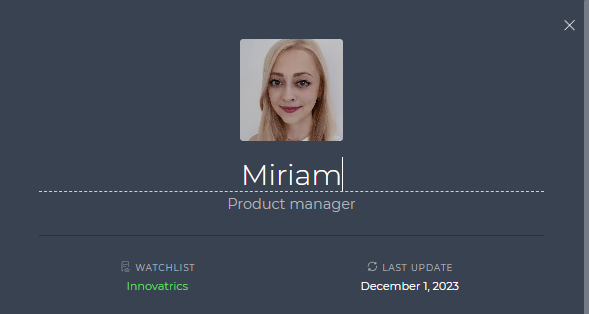
Edit the watchlist member
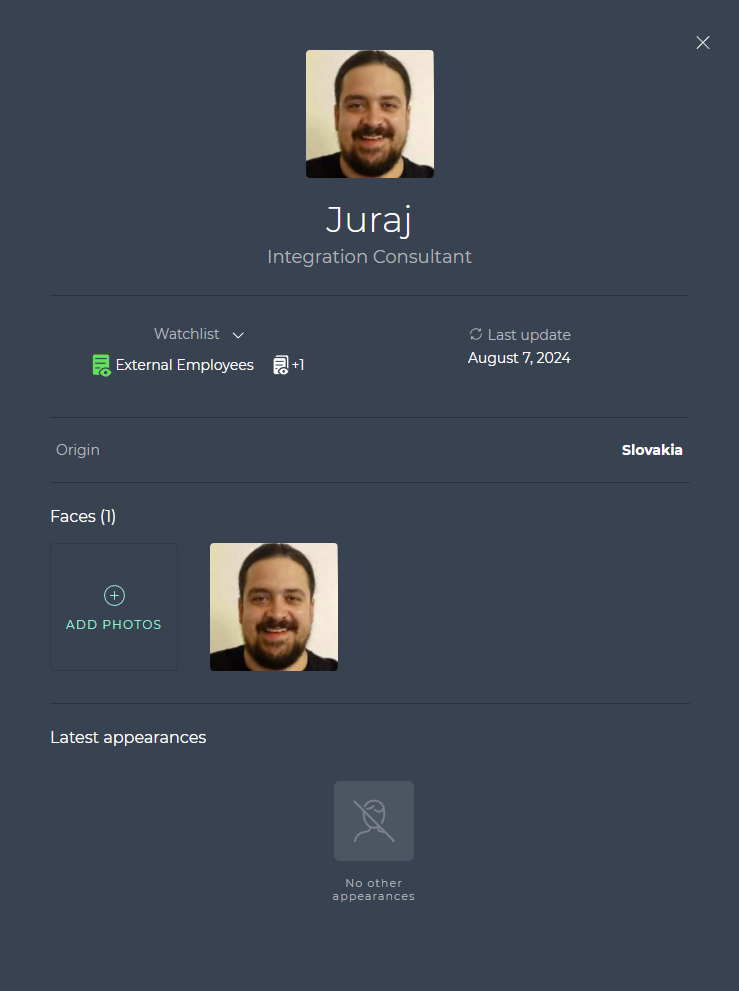
- Open the watchlist.
- Then, click on the watchlist member you want to modify.
- Details of watchlist members are displayed on the right side of your screen.
- You may edit the watchlist member’s NAME and NOTE. There is also an option to configure additional user information below.
- Changes are saved automatically once you hit the enter or click anywhere on the screen or close the watchlist member detail.
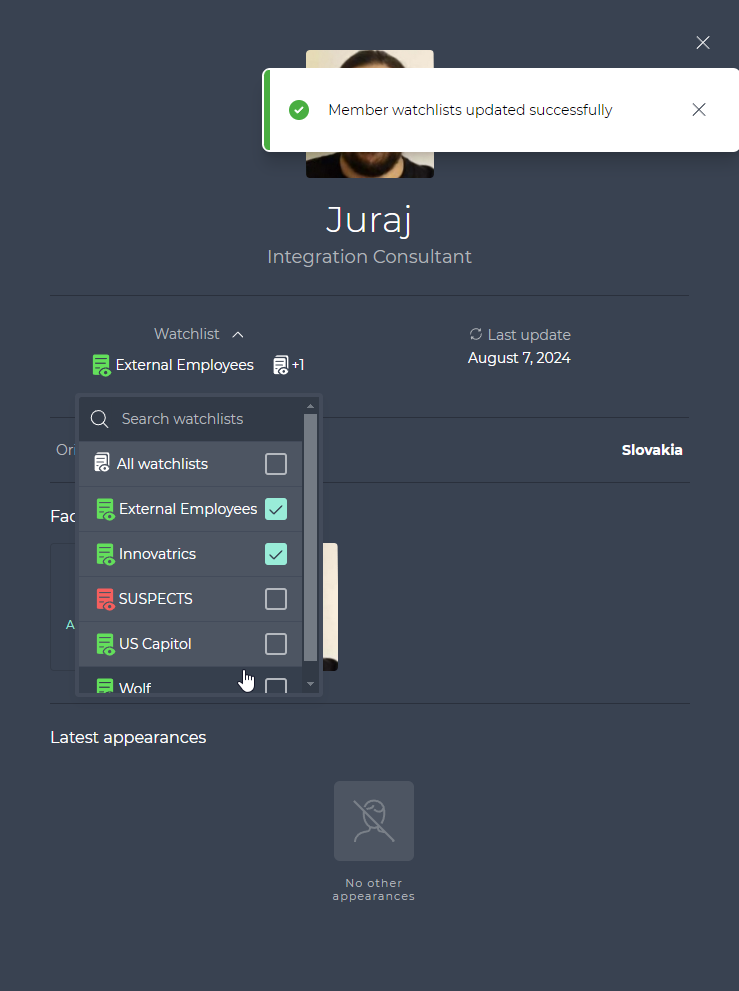
Manage watchlist member watchlists
You can link the watchlist member to additional watchlists, or unlink the watchlist member from watchlists within the watchlist member profile.
- Open the watchlist.
- Then, click on the watchlist member you want to modify.
- Details of watchlist members are displayed on the right side of your screen.
- Click on the Watchlists label.
- Check out or uncheck the watchlists.
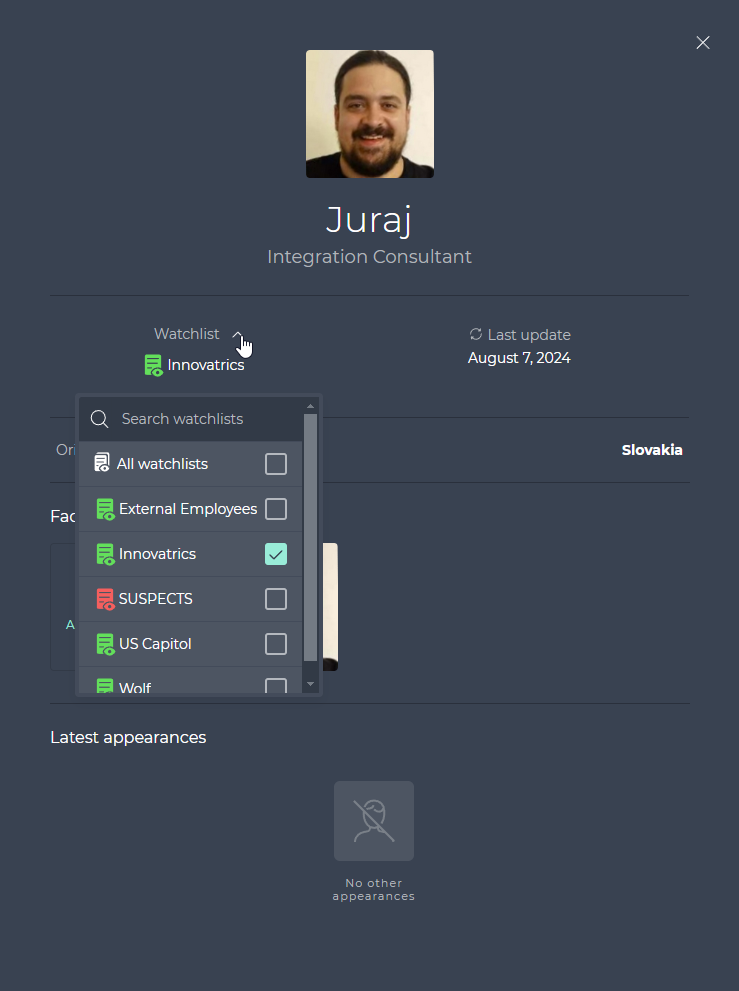
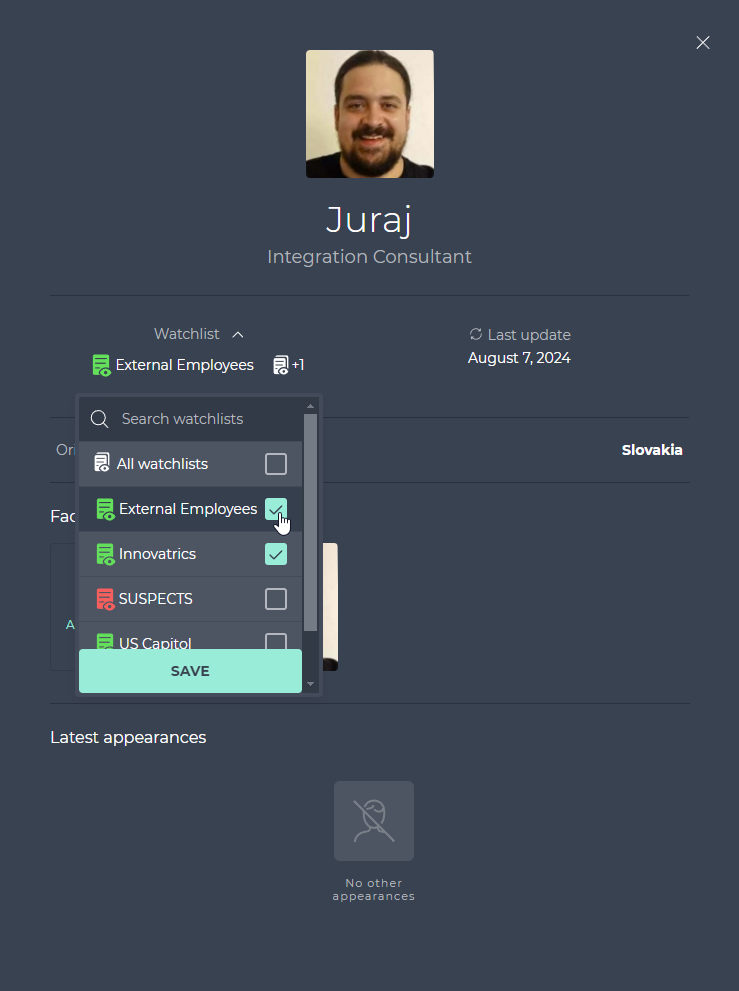
- Changes are saved once you click on the SAVE button.
Manage watchlist member labels
In the current version of Video Processing Platform Station is possible to add more information about watchlist members in watchlist member´s detail. Labels are set of unique key value pairs - each label consists of a key-label and a key-value. This step requires manual changes in the configuration files on the web server or via REST API.
Manage watchlist member labels via configuration file .env
To add or change the watchlist member´s labels:
- Go to the location where you installed the Video Processing Platform Station. For example,
C:\Program Files (x86)\Video Processing Platform Station\. - Open the
.envconfiguration file. - Add new labels (e.g. Date of birth and Tax number).
WATCHLIST_MEMBER_LABEL is displayed on the Video Processing Platform Station. A key-value can be managed only through the Video Processing Platform Station or REST API.WATCHLIST_MEMBER_KEY_0=date
WATCHLIST_MEMBER_LABEL_0=Date of birth
WATCHLIST_MEMBER_KEY_1=tax_number
WATCHLIST_MEMBER_LABEL_1=Tax number
After you completed the changes, restart the Video Processing Platform Station services:
Go to the Task Manager and select the Services tab.
Right-click on the specific service (SFStation) and choose Restart.
After restarting the Video Processing Platform Station service, you will be able to add values to the created or changed watchlist member labels directly in the web application in watchlist member´s detail
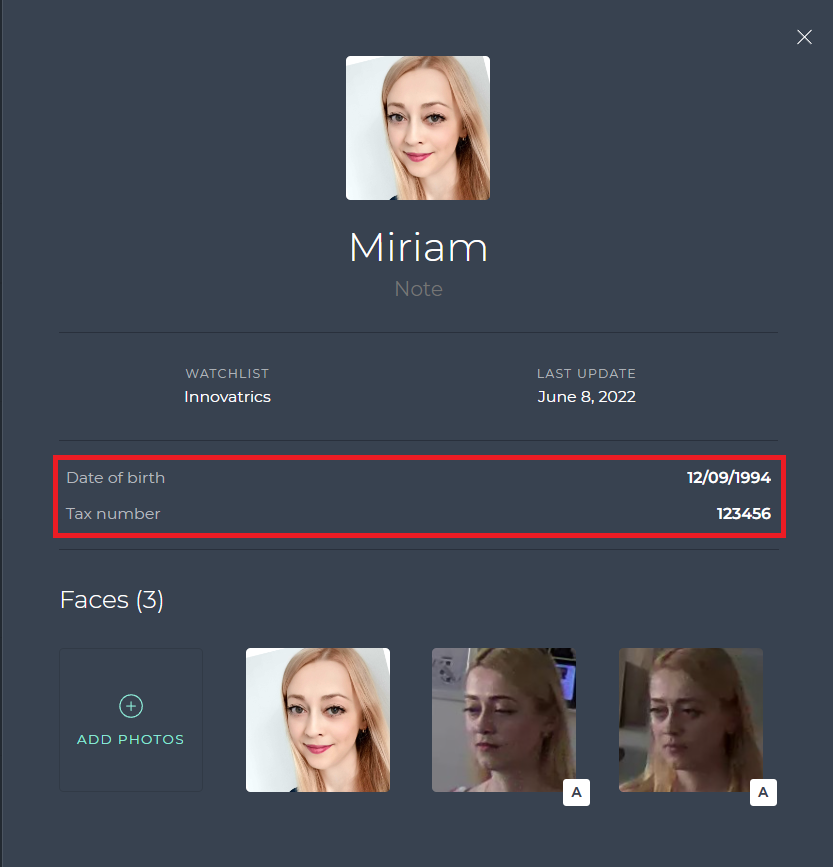
Watchlist member detail with labels (Date of birth and Tax number)
Manage watchlist member labels via REST API
The WachlistMember entity allows you to set watchlist member labels (key-label and key- value) via REST API.
For example: labels Date of birth and Tax number
"labels": [
    {
      "key": "date",
      "value": "12/09/1994"
    }
    {
      "key": "tax_number",
      "value": "123456"
    }
 ]
WachlistMember entity. To display the same labels in Video Processing Platform Station, it is necessary to maintain consistency with the .env configuration file.Manage watchlist member images
There are 2 ways to manage images to watchlist members:
- in the watchlist section: add/remove image to/from watchlist member´s gallery
- from notification detail:
- add image to watchlist member´s gallery from No-match notification detail
- add image to watchlist member´s gallery from Match notification detail
Manage images in the watchlist section
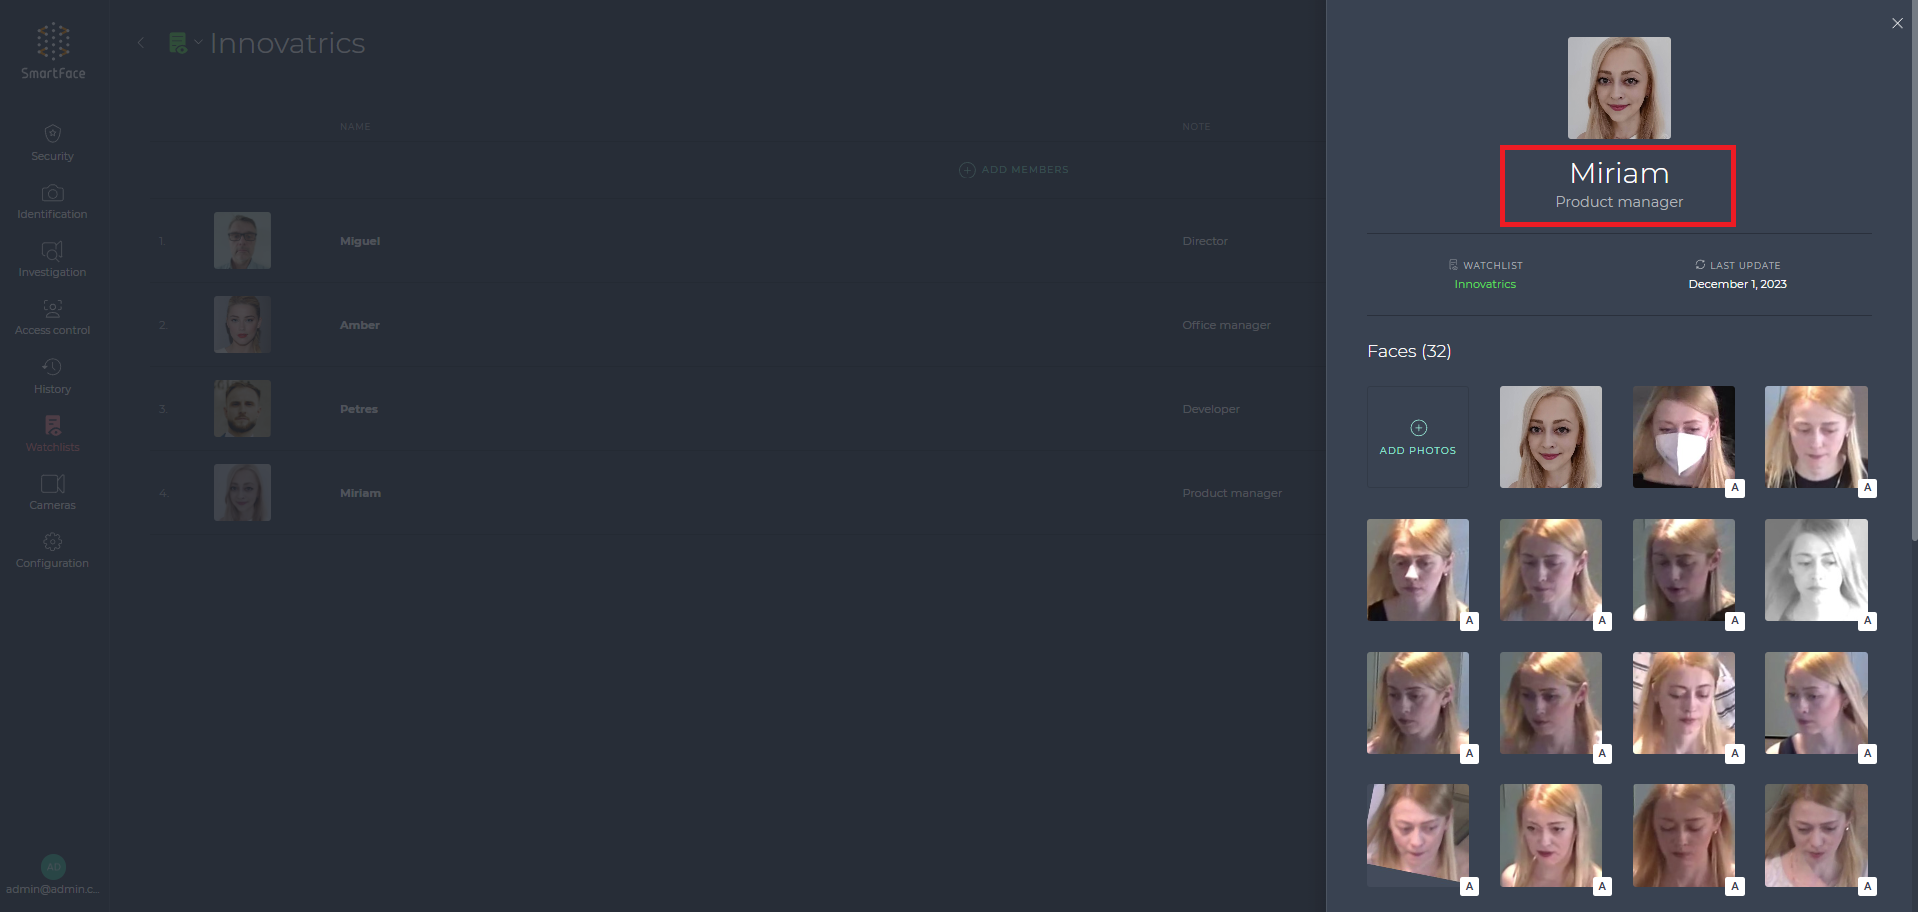
It is possible to upload multiple images for one watchlist member. Multiple images stored for one member can increase the accuracy of the identification of the respective member. Images are displayed in member gallery in member detail.
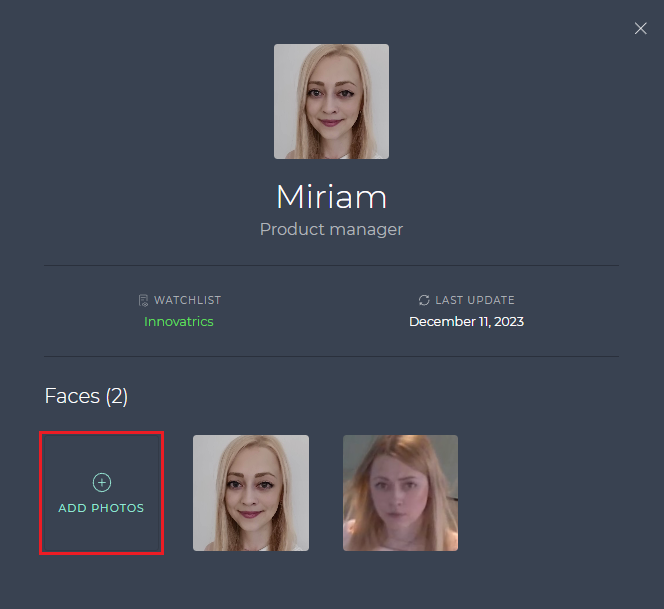
- Open the watchlist.
- Then, click on the watchlist member you want to add an image to.
- Then, click on the +ADD PHOTOS.
- Then, select the image you want to add for the watchlist member.
To remove the image:
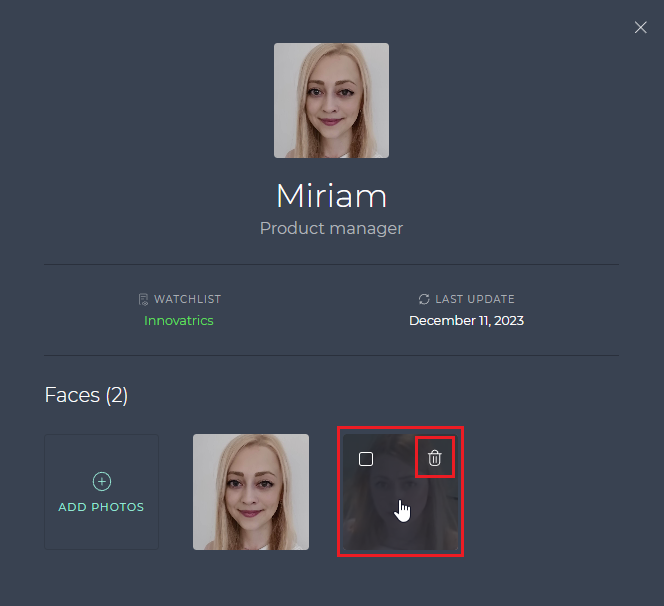
- Open the watchlist.
- Then, click on the watchlist member you want to remove an image from.
- Then, hover over the image and click on the icon of the bin to delete the image.
- You can also mark multiple images and remove them at once.
Watchlist member image badges
Watchlist member image can be marked with badges located in the right bottom corner of the image.
Watchlist member images marked with a badge “A”  are added automatically by Watchlist Autolearn feature. Images without this badge were added manually by the user. For more information, see Watchlist Autolearn chapter.
Watchlist member images marked with a badge “face mask”  are added to the cluster of images where face mask was recognized by Video Processing Platform. For more information about autolearn clusters, see Watchlist Autolearn chapter.
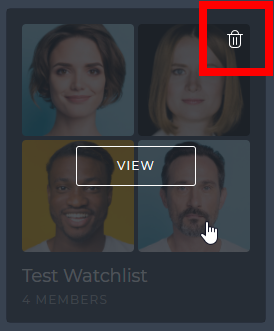
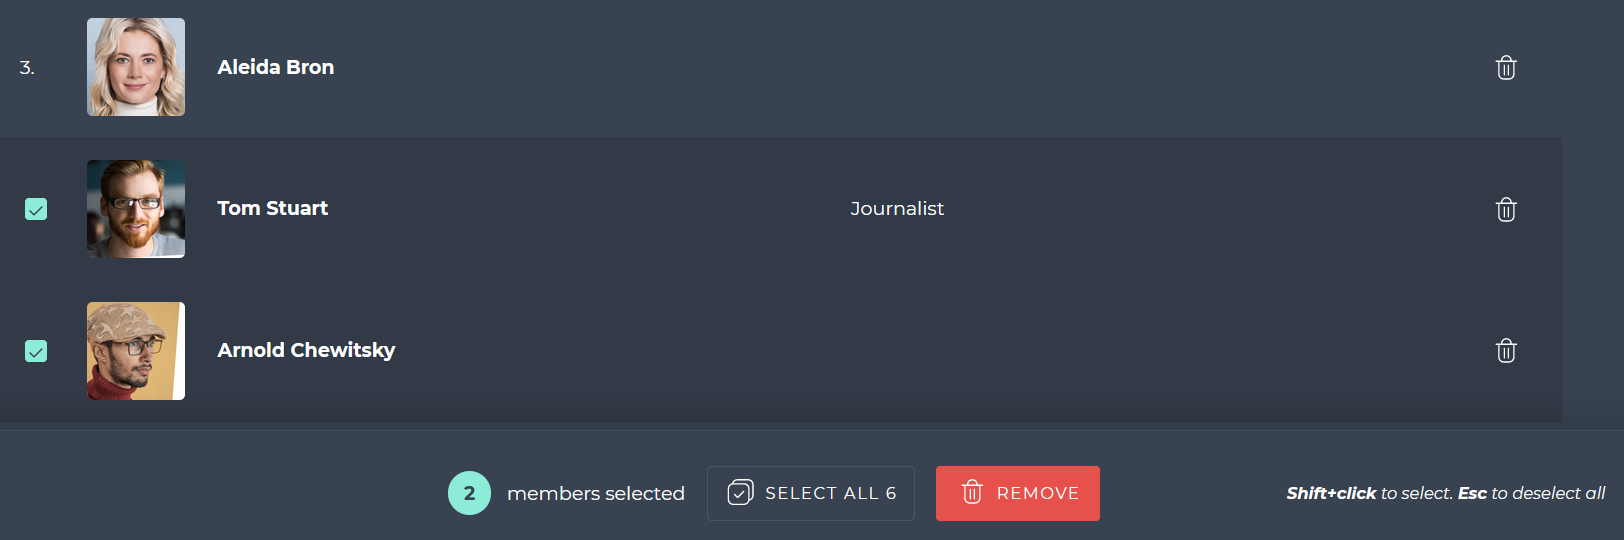
Delete watchlist members
Select a specific watchlist and click DELETE next to watchlist member you want to delete.
You may also delete several watchlist members at once, by marking the checkbox next to the members and clicking REMOVE.
Multiple images selected for removal.