Minimalistic Setup
These guides are describing combination of the low power Raspberry Pi 5 and Smart Cameras using the SFE Stream Processor.
Get hardware ready
Before you start the setup, prepare the list of suggested hardware.
Prepare a SD Card
A SD Card is needed to prepare the device, update the firmware and allow installation of the operating system on the NVME SSD drive. We recommend to run the RaspBerry using a NVME SSD as the SD Cards have limited lifespan.
We recommend using an SD card with at least 32GB of storage for Raspberry Pi OS installations. You can use any SD card with a capacity of less than 2TB. Capacities above 2TB are currently not supported due to limitations in the MBR. As with any other boot media, you’ll see improved performance on SD cards with faster read and write speeds.
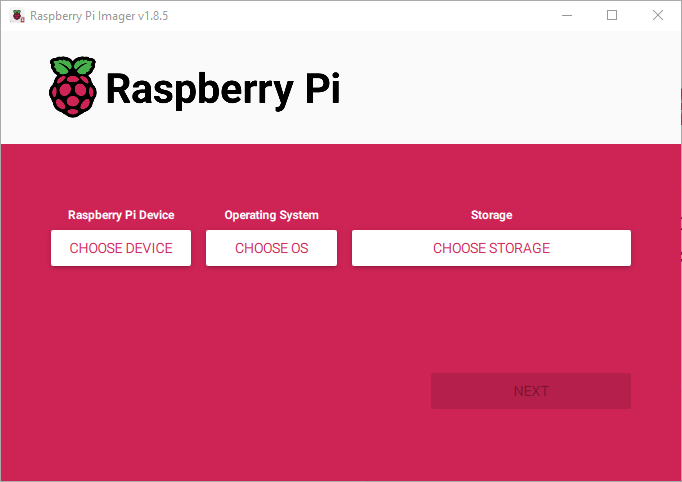
Download the Raspberry PI Imager for your operating system.

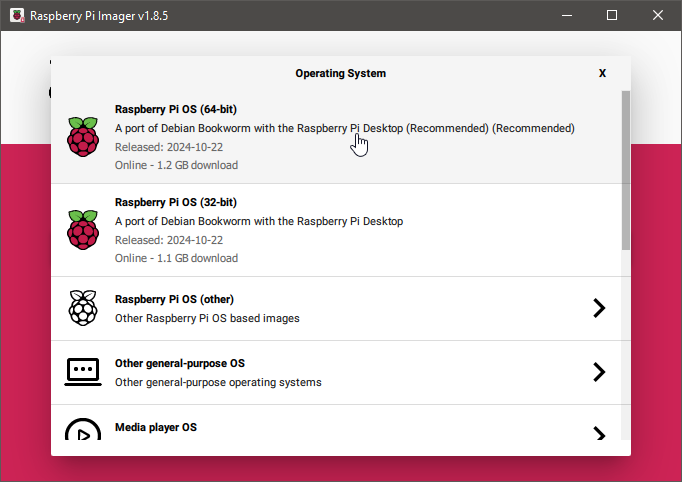
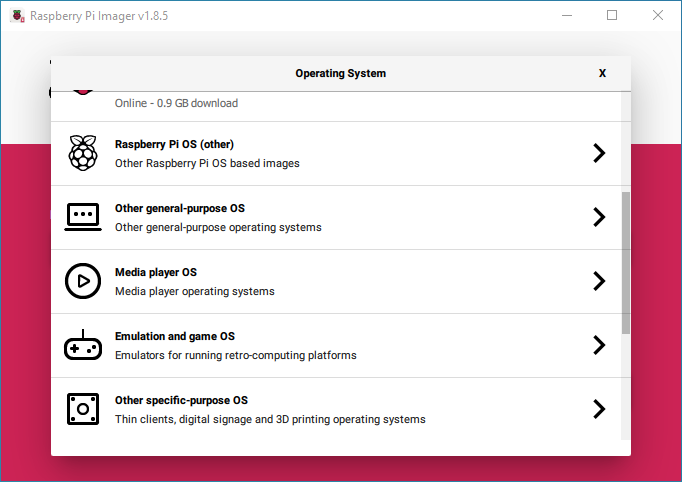
Operating System: Choose Os > Raspberry Pi OS (64-bit).
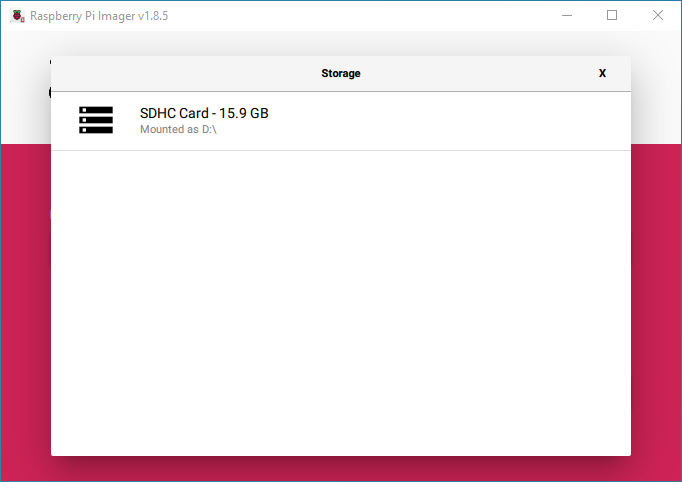
Storage: Choose Storage > Pick your SD Card
Click on Edit Settings
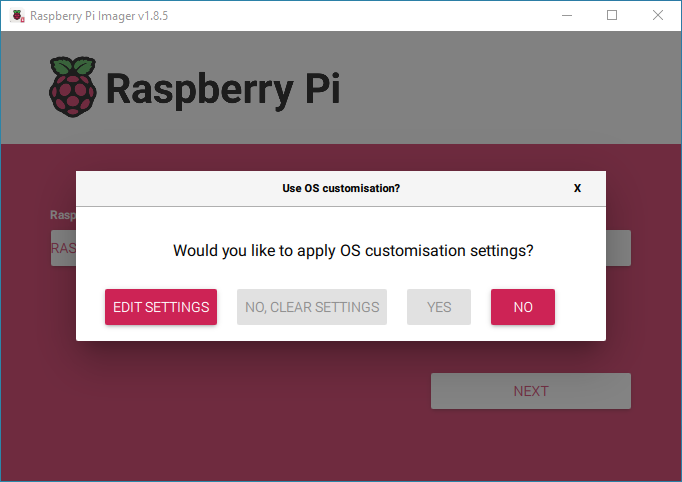
Set username smartface, password smartface.
In the Services tab, click on Enable SSH, click Save. Confirm that the current contents of the SD Card can be removed.
We are using the SD Card as a part of the installation process. You can keep this card to install additional Raspberry Pis in the future.
Run Raspberry Pi
Once the SD Card is successfully written, insert it into the Raspberry Pi and plug the Raspberry Pi into the electric power supply using the USB C to turn it on.
The Raspbian operating system will be booted directly from the SD Card. If it does not, it is likely that the Raspberry Pi does not allow booting from the SD Card. This can be fixed by preparing an SD Card with image from the Misc utility images > Bootloader (Pi 5 family) > SD Card Boot
You need to use this SD Card to boot once in the Raspberry Pi device. This will install a bootloader. Once this goes through successfully, retry using the SD Card with the Raspbian system.
Once the Raspberry Pi is booted in a graphical user interface, proceed to the next step.
Update the firmware
Ensure the Raspberry Pi is connected to internet, whethey by an Ethernet cable or by WIFI. Detailed configuration can be also achieved using the nmtui command in the Terminal.
First, ensure that your Raspberry Pi runs the latest software. Run the following command to update:$ sudo apt update && sudo apt full-upgrade
Next, ensure that your Raspberry Pi firmware is up-to-date. Run the following command to see what firmware you’re running:$ sudo rpi-eeprom-update
If you see December 6, 2023 or a later date, proceed to the next step. If you see a date earlier than December 6, 2023, run the following command to open the Raspberry Pi Configuration CLI:$ sudo raspi-config
Run the following command to update your firmware to the latest version:$ sudo rpi-eeprom-update -a
Under Advanced Options > Bootloader Version, choose Latest. Then, exit raspi-config with Finish or the Escape key.
Then, reboot with sudo reboot.
Disconnect the Raspberry Pi from power before beginning physical installation.
Physical setup
The physical setup is based on the official Raspberry Pi M2 hat documentation. For instruction details including step by step images, please visit the provided link.
Add Cooler, M.2 HAT+ and Drive
Install the Active Cooler
Install the spacers
Install the spacers using four of the provided screws. Firmly press the GPIO stacking header on top of the Raspberry Pi GPIO pins; orientation does not matter as long as all pins fit into place. Disconnect the ribbon cable from the M.2 HAT+, and insert the other end into the PCIe port of your Raspberry Pi. Lift the ribbon cable holder from both sides, then insert the cable with the copper contact points facing inward, towards the USB ports. With the ribbon cable fully and evenly inserted into the PCIe port, push the cable holder down from both sides to secure the ribbon cable firmly in place.
Set the M.2 HAT+ on top of the spacers
use the four remaining screws to secure it in place.
Insert the ribbon cable into the slot on the M.2 HAT+
Lift the ribbon cable holder from both sides, then insert the cable with the copper contact points facing up. With the ribbon cable fully and evenly inserted into the port, push the cable holder down from both sides to secure the ribbon cable firmly in place.
Insert the drive
Remove the drive attachment screw by turning the screw counter-clockwise. Insert your M.2 SSD into the M.2 key edge connector, sliding the drive into the slot at a slight upward angle. Do not force the drive into the slot: it should slide in gently.
Push the notch on the drive attachment screw into the slot at the end of your M.2 drive. Push the drive flat against the M.2 HAT+, and insert the SSD attachment screw by turning the screw clockwise until the SSD feels secure. Do not over-tighten the screw.
Congratulations, you have successfully installed the M.2 HAT+. Connect your Raspberry Pi to power; Raspberry Pi OS will automatically detect the M.2 HAT+. Now you are ready to install the operating system on your drive.
Case
You can use a case, that will keep the whole system enclosed. For example, you can use the KKSB Raspberry Pi 5 Case - Space for HATs, Add-on Boards, Cooler, and NVMe HATs that is suited for a Raspberry Pi 5 with the NVME drive added.
DIN Rail
Such use case can attach a DIN rail adapter, so you can easily mount the whole system on to DIN rail.
Operating System Installation
Using the Raspbian OS, find the Raspberry Imager in the top left menu, in the Accessories section. We will now process in setting up the NVME SSD Drive.
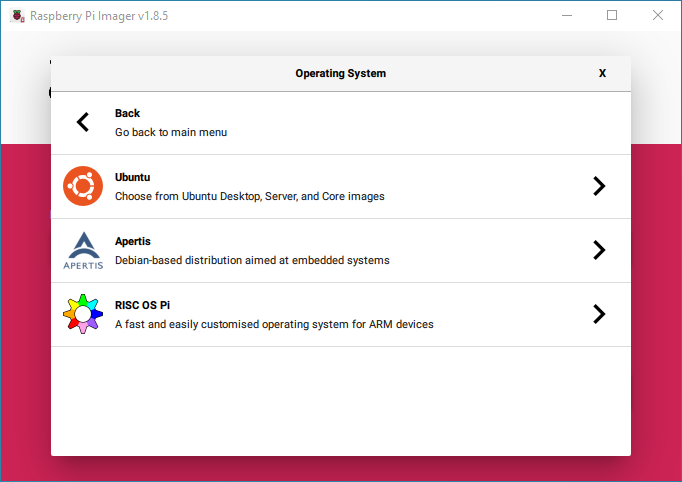
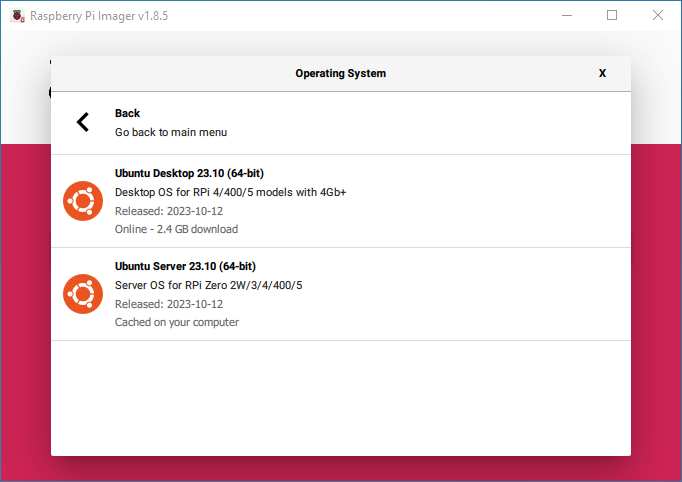
Operating System: Choose Os > Other general-purpose OS > Ubuntu > Current Ubuntu LTS edition such as Ubuntu Desktop 24.04.1 LTS (64-bit) . The server option does not have graphical interface - suitable for skilled administrators, yet uses less processing power
It will use your settings from the SD Card (and your WIFI connection, if you are using the WIFI). Proceed with the installation, once it is installed you can turn the Raspberry Pi off, remove the SD Card and boot it again. It will now run the Ubuntu OS from the SSD drive.