Enrollment
Process of adding a person into a Watchlist is called an Enrollment. Person can be enrolled via the SmartFace Station or programmatically via SmartFace REST API.
This section aims to define the expected quality of enrollment inputs. Higher quality enrollment pictures result in better matching outcomes. High-quality enrollment pictures positively influence the matching mechanism, regardless of the source of the matched faces—whether from a random detection via an RTSP stream or a high-quality image from a database. Using quality enrollment inputs ensures reliable facial biometrics.
When the image does not have a required quality it might not be suitable for facial biometry. While the SmartFace Platform can work with images of various quality gathered from the “wild conditions”, the better the image is provided the more precise the results are. Therefore we suggest trying to avoid issues with the quality of the images used as inputs to the SmartFace. Especially we suggest providing high-quality enrollment photos to have the best possible base for future matching.
Since the version v5_4.28 a new Face Validation feature is enabled by default. It enforces image quality requirements for enrollment.
Image Resolution
Face Size / Minimum eye distance
For the purpose of the WatchlistMember enrollment in the SmartFace, the intention is to have a sharp image of the WatchlistMember - in focus and without strong compression artefacts. with pixel face size / eye distance at least 50 pixels. A smaller value such as 30 pixels can be used, however, going lower with the face size will be detrimental to the quality of face templates used for matching purposes. Using values lower than 30 pixels are not recommended.
To keep the face size to have a reasonable value, there are several ways to achieve it, such as
- using a reasonable resolution
- taking pictures from a correct spot - angle and distance according to your use case and zoom options of the camera
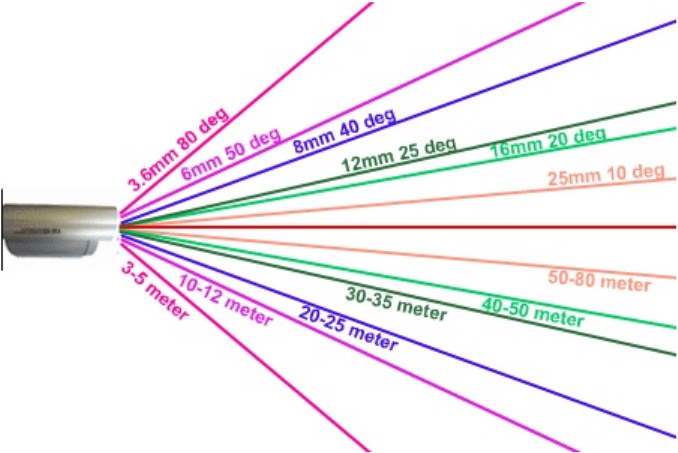
- using a camera with a correct field of view (FOV) for your use case
Choose the right lens
Used lenses influence the field of view and thus distort the enrollment image. Choose proper lenses to prevent perspective - low focal distance or other deformations such as the fish eye effect. Control the focal distance to maximize the eye distance, or to limit the area of interest (static focal distance vs zoom lenses). We do not recommend using lower than 2.8 mm to prevent perspective deformation.
For more information about the face size please read the introduction to the biometry manual.
Image contrast
In the context of images, contrast refers to the difference in brightness between the light and dark areas of an image. It is a key visual element that helps define and distinguish objects and details within the image. High-contrast images have a significant difference between light and dark areas, resulting in well-defined edges and a more visually striking appearance. On the other hand, low-contrast images have less noticeable differences between light and dark areas, resulting in a softer and more muted appearance.
Please see below the most common issues related to losing contrast:
Focus
In the context of images, focus refers to the clarity and sharpness of the details in a photograph. A well-focused image has clear and distinct details, making the subject or elements within the frame sharp and easily distinguishable.
Achieving proper focus is crucial in biometry, as it directly impacts the overall quality of the image. Using a higher quality images with better focus bring better biometry results.
There are two common reasons for the subject being placed out of focus:
Shallow depth of field (DOF)
It is the physical distance range inside which objects appear in focus. Note that the zoom lenses with greater focal distances have typically a shallow depth of field. A slight out of focus situation doesn’t pose a problem for the SmartFace face-matching technology if the face size is sufficient. The suggested value is 50 pixels and higher.Dynamic changing of the focus
This happens with automatic focus control, therefore a fixed focus is typically preferable. This allows you to avoid issues related to the quality of the camera’s autofocus and its reaction to the current environmental conditions including the current lighting conditions.
Lighting conditions
Lightning might be one of the limiting factors. Please consider the existing light sources when taking an enrollment image. Generally speaking having any light source within the camera view is making the camera’s view worse.
Natural light from windows or entrance doors might be hard to avoid but considering proper camera placement can mitigate a lot of the existing issues. Having additional shades between the source of the light and the camera’s view might be helpful. Natural light changes during the day and even year cycles, so it is unlikely natural light will be sufficient as the only source for your biometric needs.
In some cases, the artificial light can be moved, turned off or covered. Please consider these options, when setting up your camera. Lighting conditions are probably the most difficult part to control. In most cases, it’s the camera placement that can mitigate this issue.
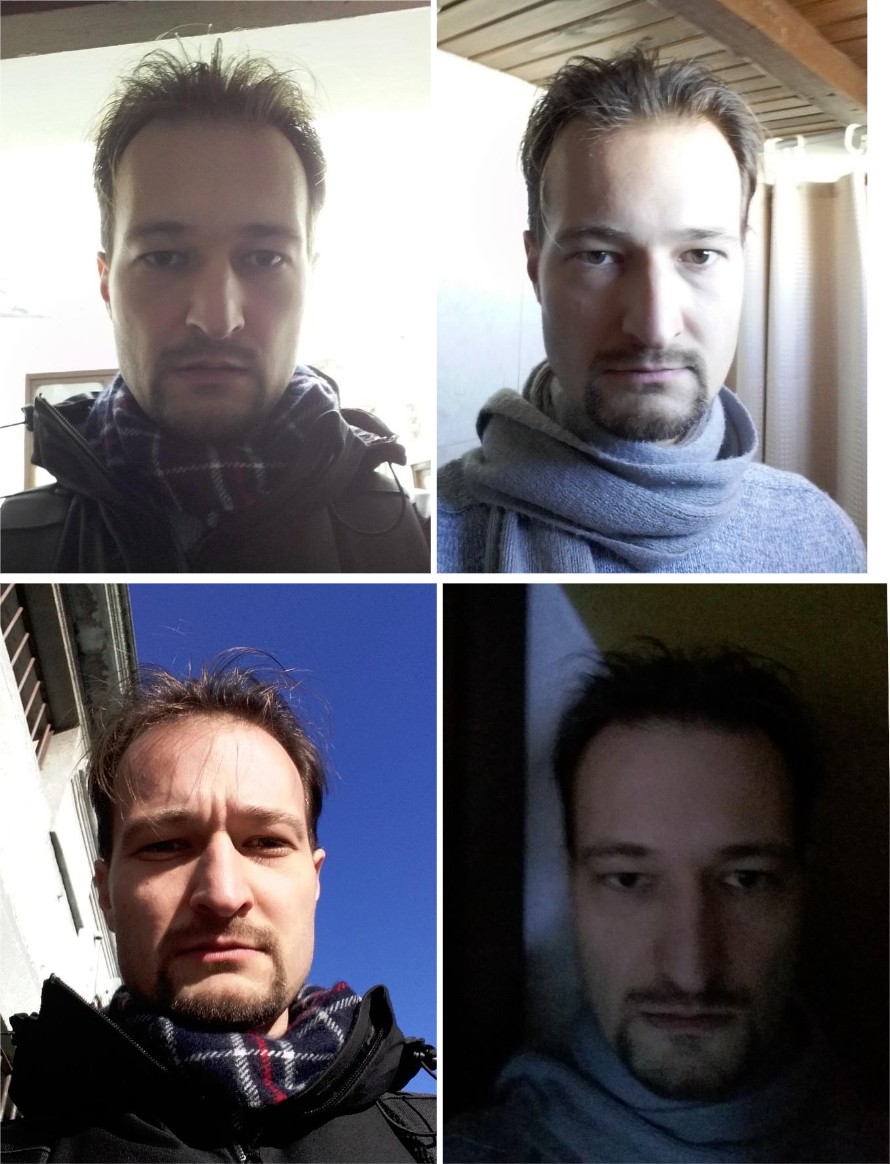
Typical problematic and the most common negative lighting conditions:
Backlight
Prevent the camera from facing the light source
Low light
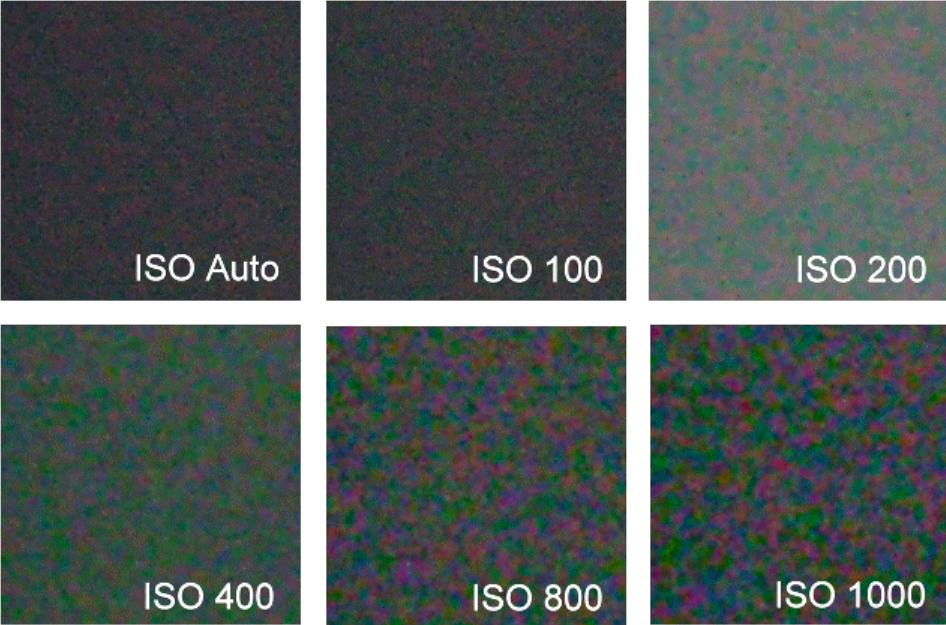
Low light conditions (typically in outdoor setups) usually cause exposure time to rise. The maximum exposure to prevent blurry images is 1/50 sec. Higher ISO settings on the other hand lower the signal-to-noise ratio. Having additional light sources might be the answer to the issues with a low-light environment.
Low signal noise ratio as per different ISO values:
ISO Sensitivity is a standard set by the International Organization for Standardization (ISO) that represents sensitivity to light as a numerical value. A higher number indicates a higher sensitivity and a greater ability to capture light at the expense of reduced image quality in the form of more noticeable noise/grain. The ISO Sensitivity is set and changed in the cameras shooting settings menu.
Overexposure
This is a consequence of the camera adjusting the exposure setting to the wrong part of the scene. Either zoom in to help camera software evaluate better according to the central part of the scene or eliminate the spotlights.
Warm colored light
This can lower the contrast on the human skin and thus reduce the amount of information in the facial area for recognition.
Please avoid conditions, such as: no backlight, no sidelight, no top light or low light. They can cause wrong contrast or additional darker spots:
Face orientation
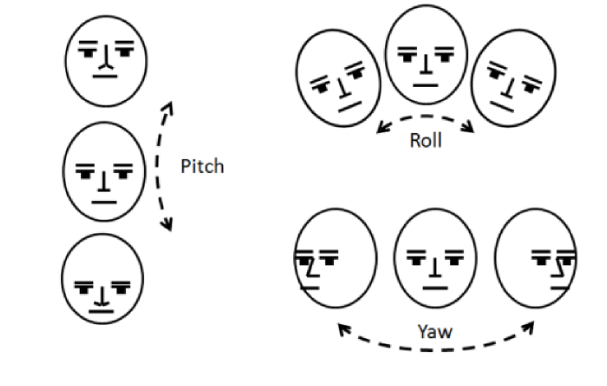
To assure the best conditions for the facial biometry, we suggest to work towards ensuring the best posible visibility of a face image used for a facial biometry - frontal face view. Practically the frontal face view will have some deviations. For the enrollment we suggest to keep the used angles within the suggested ranges:
- Roll in range <-15°, 15°>
- Pitch in range <-15°, 15°>
- Yaw in range <-15°, 15°>
The SmartFace Platform can work with angles over the suggested values, however using higher values will lower the quality of the facial biometry results.
Suggested placement of the camera setup for enrollment is at the eye level preferably near the person you want to enroll. To keep the face size around and more than 50 pixels using zoom might be needed.
Ideal Image
As you can see above, the frontal diffuse lighting provides clear view of the face without any darker spots or spotlights causing too much contrast. The frontal view of the camera allows good overview of the facial features. This enhances the matching capabilities. While the provided image does not have perfect sharp focus, this input is well suitable.


