Video Processing Platform Station
Please see below advanced guides for the Video Processing Platform Station. The guides are split into few categories:
Configuration
These guides are focusing at advanced configuration, actions and settings that are not covered in the Video Processing Platform Station manuals.
How to enable Palm processing
To enable Palm processing in your Video Processing Platform Station, update the .env.sfstation file and add the line below:
PALMS_ENABLED=true
Apply changes with command docker compose up -d.
How to enable Visual Codes processing (QR codes)
To enable Visual Codes processing (TOTP QR codes) you need to update both Video Processing Platform Station and Video Processing Platform.
Update the .env.sfstation file and add the lines below:
# Enabled and configure QR code generation
QR_CODE_ENABLED=true
QR_CODE_REFRESH_INTERVAL=1
QR_CODE_WITH_WHITE_ZONES=true
Apply changes with command docker compose up -d.
For information about the Video Processing Platform part, click here.
Mounting a video as a camera source
In the Video Processing Platform Station you can mount a video file instead of the RTSP stream if needed. To mount a video the video needs to be accessible to the browser accessing both the Video Processing Platform Station and the video.
The easiest way to achieve availability of a video is to upload it into the Video Processing Platform’s S3 bucket in the Min.IO object database.
Uploading a Video into Min.IO
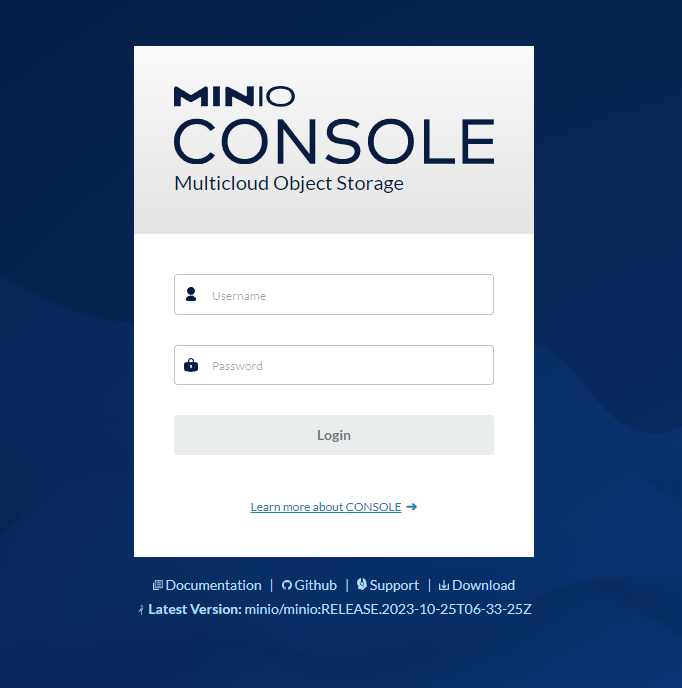
To upload a video into the Min.IO please visit your Min.IO’s on the port 9000, if you are using the same machine as it is installed on the URL would look like: http://localhost:9000. You will be redirected to http://localhost:9001/login. Here you
can log in using the default username minioadmin and password minioadmin. It is recommended to change this for security reasons.
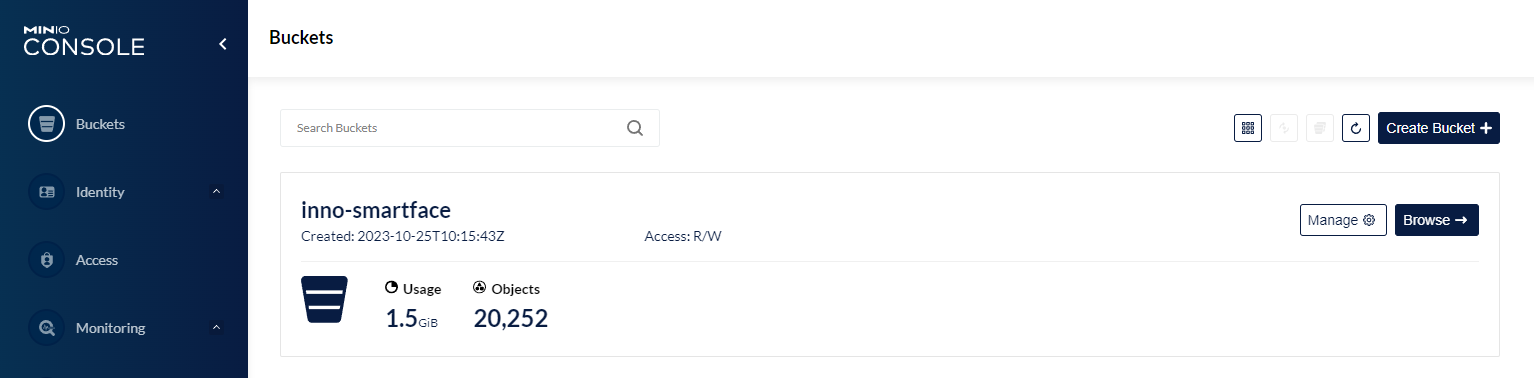
Once you are logged in, you can click on the Create Bucket + button to create a new bucket. We will use this bucket to separate our additional videos from the internally managed data from the Video Processing Platform platform.
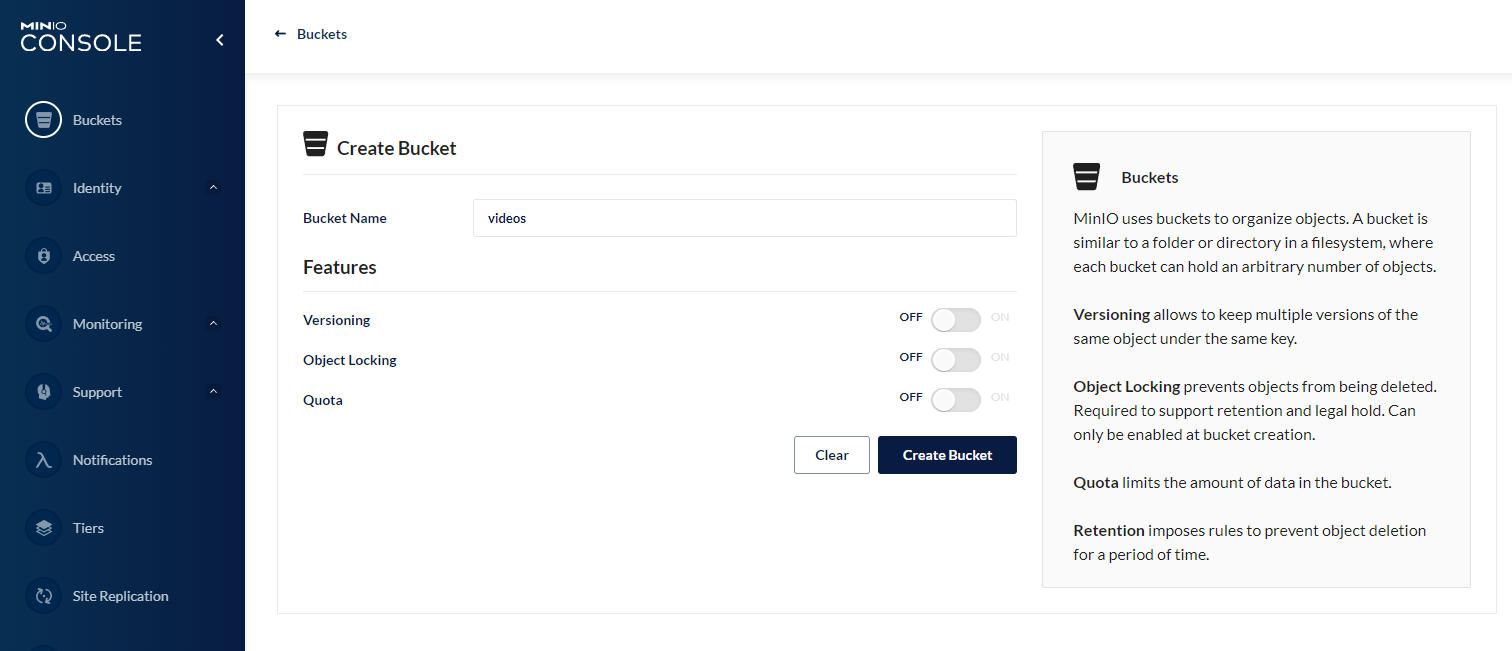
In the Create Bucket page pick a name. For the example purposes we will use the name videos.
The newly created bucket will be now available in the list of buckets. Click the Browse -> button.
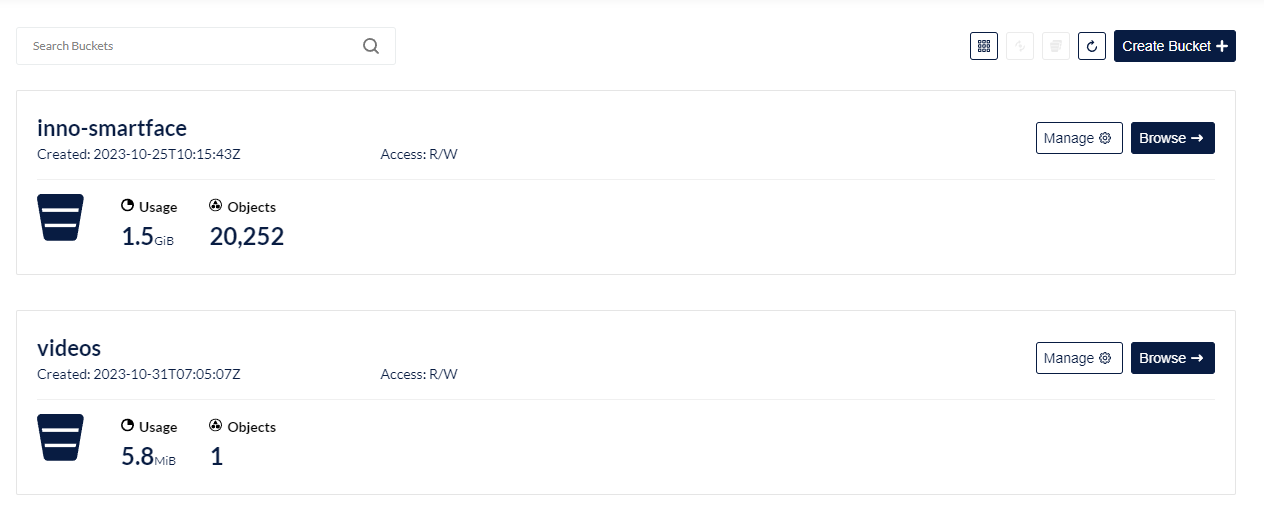
To upload a video, click on the click the Upload button. Uploaded files are visible.

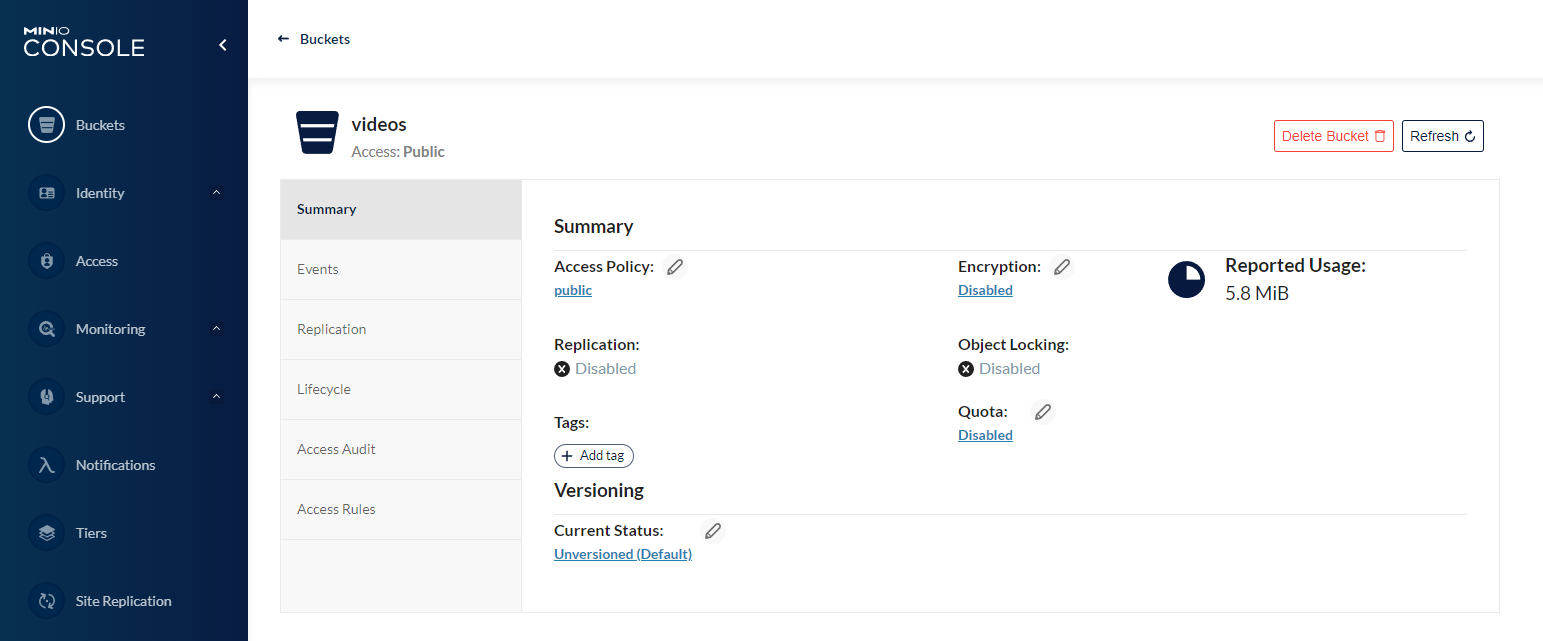
To ensure we can use the videos for our intended purposes we need to adjust the access policy. The Default private policy might be the right one for us. Please click on the Manage button for the bucket. Then click on the Access Policy.
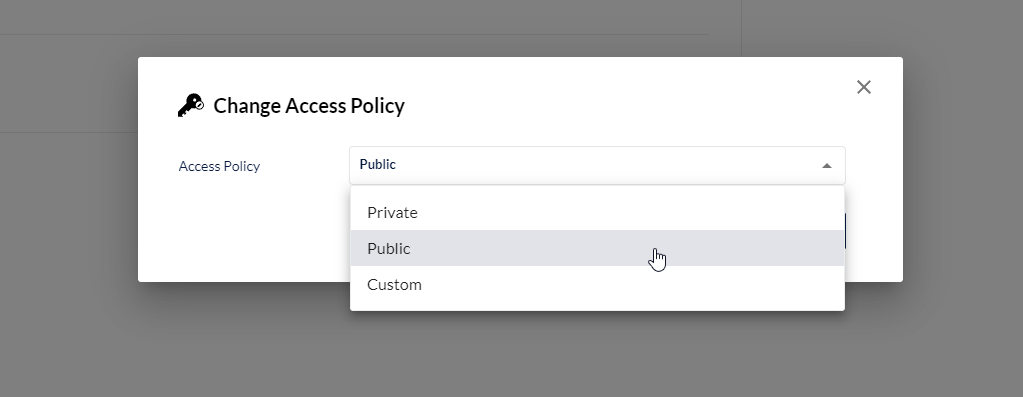
Pick the right policy. In our example we will use public.
Adding a Video as a RTSP camera source
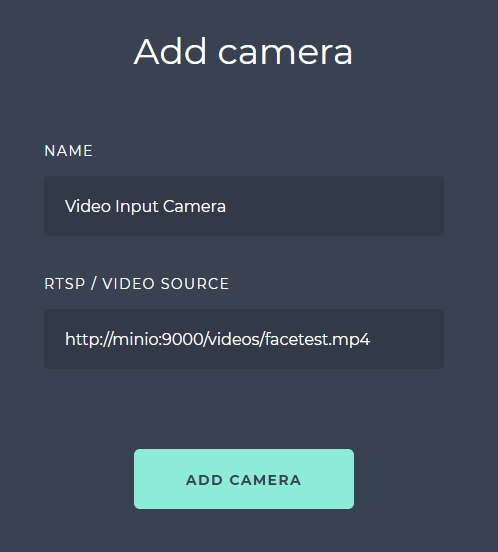
To use the video in a new camera, click on REGISTER CAMERA button. In the camera configuration in the Video Processing Platform Station. As a RTSP / VIDEO SOURCE use the full path to the uploaded video. Unless configured differently, for the URL please use the http://minio:9000/ then the name of the bucket and the name of the file. In such a case the full URL to be used will be http://minio:9000/videos/facetest.mp4.
How to disable video looping on video as a camera source
When you use a video as an input source, per default the video will be repeating on a loop. To avoid infinite looping we can set the video to run only once.
To disable looping, set ProcessVideoOnlyOnce parameter of a camera to true. It can be done via the REST API. This parameter is hidden and it will be not be visible as an option in the swagger. To change specific camera configuration, use PUT command of Camera endpoint.
A sample of an incomplete put command is below:
{
    "spoofDetectorResourceIds": [
      "none"
    ],
    "id": "53519cb1-c75e-4ad2-44cd-08da8fde8bfe",
    "name": "Video Input Camera",
    "source": "http://minio:9000/videos/facetest.mp4",
    "enabled": true,
    "ProcessVideoOnlyOnce": true,
    "faceDetectorConfig": {
      "minFaceSize": 20,
      "maxFaceSize": 300,
      "maxFaces": 20,
      "confidenceThreshold": 600
    },
    "pedestrianDetectorConfig": {
      "minPedestrianSize": 80,
      "maxPedestrianSize": 2000,
      "maxPedestrians": 20,
      "confidenceThreshold": 2500
    },
    "faceDetectorResourceId": "cpu",
    "templateGeneratorResourceId": "cpu",
    "pedestrianDetectorResourceId": "none",
    .
    .
    }
  }

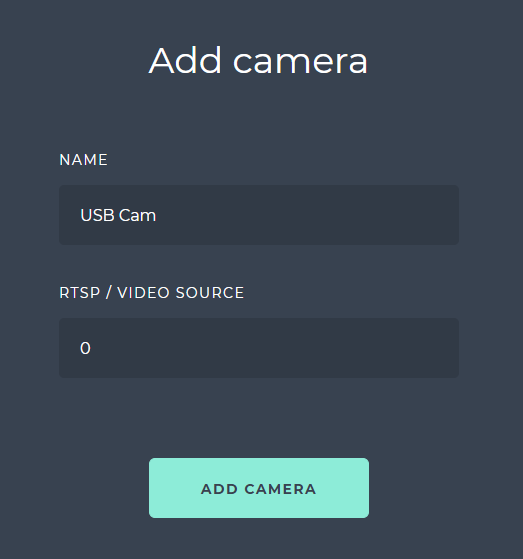
How to use an USB Camera in the Video Processing Platform
You can use USB cameras, such as web cameras with the Video Processing Platform. The configuration does differ between the Windows and the Docker environments.
Windows Environment
In the Windows environment as long as the USB camera is recognized and the drivers are up to date, you can simply use the number of the camera in the Device Manager on Windows. Please note the count starts from 0. When registering a new camera, in our example we will put 0 as an RTSP/VIDEO SOURCE.
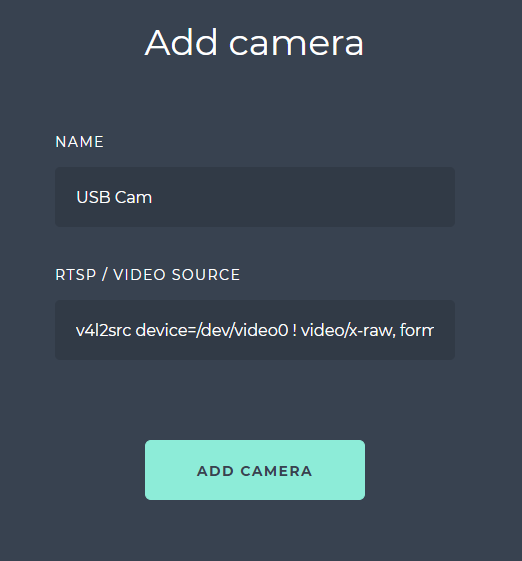
Linux Docker Environment
In the Linux Docker environment we are using gstreamer configuration string. If the camera is up and running correctly then we use the device’s mount point from the /dev/ directory. As an example we will use the device video0.
Update the docker-compose.yml
In the Linux Docker environment we need to allow the camera service to access the device. Please add these lines under the camera service:
devices:
      - /dev/video0:/dev/video0
For a sample camera SFCam2, the docker-compose.yml setup would look like this:
sf-cam-2:
    image: ${REGISTRY}sf-cam:${SF_VERSION}
    container_name: SFCam2
    command: --serviceName SFCam2
    ports:
      - 30002:${CameraDefaults__PreviewPort}
    restart: unless-stopped
    devices:
      - /dev/video0:/dev/video0
    environment:
      - RabbitMQ__Hostname
      - RabbitMQ__Username
      - RabbitMQ__Password
      - RabbitMQ__Port
      - RabbitMQ__VirtualHost
      - RabbitMQ__UseSsl
      - ConnectionStrings__CoreDbContext
      - Database__DbEngine
      - AppSettings__Log_RollingFile_Enabled=false
      - AppSettings__USE_JAEGER_APP_SETTINGS
      - JAEGER_AGENT_HOST
      - S3Bucket__Endpoint
      - S3Bucket__BucketName
      - S3Bucket__AccessKey
      - S3Bucket__SecretKey
    volumes:
      - "./iengine.lic:/etc/innovatrics/iengine.lic"
To apply changes use docker-compose up -d command.
Set source using the gstreamer string
Then a sample gstreamer string will be v4l2src device=/dev/video0 ! video/x-raw, format=YUY2, pixel-aspect-ratio=1/1, width=1280, height=720, framerate=10/1 ! videoconvert ! appsink.
Please add this string as an RTSP/VIDEO SOURCE for a camera.
How to enable video uploading for Rapid Video Investigation
The Video Processing Platform Station is managing the interaction between the Video Processing Platform and the user web browser. During the installation the run.sh script sets the paths for the S3/Min.IO endpoint. This is set to your hostname. If the hostnames are not correcly set for the network and the machines on it, it is possible that in some cases the hostname set for the machine where the Video Processing Platform is running is not accesible to the machine running the browser. This means that the user’s browser can not see the Min.IO path correctly. In this case the upload of a video is not possible.
This situation was updated in the Video Processing Platform version 5.4.22. If you are using and older version and this happens to you, or you are using a newer version and this issue occurs to you, please adjust the S3_ENDPOINT to match your ip, that is accessible for both the Video Processing Platform Station container and the user via a web browser.
To fix the issue for your installation please edit .env.sfstation and update the S3_ENDPOINT to match your ip address as below:
# Setup for S3 / MinIO API
S3_ENDPOINT=http://your-ip-address:9000
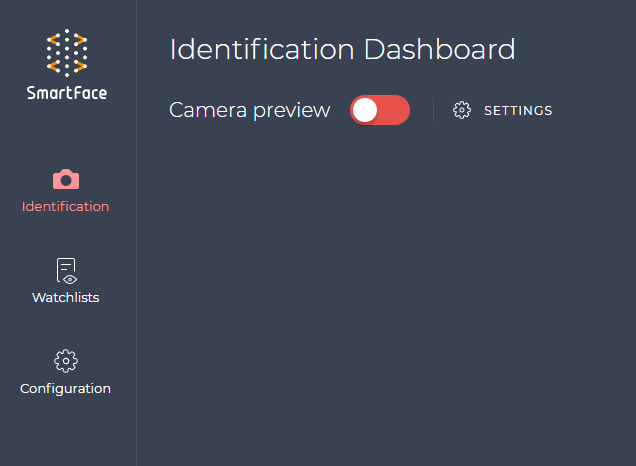
How to enable Identification tab
To enable the Identification tab, you need to enable it in the docker configuration and you need to have https certificate on your server.
Enablement in the docker configuration
Open the directory where your Video Processing Platform’s docker-compose.yml is located. Edit the file .env.sfstation and locate the lines below:
#Enabled Identification page
IDENTIFICATION_ENABLED=false
Adjust the IDENTIFICATION_ENABLED line to be true:
#Enabled Identification page
IDENTIFICATION_ENABLED=true
Restart the SFStation service. An easiest way to achieve it is to use this command in the same directory:
docker-compose up -d
Enabling of the HTTPS Certification
To enable the HTTP Certification please read the guide in here.
Testing the results of the enablement
Once you access the SF Station on the port 8000 again, then an additional tab is available:

How to enable local Camera usage
To enable camera usage in the Identification Dashboard and in the Watchlist Management tab, please ensure the secure https connection is enabled or your Chrome web browser considers your Video Processing Platform Station to be trusted.
Then you can proceed with enabling the Camera usage in the .env.sfstation environment variables configuration file for the docker installation. Please find the configuration below and set the DOT_FACE_CAMERA_ENABLED to be true.
# DOT camera parameters (HTTPS is required)
DOT_FACE_CAMERA_ENABLED=true
DOT_FACE_CAMERA_FACE_CENTER_LIMIT=0.2
DOT_FACE_CAMERA_FACE_CONFIDENCE=0.06
Enabling HTTPS (Certification)
You can can enable and configure the HTTPS Certificate in the .env file. If it is enabled, the Smartface Station would run on https://your-domain. Please note that backend services behind the Video Processing Platform Station server can still use http://.
Configuring the .env file
Please adjust (and add if necessary) values listed in the table below
| Variable name | Description | Example value |
|---|---|---|
| HTTPS_ENABLED | Define if this feature is enabled/disabled | false |
| HTTPS_HOST_NAME | your-server | |
| HTTPS_KEY_FILE | Path to private key | server.key |
| HTTPS_CERT_FILE | Path to public key | server.cert |
Please put your server.key and server.cert files next to .env file or specify a full path.
To apply the changes, please run the command:
docker compose up -d
Generating your own local certificate
Certificate have to be obtained from verified certificate authority or generated on local machine. For local testing and development purposes it is possible to generate your own certificate. If it is generated on local machine it can be considered by Internet browser as untrusted.
Become local certificate authority
To obtain myCA.key (your private key) and myCA.pem (your root certificate) use the terminal commands below.
mkdir ~/certs
cd ~/certs

//generate the private key to become a local CA
openssl genrsa -des3 -out myCA.key 2048

//generate a root certificate
openssl req -x509 -new -nodes -key myCA.key -sha256 -days 1825 -out myCA.pem -reqexts v3_req -extensions v3_ca
Apply the local certificates
The locally generated certificates can be applied to browsers. The steps differ depending on the device/OS you are using
Mac
Please run the command below using the myCa.pem file generated:
sudo security add-trusted-cert -d -r trustRoot -k "/Library/Keychains/System.keychain" myCA.pem
Windows
Please follow the below steps for adding the Root Certificate to Windows 10:
- Open the “Microsoft Management Console” by using the Windows + R keyboard combination, typing
mmcand clicking Open - Go to File > Add/Remove Snap-in
- Click Certificates and Add
- Select Computer Account and click Next
- Select Local Computer then click Finish
- Click OK to go back to the MMC window
- Double-click Certificates (local computer) to expand the view
- Select Trusted Root Certification Authorities, right-click on Certificates in the middle column under “Object Type” and select All Tasks then Import
- Click Next then Browse. Change the certificate extension dropdown next to the filename field to All Files (.) and locate the
myCA.pemfile, click Open, then Next - Select Place all certificates in the following store. “Trusted Root Certification Authorities store” is the default. Click Next then click Finish to complete the wizard.
Linux
For Linux you can install certificate to google chrome (setting → security → manage certificates → add certificate authority → select myCA.pem) or you can add the root certificate. This guide is focusing on Ubuntu Linux distribution.
- If it isn’t already installed, install the ca-certificates package.
sudo apt-get install -y ca-certificates
- Copy the
myCA.pemfile to the/usr/local/share/ca-certificatesdirectory as amyCA.crtfile.
sudo cp ~/certs/myCA.pem /usr/local/share/ca-certificates/myCA.crt
- Update the certificate store.
sudo update-ca-certificates
iOS
Adding the Root Certificate to iOS 14 can be done by following these steps:
- Email the root certificate to yourself, so you can access it on your iOS device. Make sure to use the default Mail app to access the email.
- Tap on the attachment in the email on your iOS device. It will prompt you to review the profile in the Settings app.
- Open the Settings app and click Profile Downloaded near the top.
- Click Install in the top right, and then Install again on the Warning screen.
- Once installed, hit Close and go back to the main Settings page.
- Go to General > About.
- Scroll to the bottom and click on Certificate Trust Settings.
- Enable your root certificate under “ENABLE FULL TRUST FOR ROOT CERTIFICATES”.
Android
On Android devices, if you move the file manually via USB tether, you can go to Lock screen and security > Other security settings > Install from device storage, then navigate to the certificate file to install it. On older Android devices, the path might be Settings > Security & Screen Lock > Install from storage.
Creating CA-Signed Certificates for Smartface
As an alternative to locally generate and supply the certificates on the device/browser level you can also generate your own certificates that will be used directly by the Video Processing Platform Station. To do so, please follow the steps below:
openssl genrsa -out smartface.test.key 2048

//create a CSR
openssl req -new -key smartface.test.key -out smartface.test.csr
Create smartface.test.ext (X509 V3 certificate extension config file, which is used to define the Subject Alternative Name (SAN) for the certificate)
smartface.test.ext should contain
authorityKeyIdentifier=keyid,issuer
basicConstraints=CA:FALSE
keyUsage = digitalSignature, nonRepudiation, keyEncipherment, dataEncipherment
subjectAltName = @alt_names

[alt_names]
DNS.1 = your-hostname
Now we run the command to create the certificate: using our CSR, the CA private key, the CA certificate, and the config file:
openssl x509 -req -in smartface.test.csr -CA myCA.pem -CAkey myCA.key -CAcreateserial -out smartface.test.crt -days 825 -sha256 -extfile smartface.test.ext
We now have two files: smartface.test.key (the private key) and smartface.test.crt (the signed certificate) which we can use in smartface (copy them next to .env and set HTTPS_KEY_FILE=smartface.test.key and HTTPS_CERT_FILE=smartface.test.crt)
Making Video Processing Platform Station trusted for Chrome
For local development and for testing purposes it might be useful to make the Video Processing Platform Station trusted for the Google Chrome web browser. For production environments we recommend to enable secure https connection. This would allow you to use the local computer’s camera functionality, such as the Identification Dashboard or to allow Watchlist member registration in the Watchlist Management Dashboard directly from the web browser using the web camera.
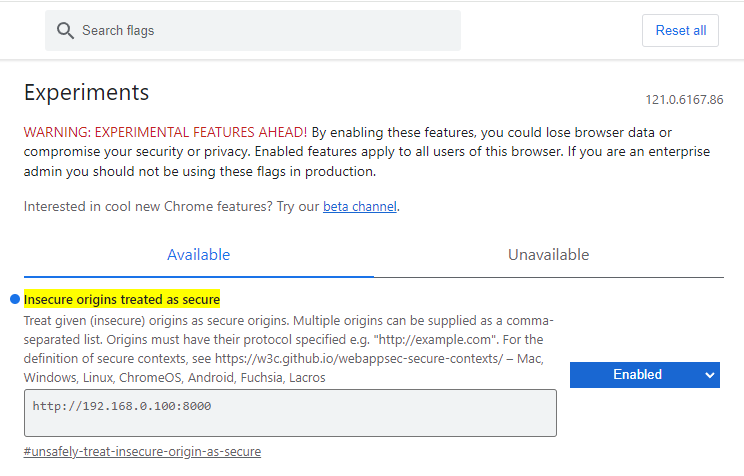
To make the Video Processing Platform Station trusted in Chrome please follow these steps:
- Enter the following URL using your Google Chrome: chrome://flags/#unsafely-treat-insecure-origin-as-secure
- Find the section Insecure origins treated as secure. Add your URL including the port (default is port
8000). For example:http://smartface-installation:8000orhttp://192.168.0.100:8000 - Change the dropdown button to Enabled
- Click Relaunch to apply changes
- You can check if the Camera Preview option is available in the Identification Dashboard. Please ensure the
DOT_FACE_CAMERA_ENABLEDis true as explained in the How to enable local Camera usage guide.
Logging in Video Processing Platform Station
IYou can configure and enable loging in the .env file .
By default Logging is enabled and logging to file is disabled.
Windows
The location of the env file is C:\Program Files (x86)\Video Processing Platform Station\.env.
Docker
The location of the env file is .env.sfstation.
| Variable name | Description | Example value |
|---|---|---|
| ENABLE_LOGGING | Define if this feature is enabled/disabled | true |
| LOG_TO_FILE | Define if logs are saved to file | your-server |
| LOG_FORMAT_JSON | Logs in plain text or in JSON format | false |
| LOG_FILE_PATH | Path to log file | “%PROGRAMDATA%\Innovatrics\Video Processing Platform Station\sfs-station-%DATE%.log” |
| LOG_FILE_DATE_PATTERN | Date format of log file name | “YYYY-MM-DD” |
| LOG_FILE_MAX_SIZE | Maximum size of single log file (in MB) | “20m” |
| LOG_FILE_MAX_FILES | Number of day logs files are kept | “1d” |
| LOG_LEVEL | Verbosity of logs - debug, info, error | “info” |
Personalization
These guides focus on personalizing the experience with the Video Processing Platform Station and the Video Processing Platform Station’s Feedback Display.
Branding
The Video Processing Platform Station as a web user interface for the user can be branded to match your environment and the user experience you want to provide to users. Branding can be applied by changing configuration files and the media files used within the branding folder.
The branding folder has these files:
naming-product.json
logo-product.svg
logo-product-without-text.svg
logo-company.svg
feedback-display-top-image.svg
feedback-display-error.svg
feedback-display-bottom-image.svg
feedback-display-access-denied-not-identified.svg
feedback-display-access-denied-block-or-spoof.svg
favicon-product.ico
empty-display.gif
Set up branding in Windows
In a Windows installation, there is a branding folder located within the Video Processing Platform Station installation folder. The default path is C:\Program Files (x86)\Video Processing Platform Station\branding.
To apply the changes, restart the Video Processing Platform Station service, within the Windows Services.
Set up branding in Docker
In Docker installation, you need to have branding folder in your file system and bind it in your docker-compose.yml file. The branding folder is not available in the GitHub presets, however it is included in the SFStation docker container. You can get it using the commands below:
Ensure the SFStation docker container is running. While in the directory containing the Video Processing Platform services' docker-compose.yml file, run the commands:
mkdir branding
cd branding
docker cp SFStation:/build/branding/ ./branding/
Adding it within the volumes section of the SFStation, add lines the following lines into your docker-compose.yml file:
    volumes:
      - "./branding:/build/branding"
So the SFStation section of the docker-compose.yml looks like below:
  sf-station:
    image: ${REGISTRY}sf-station:${SFS_VERSION}
    container_name: SFStation
    restart: unless-stopped
    ports:
      - 8000:8000
    volumes:
      - "./branding:/build/branding"
    env_file: .env.sfstation
To apply the changes, restart the SFStation container:
docker restart SFStation
Branding for the Video Processing Platform Station
To apply branding to your Video Processing Platform Station, you can apply changes to these files:
- naming-product.json
- logo-product.svg
- logo-product-without-text.svg
- logo-company.svg
- favicon-product.ico
The *.svg and *.ico files are common image files, to update them you need to match the constraints of the image types. We recommend keeping similar sizes to avoid any rendering or network issues, both in the sense of data and space. The naming-product.json has the configuration for the text strings used.
The default content of the naming-product.json:
{
  "windowTitle": "Video Processing Platform Station",
  "configSection": "Video Processing Platform",
  "feedbackDisplayErrorMessage": "Error",
  "feedbackDisplayAccessGrantedWelcomeMessage": "Welcome",
  "feedbackDisplayDeniedNotIdentifiedMessage": "Passage is not allowed",
  "feedbackDisplayDeniedBlockedOrSpoofMessage": "Passage is not allowed",
  "feedbackDisplayPutOnYourMaskMessage": "Put on your mask please"
}
The windowTitle and configSection changes will apply directly to your Video Processing Platform Station.
Branding for the Video Processing Platform Station’s Feedback Display
The Feedback Display can be branded, updating its layout, texts and animations. For more information about the Feedback display read here. Files that can be changed to apply branding:
- naming-product.json
- feedback-display-top-image.svg
- feedback-display-error.svg
- feedback-display-bottom-image.svg
- feedback-display-access-denied-not-identified.svg
- feedback-display-access-denied-block-or-spoof.svg
- favicon-product.ico
- empty-display.gif
The *.svg and *.ico files are common image files, to update them you need to match the constraints of the image types. We recommend keeping similar sizes to avoid any rendering or network issues, both in the sense of data and space. The naming-product.json has the configuration for the text strings used. The empty-display.gif is a file that can show an animation during a time when no one is in front of the camera.
The default content of the naming-product.json:
{
  "windowTitle": "Video Processing Platform Station",
  "configSection": "Video Processing Platform",
  "feedbackDisplayErrorMessage": "Error",
  "feedbackDisplayAccessGrantedWelcomeMessage": "Welcome",
  "feedbackDisplayDeniedNotIdentifiedMessage": "Passage is not allowed",
  "feedbackDisplayDeniedBlockedOrSpoofMessage": "Passage is not allowed",
  "feedbackDisplayPutOnYourMaskMessage": "Put on your mask please"
}
The feedbackDisplayErrorMessage, feedbackDisplayAccessGrantedWelcomeMessage, feedbackDisplayDeniedBlockedOrSpoofMessage, feedbackDisplayPutOnYourMaskMessage changes will apply directly into your Feedback display.
How to apply and manage labels
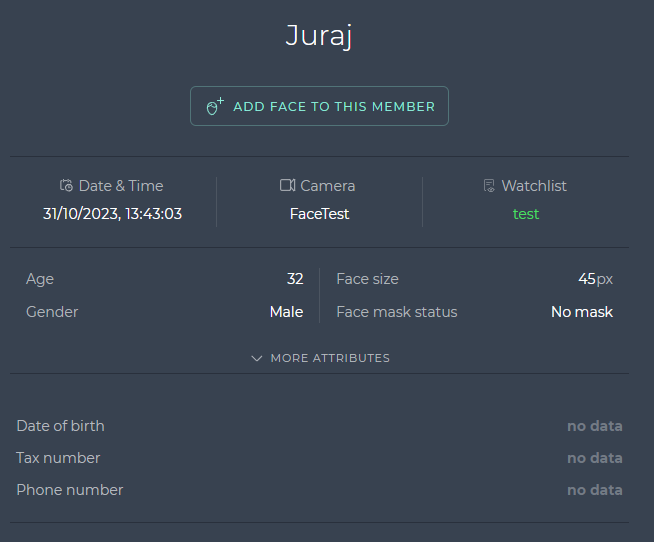
The Video Processing Platform Station allow to enable labels for each watchlist member. It is a set of key/value pairs that can be shown in the Video Processing Platform Station. To present such labels you need to enable them and then you need to add this information to watchlist members.
In an example below you can see “Date of birth”, “Tax number” and “Phone number” labels.
Enabling labels in the Video Processing Platform Station
Please edit .env.sfstation in your installation folder with a text editor.
Uncomment/apply changes to the section below:
# Add optional labels to watclist member (key is used in API requests, label is visual representation of key and used only in station frontend)
WATCHLIST_MEMBER_KEY_0=date
WATCHLIST_MEMBER_LABEL_0=Date of birth
WATCHLIST_MEMBER_KEY_1=tax_number
WATCHLIST_MEMBER_LABEL_1=Tax number
WATCHLIST_MEMBER_KEY_2=phone
WATCHLIST_MEMBER_LABEL_2=Phone number
Apply changes to the Video Processing Platform Station, so the configuration reloads. The easiest way to achieve this is to run the command below:
docker compose up -d
Please observe any match notification in the Video Processing Platform station to ensure the labels are shown for any watchlist member.
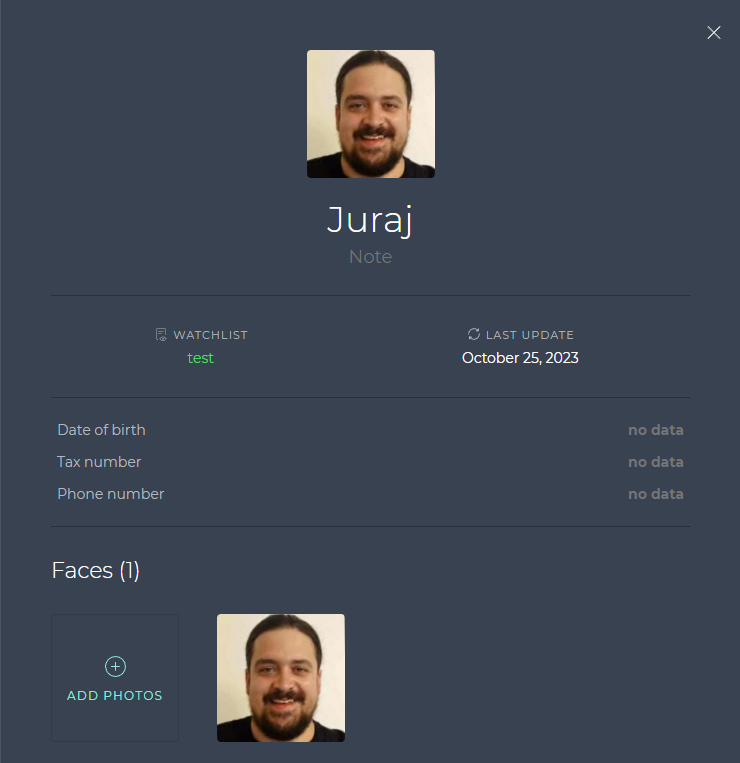
Adding label data to watchlist members
You can change the values for each label either directly in the Video Processing Platform Station, or via the RESP API on the port 8098.
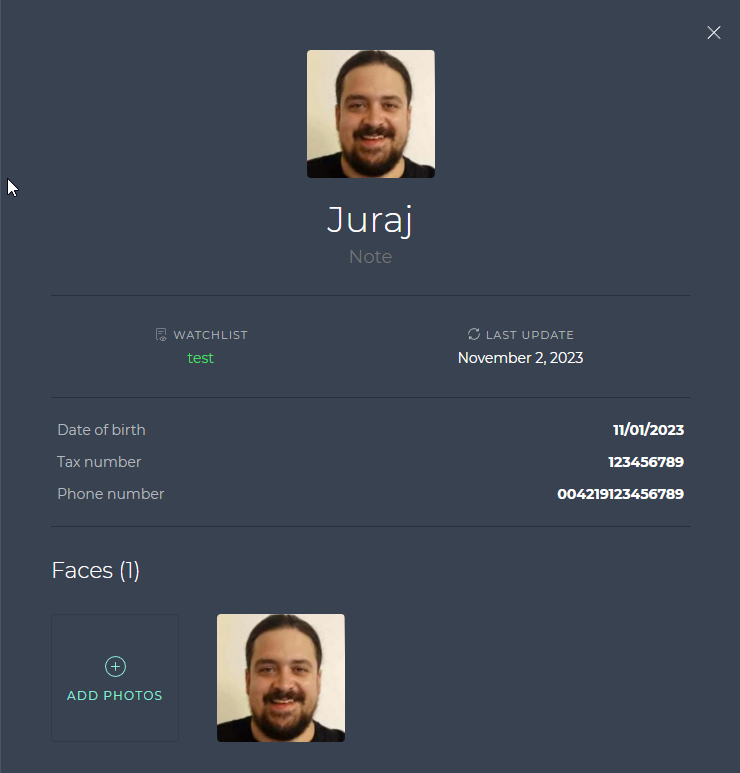
To update the values, please run a REST API request, such as below:
{
	"displayName": "Juraj",
	"fullName": null,
	"note": "",
	"labels": [],
	"id": "88866909-54ea-4c09-8673-2a95aa370180",
	"createdAt": "2023-10-25T10:16:56.899082Z",
	"updatedAt": "2023-10-25T10:17:05.337245Z",
	"labels":
	[
		{
		  "key": "date",
		  "value": "11/01/2023"
		},
		{
		  "key": "tax_number",
		  "value": "123456789"
		},
		{
		  "key": "phone",
		  "value": "004219123456789"
		}
	]
}
Once applied, the values are visible together with the keys in the Video Processing Platform Station.
How to setup Video Processing Platform Station Presets
The Video Processing Platform allows to use several presets meant for different users, who have different roles. The preset’s lock out options and the user is not allowing to do certain actions.
Available Video Processing Platform Station roles
The default role is the admin (administrator) of the whole Video Processing Platform Station - can see/change everything. There are 3 specific roles Access, Investigation and Security with 3 levels each - Operator, Supervisor and Administrator
Access
Video Processing Platform Station Functionality Per Role Level for the Access. The Starting Page is http://localhost:8000/access-control
| Access Admin | Access Supervisor | Access Operator | |
|---|---|---|---|
| Security Dashboard | ❌ | ❌ | ❌ |
| Camera Preview Setting | ❌ | ❌ | ❌ |
| Recent Events Settings | ❌ | ❌ | ❌ |
| Notification Detail | ❌ | ❌ | ❌ |
| Investigation Dashboard | ❌ | ❌ | ❌ |
| History | ❌ | ❌ | ❌ |
| History - Notification Detail | ❌ | ❌ | ❌ |
| Access Dashboard | ✅ | ✅ | ✅ |
| Watchlist | ✅ | ✅ | ❌ |
| Configuration | ✅ | ✅ | ✅ |
| Video Processing Platform Station section | ✅ | ✅ | ✅ |
| Video Processing Platform Camera section | ✅ | ❌ | ❌ |
| Video Processing Platform section | ✅ | ❌ | ❌ |
Investigation
Video Processing Platform Station Functionality Per Role Level for the Investigation. The Starting Page is http://localhost:8000/investigation/
| Investigation Admin | Investigation Supervisor | Investigation Operator | |
|---|---|---|---|
| Security Dashboard | ❌ | ❌ | ❌ |
| Camera Preview Setting | ❌ | ❌ | ❌ |
| Recent Events Settings | ❌ | ❌ | ❌ |
| Notification Detail | ❌ | ❌ | ❌ |
| Investigation Dashboard | ✅ | ✅ | ✅ |
| History | ✅ | ✅ | ✅ |
| History - Notification Detail | ✅ | ✅ | ✅ |
| Access Dashboard | ❌ | ❌ | ❌ |
| Watchlist | ✅ | ✅ | ❌ |
| Configuration | ✅ | ✅ | ✅ |
| Video Processing Platform Station section | ✅ | ✅ | ✅ |
| Video Processing Platform Camera section | ❌ | ❌ | ❌ |
| Video Processing Platform section | ✅ | ❌ | ❌ |
Security
Video Processing Platform Station Functionality Per Role Level for the Security. The Starting Page is http://localhost:8000/security
| Security Admin | Security Supervisor | Security Operator | |
|---|---|---|---|
| Security Dashboard | ✅ | ✅ | ✅ |
| Camera Preview Setting | ✅ | ✅ | ✅ |
| Recent Events Settings | ✅ | ✅ | ✅ |
| Notification Detail | ✅ | ✅ | ✅ |
| Investigation Dashboard | ❌ | ❌ | ❌ |
| History | ✅ | ✅ | ❌ |
| History - Notification Detail | ✅ | ✅ | ❌ |
| Access Dashboard | ❌ | ❌ | ❌ |
| Watchlist | ✅ | ✅ | ❌ |
| Configuration | ✅ | ✅ | ✅ |
| Video Processing Platform Station section | ✅ | ✅ | ✅ |
| Video Processing Platform Camera section | ✅ | ❌ | ❌ |
| Video Processing Platform section | ✅ | ❌ | ❌ |
How to Setup the Roles
The file .env.sfstation is located in the same folder as the main docker-compose.yml. There is a section in this file that allows you to configure what role is to be used in the Video Processing Platform Station. This allows you to focus on the functionality related to the role and to hide functionality that should not be related to the role of the user.
The section of the file .env.sfstation is listed below:
# Optional roles are used for locking specified part of frontend for given roles
# Claim name is "Group mapper name" specified in Keycloak or "cognito:groups" in Cognito
# ROLES_CLAIM_NAME=sf_roles
# ROLE_KEY_ADMIN=/admin
# ROLE_KEY_SECURITY_SUPERVISOR=/security_supervisor
# ROLE_KEY_SECURITY_OPERATOR=/security_operator
# ROLE_KEY_ACCESS_SUPERVISOR=/access_supervisor
# ROLE_KEY_ACCESS_OPERATOR=/access_operator
# ROLE_KEY_INVESTIGATION_SUPERVISOR=/investigation_supervisor
# ROLE_KEY_INVESTIGATION_OPERATOR=/investigation_operator
# ROLE_KEY_SECURITY_ADMIN=/security_admin
# ROLE_KEY_ACCESS_ADMIN=/access_admin
# ROLE_KEY_INVESTIGATION_ADMIN=/investigation_admin
# FORCED_ROLE_NAME_0=/admin
By adjusting the line # FORCED_ROLE_NAME_0=/admin you can adjust the role to be used. So to change the role to access operator instead of the `admin role, you can set the line as this:
FORCED_ROLE_NAME_0=/access_supervisor
Please do not forget to remove the # symbol as only then is the new configuration applied. Once the role is applied please save the configuration file and restart the Video Processing Platform Station docker container. It easiest way to achieve this is to run the commands below in the same folder as is the docker-compose.yml file.
docker-compose stop;docker-compose down;docker-compose up -d
Please note that the roles can also be applied dynamically to specific users. Together with restricting access to specific ports this can be done via Keycloak setup.
Centralized Edge Camera Management (Station)
Since the Video Processing Platform version 4.25, there is new centralized configuration for Edge cameras (Smart cameras using the Video Processing Platform Embedded Stream Processor plugins). This configuration can be done using the Video Processing Platform Station or via API. This guide focuses on the configuration via the Video Processing Platform Station. To know more about how to configure the Edge cameras centrally using APIs, read here.
More information about installing the Video Processing Platform Embedded Stream Processor can be read here.
Once the plugin is installed and the initial configuration is done, you can add the Edge camera to the Video Processing Platform. Such a cameras is then visible in the Video Processing Platform Station’s list of cameras within the Camera dashboard. You can configure the following on the Edge cameras directly within the Video Processing Platform Station:
- Uploading Licenses
- Setting Face Recognition Parameters
- Synchronizing Watchlists
- Enabling and setting up the Liveness Check
- Messaging Configuration
Uploading Licenses
Managing and updating licenses for all cameras can be done centrally, eliminating the need to individually access each camera. To obtain a license, please read the Get Started section for more information.
At first, for each cameras there is License not provided warning. It is visible both at the top of the Edge camera’s configuration panel and in the License section of the same panel
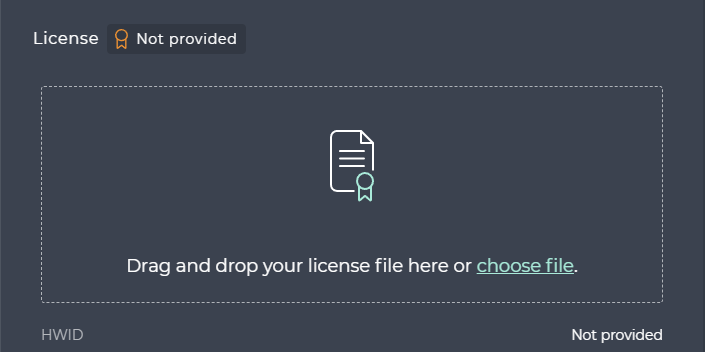

In the License section you can drag and drop you license file into the highlighted area, or you can choose file to be uploaded. After uploading a license, please click on the Save button.

After a successful upload, the License will be Valid with a green ribbon. The License not valid notification will be no longer present at the top of the panel.
Setting Face Recognition Parameters
You can set and adjust the face recognition parameters directly in the Video Processing Platform Station. Enabling/disabling the face processing is possible using the toggle button. The parameters below can be adjusted:
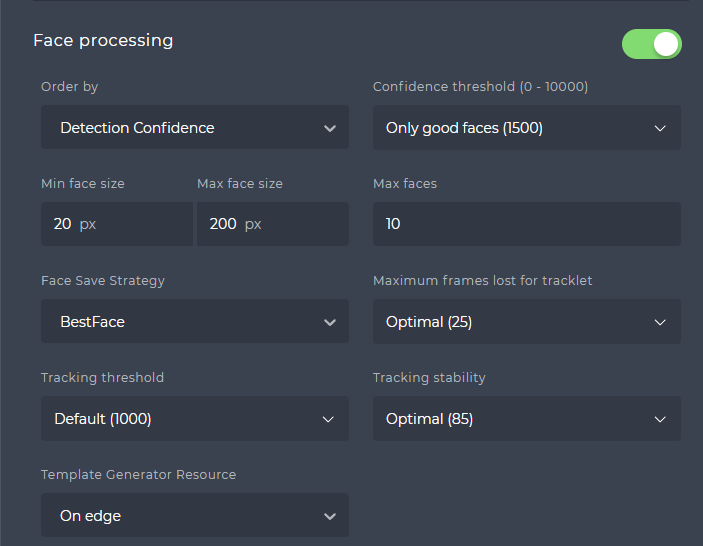
- Order by
In the case there are several faces detected on an incoming image from the Edge camera, you can order the notifications created. You can order them by Detection Confidence, or by their Face Size. - Confidence threshold
The face detector is looking for faces in the images generated by the Edge camera. Each detected face comes with a confidence, that represents how certain the detector is that something detected as a face is actually a face. By changing the Confidence threshold you filter out results under your preferred threshold. You can choose Include low quality faces (1200), Only good faces (1500), Only perfect faces (3500) and Custom, allowing you to set your own values. - Face size
You can set the minimum and maximum face size in pixels. Detected faces outside of the set range will be ignored. - Max faces
The maximum amount of faces provided by the face detector from one image. - Face Save Strategy
You can choose a strategy to save detected faces: All for saving all images,Balanced for saving the initial match and then saving into tracklet additional images with with higher matching threshold or face detection confidence , and MatchOnly with similar behaviour as the balanced, however only matched enrolled Watchlist Members will have their tracklet saved. - Maximum frames lost for tracklet
You can adjust the detector’s tracking capabilities, where you can set an amount of frames, where the person who’s face is being detected, is not visible for the camera, yet once the person reappears, it will continue within the same tracklet. There is default optimal value of 25, you can set a Custom value. - Tracking threshold
It is the inimal detection confidence threshold for tracked faces. Faces with detection confidence below this threshold are filtered out by tracking and not propagated to landmarks detection and template extraction. - Tracking stability
This is a threshold where the certainty of having the same person’s face within a tracklet is being set. You can set custom values, where lower values increase a change of the tracklet jumping between nearby persons and higher values increase chances of loosing the detected person from a tracket and the risk of creating an additional tracklet for the same person. - Template Generator Resource
You can choose whether the Face Template extraction happens directly on the Edge camera or on the Video Processing Platform server. Within the server you can choose to use the CPU, GPU or Any service.
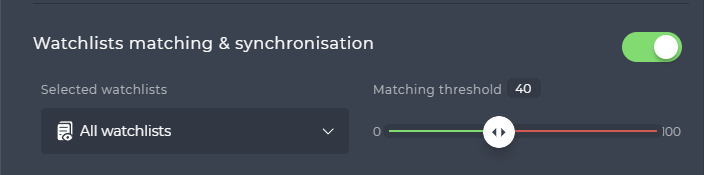
Synchronizing Watchlists
You can synchronize Watchlists and their Watchlist Members on the Edge camera(s). You can enable matching and synchronizating using the toggle button.
This allows to do the matching directly on the camera. You can choose what Watchlist(s) to use and you can se the Matching threshold. Only matches with higher Biometric score will be considered a match.
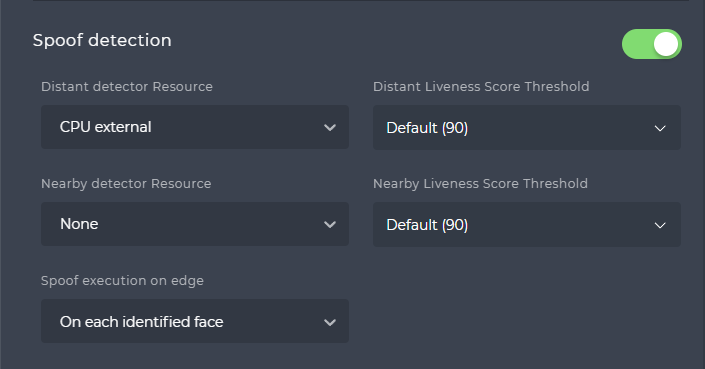
Enabling and setting up the Liveness Check
You can enable spoof check / liveness check using the toggle button in the Spoof detection section. Once enabled, there are several parameters to set and adjust:
Distant detector Resource
You can choose what resource to use for the Distant liveness. It can be None to not use the Distant liveness, On edge to run the liveness on the Edge camera directly, CPU External for running it on the Video Processing Platform’s server using CPU, GPU Internal for running it on the Video Processing Platform’s server using GPU, Any External for running it on the Video Processing Platform’s server using any service.Distant Liveness Score Threshold
You can choose the minimal Liveness Score that we will consider genuine for the Distant Liveness. Lower Score will be considered Spoof.Nearby detector Resource
You can choose what resource to use for the Distant liveness. It can be None to not use the Nearby liveness, On edge to run the liveness on the Edge camera directly, CPU External for running it on the Video Processing Platform’s server using CPU, GPU Internal for running it on the Video Processing Platform’s server using GPU, Any External for running it on the Video Processing Platform’s server using any service.Nearby Livenss Score Threshold
You can choose the minimal Liveness Score that we will consider genuine for the Nearby Liveness. Lower Score will be considered Spoof.Spoof execution on edge
If you use the Spoof check / Liveness check on the edge, you can choose whether to choose it on each extracted or identified face. Extracted faces went throught the face detection and face template extraction process sucessfully. The identified faces went successfully via matching.
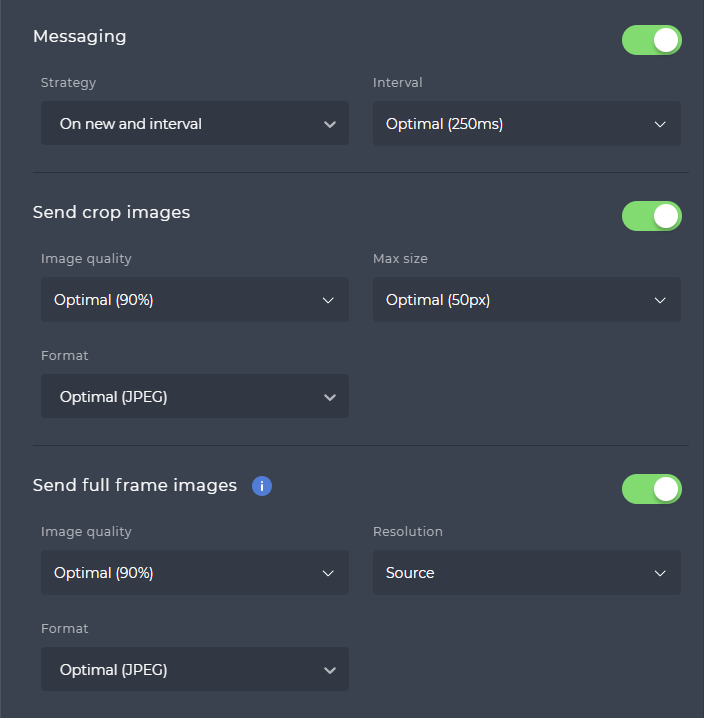
Messaging Configuration
You can enable messaging between the Edge Camera and the Video Processing Platform platform using the toggle button in the Messaging section. If the toggle is disabled, no message will be sent to the Video Processing Platform. You can choose messaging stratefy and interval.
Strategy options:
- On new and interval
New message to the Video Processing Platform is sent once a new tracklet is created and then each time we keep the same tracket and the interval ticks - On new and interval best
New message to the Video Processing Platform is sent once a new tracklet is created and then each time we keep the same tracket and the interval ticks, but only of new best confidence is achieved within the tracklet
You can choose the interval in miliseconds (ms).
You can also enable and disable the crop images. If this is disabled, the crops of detected faces will not be sent. If enabled you can adjust the image quality (90% or Custom), maximum image size (Optimal (50px) or Custom) and image format (JPEG, RAW, PNG).
You can also enable and disable the crop images. If this is disabled, the crops of detected faces will not be sent. If enabled you can adjust the image quality (90% or Custom), image resolution(Source, High definition (1080p), Resource saving(720p) and Custom) and image format (JPEG, RAW, PNG).
How to setup Authentication
The Video Processing Platform Station supports several methods for authentication, security restrictions and identity providers.
Setting up Keycloak
One of the supported identity providers is the Keycloak. It uses standard protocols and provides Single-Sign On. It is easily configurable and offers many options for advanced users.
In this guide we provide an easy basic installation that allows you to hide the Video Processing Platform Station behind it, exposing only public ports.
Requirements
- 1 to N Video Processing Platform installations, including the Video Processing Platform Station (can be both Windows and Linux/Docker)
- Docker-enabled Linux machine/virtual machine
- Machines are networked and communication between them is allowed
Setting up the Video Processing Platform
In this sample, KeyCloak is deployed on the same machine. In production deployments, KeyCloak is deployed on a standalone machine with extra security.
For our sample installation, we will use the docker-compose.yml preset available on the Video Processing Platform GitHub.
Download the required files using the GIT by running the command below in the desired location:git clone https://github.com/innovatrics/smartface.git
Navigate to the preset at / > special > sf-with-keycloak.
Find $YOUR-SERVER-IP$ strings across the realm-export.json in the keycloak-server subfolder and .env.sfstation in the sf-server subfolder.
Replace them with the IP address of the KeyCloak server, that is accessible for both the Video Processing Platform Station and the final user. When deployed publicly on the internet, replace with FQDN (keycloak.mySuperDomain.com)
Files and the line numbers:
keycloak-server/realm-export.json:877 >> "rootUrl": "http://$YOUR-SERVER-IP$:8000/",
keycloak-server/realm-export.json:878 >> "adminUrl": "http://$YOUR-SERVER-IP$:8000/",
keycloak-server/realm-export.json:884 >> "http://$YOUR-SERVER-IP$:8000/*"
sf-server/.env.sfstation:36:          >> KEYCLOAK_DOMAIN=http://$YOUR-SERVER-IP$:8080/auth
sf-server/.env.sfstation:39:          >> KEYCLOAK_JWKS_URI="http://$YOUR-SERVER-IP$:8080/auth/realms/master/protocol/openid-connect/certs"
sf-server/.env.sfstation:40:          >> KEYCLOAK_ADMIN_URL=http://$YOUR-SERVER-IP$:8080/auth/admin
Then you can start the KeyCloak and the Video Processing Platform, including the Video Processing Platform Station using the steps below:
- Enter
keycloak-serverand run commanddocker-compose up -d - Enter
sf-serverand runrun.sh
Or you can use the run.sh bash script located in the sf-with-keycloak directory.
User roles and their configuration
The Video Processing Platform Station supports several roles. An authenticated user can have a role.
Roles in the Video Processing Platform Station
For more information about the roles available and how to set them for the Video Processing Platform Station, read about the Video Processing Platform Station Presets.
Such roles are defined for the Video Processing Platform Station in the .env.sfstation environmental variable file, such as below:
ROLES_CLAIM_NAME=sf_roles
ROLE_KEY_ADMIN=/admin
ROLE_KEY_SECURITY_SUPERVISOR=/security_supervisor
ROLE_KEY_SECURITY_OPERATOR=/security_operator
ROLE_KEY_ACCESS_SUPERVISOR=/access_supervisor
ROLE_KEY_ACCESS_OPERATOR=/access_operator
ROLE_KEY_INVESTIGATION_SUPERVISOR=/investigation_supervisor
ROLE_KEY_INVESTIGATION_OPERATOR=/investigation_operator
ROLE_KEY_SECURITY_ADMIN=/security_admin
ROLE_KEY_ACCESS_ADMIN=/access_admin
ROLE_KEY_INVESTIGATION_ADMIN=/investigation_admin
Roles in the Keycloak
Visit the Keycloak’s server via URL:
http://<your-keycloak-ip-or-hostname>:8080/auth/Click on Administration Console
Use admin/admin credentials in the default setup to login. Do not forget to change it for production!
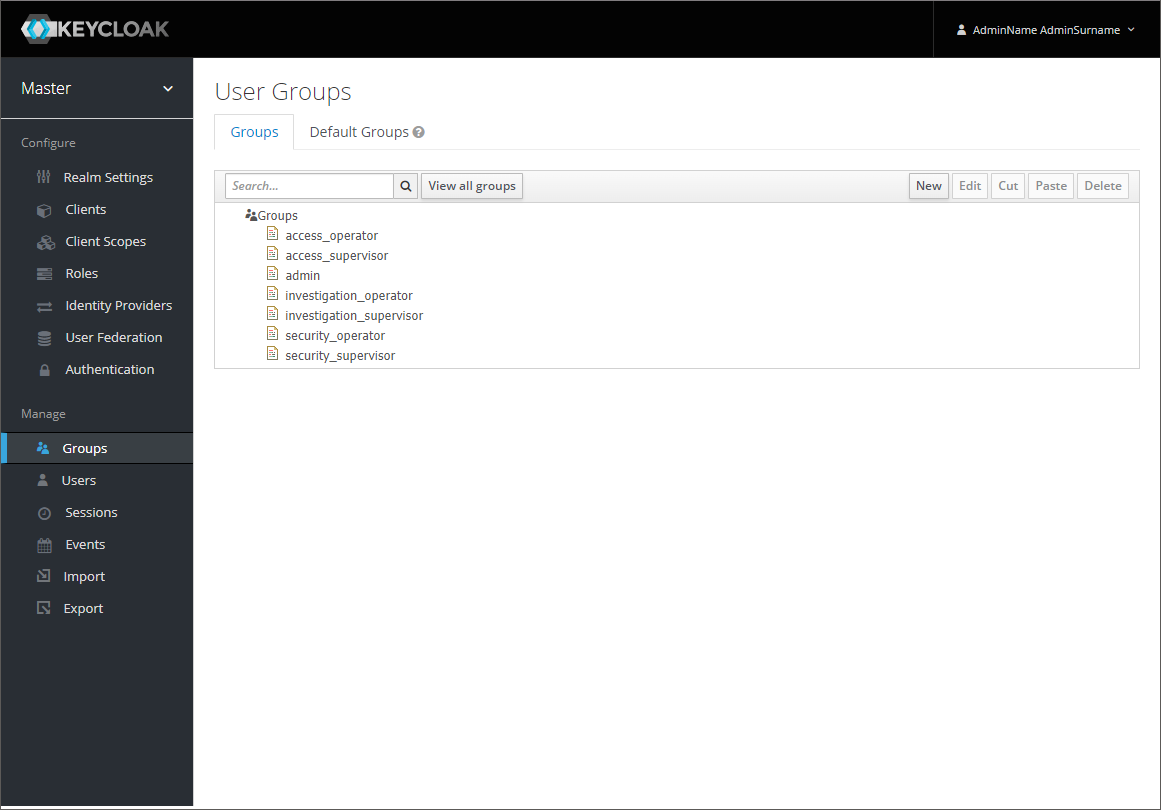
Click in the left menu: Manage>Groups
Ensure you have all the groups (mapped to roles in the Video Processing Platform Station) or click New to add new groups if needed.
/admin
/security_supervisor
/security_operator
/access_supervisor
/access_operator
/investigation_supervisor
/investigation_operator
/security_admin
/access_admin
investigation_admin
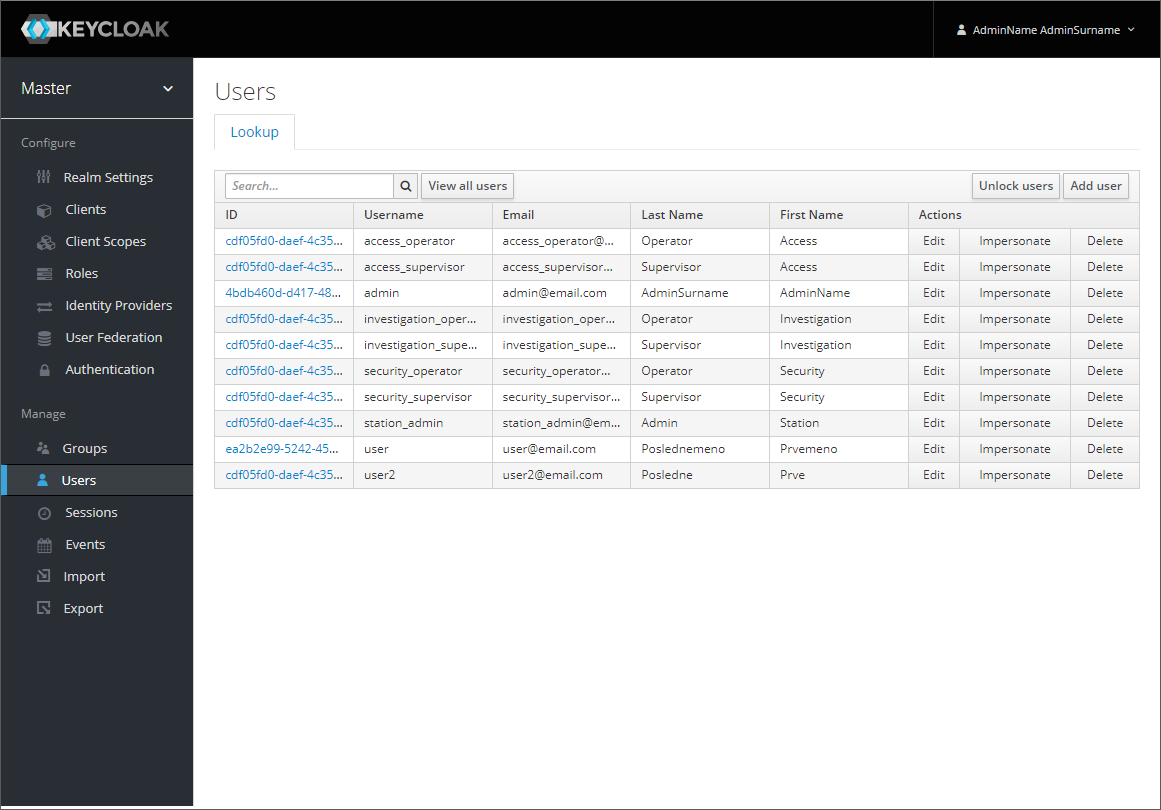
You can also use premade users or create new users in the Manage>Users section:
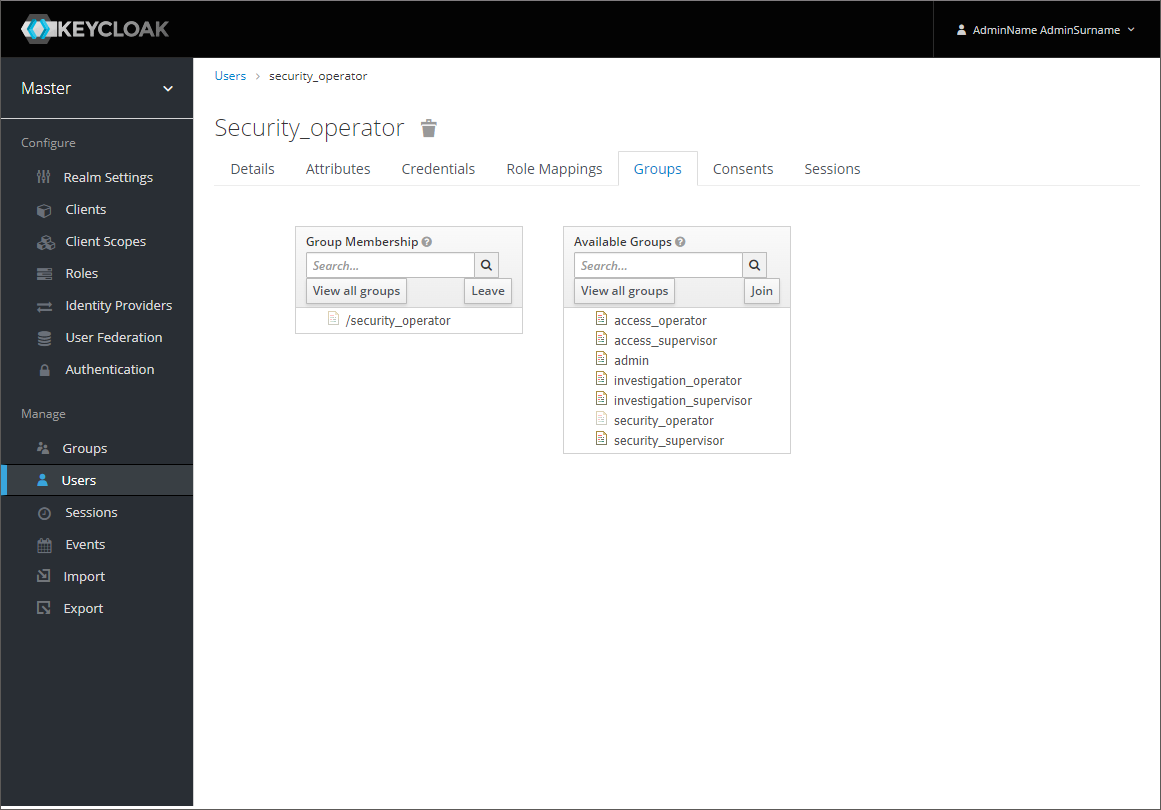
If you create a new user or edit an existing user, you can adjust the rules available to the user in the Groups tab within the Manage>Users section:
Securing the communication
After creating a secured channel to communicate with the Video Processing Platform Station to ensure that only the selected ports are used we should disable any ports that are normally used to communicate with the Video Processing Platform Station and the Video Processing Platform Station.
This can be done in the firewall configuration and you should disable the unused ports between the Video Processing Platform installation machines and the outer world, especially the ports 8098 and 8097. Disable unused ports between the Video Processing Platform installation machines and the Keycloak machine.
We also recommend changing the default admin user in the Keycloak.
Using the configured Keycloak
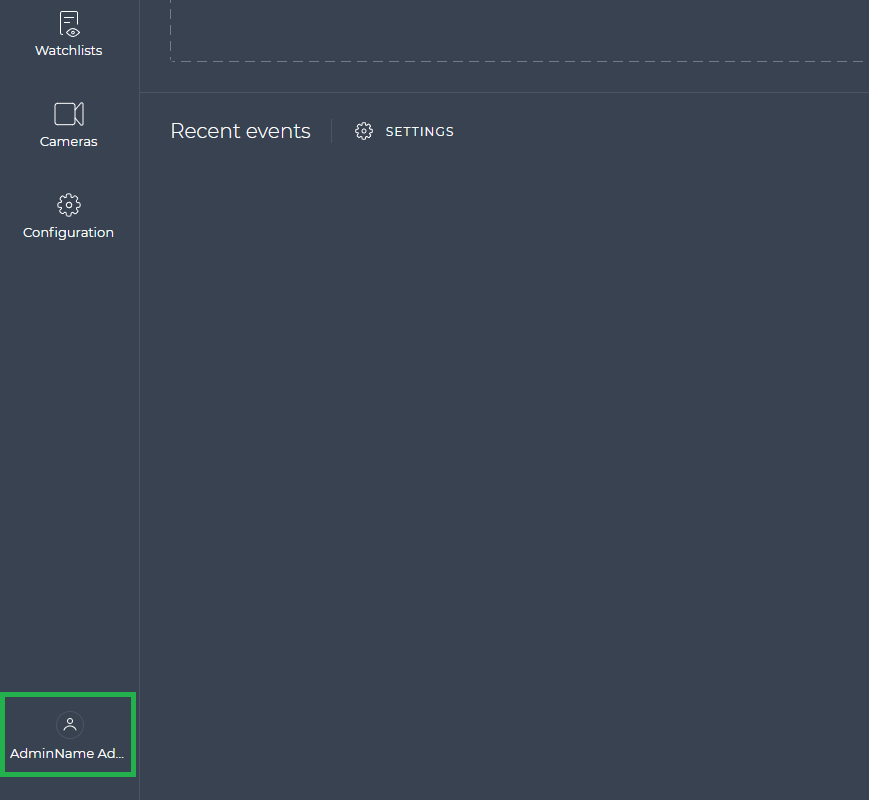
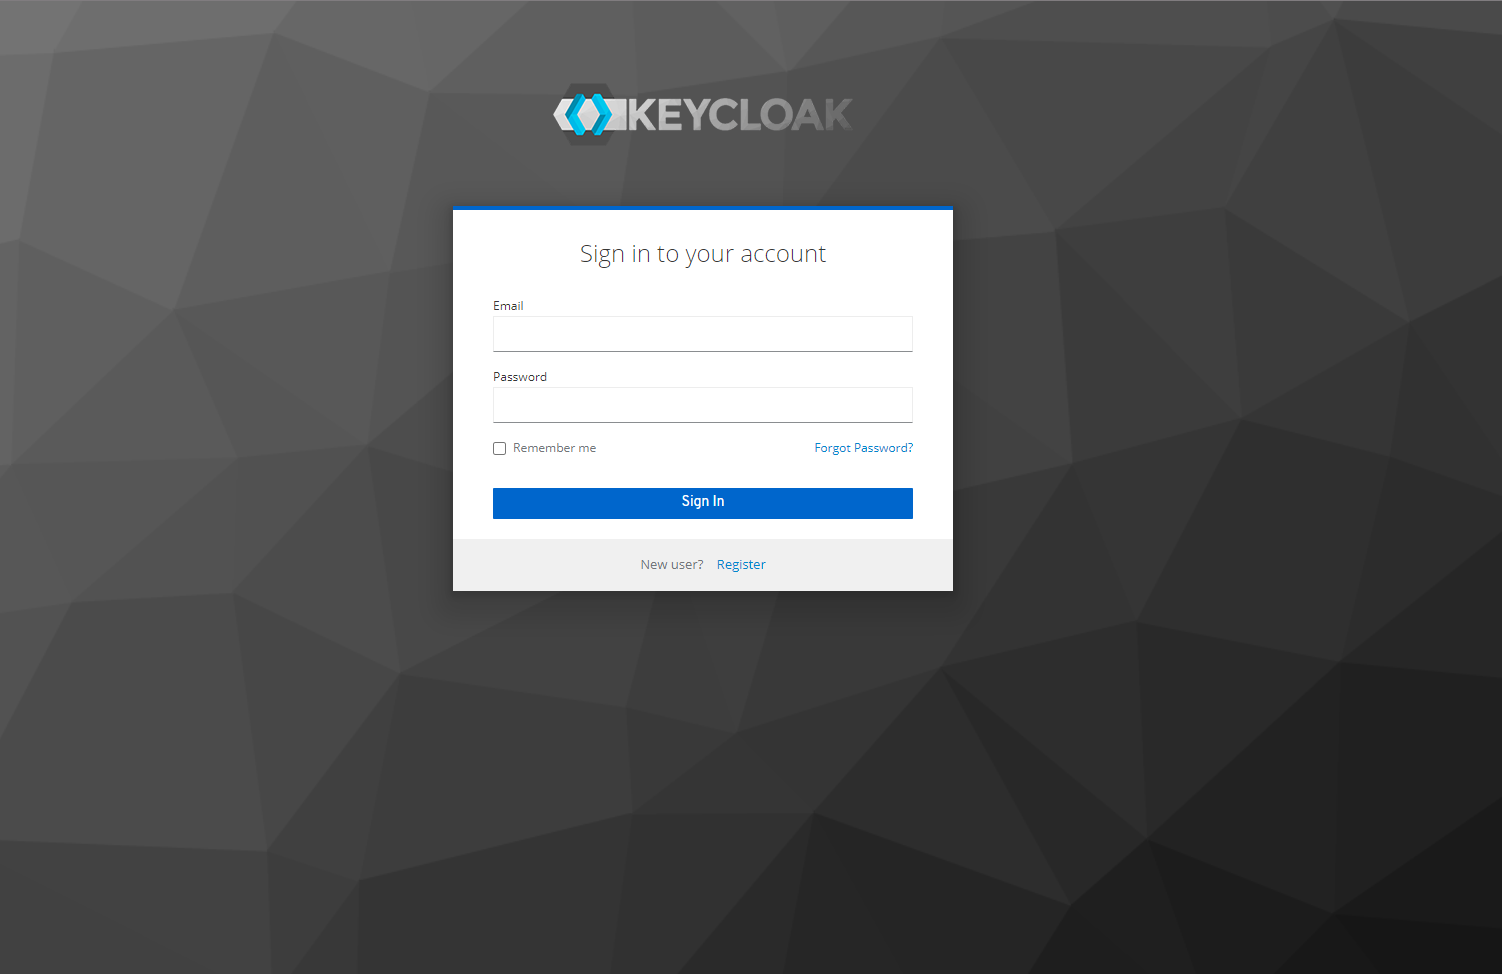
Once the Keycloak is configured and running, trying to visit the Video Processing Platform Station at port 8000 will require you to log in/authenticate.
Once logged in, you can log off using the button at the bottom left.