After Installation
Your Video Processing Platform installation is now complete and you are ready for the first steps, such as enrolling a Watchlist Member, adding an RTSP camera or Edge stream and doing your first biometric identification. This video will guide you through this first experience.
Video tutorial
If you prefer a video step-by-step guide please watch the prepared tutorial video. If you prefer to read a step-by-step guide, please skip this section and navigate to the Step-by-step guide section. NOTE: This video tutorial shows how to add an RTSP camera only.
Step-by-step guide
To ensure the proper functioning system and to get your first own real world results, we can do a few more things:
- Register yourself into a watchlist
- Add a camera
- Add an edge stream if you are using Video Processing Platform Embedded on smart camera
- Get your first identification
Register yourself into a watchlist
Go to Watchlists in the left panel.
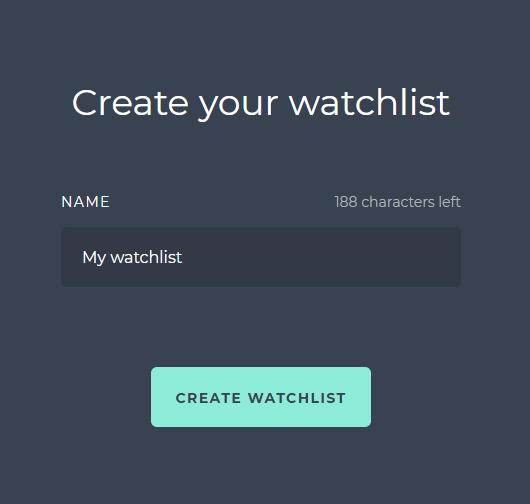
Select ADD WATCHLIST.

- Type the name of your watchlist and confirm with CREATE WATCHLIST.
Upload a photo by dropping the photos directly onto the marked area or by choosing a photo on your computer. You can also take a photo (in this case your selfie) using the device’s built-in camera or a USB camera connected to your computer
After you upload photos of watchlist members, click NEXT.

- Type the FULL NAME for the uploaded watchlist member. You may also add a note by specifying the NOTE field.

Click NEXT.
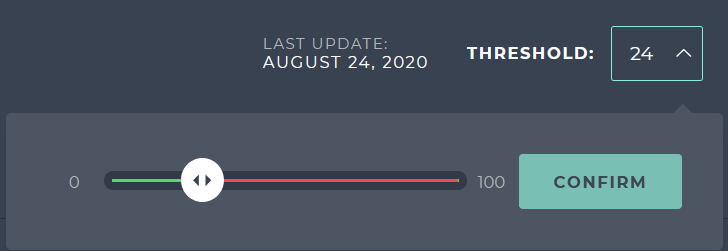
Specify the matching THRESHOLD and CONFIRM. For more information what is the matching threshold, see Matching
Add an RSTP camera
- Click on Cameras in the left menu panel.
- Click on the button ADD CAMERA.
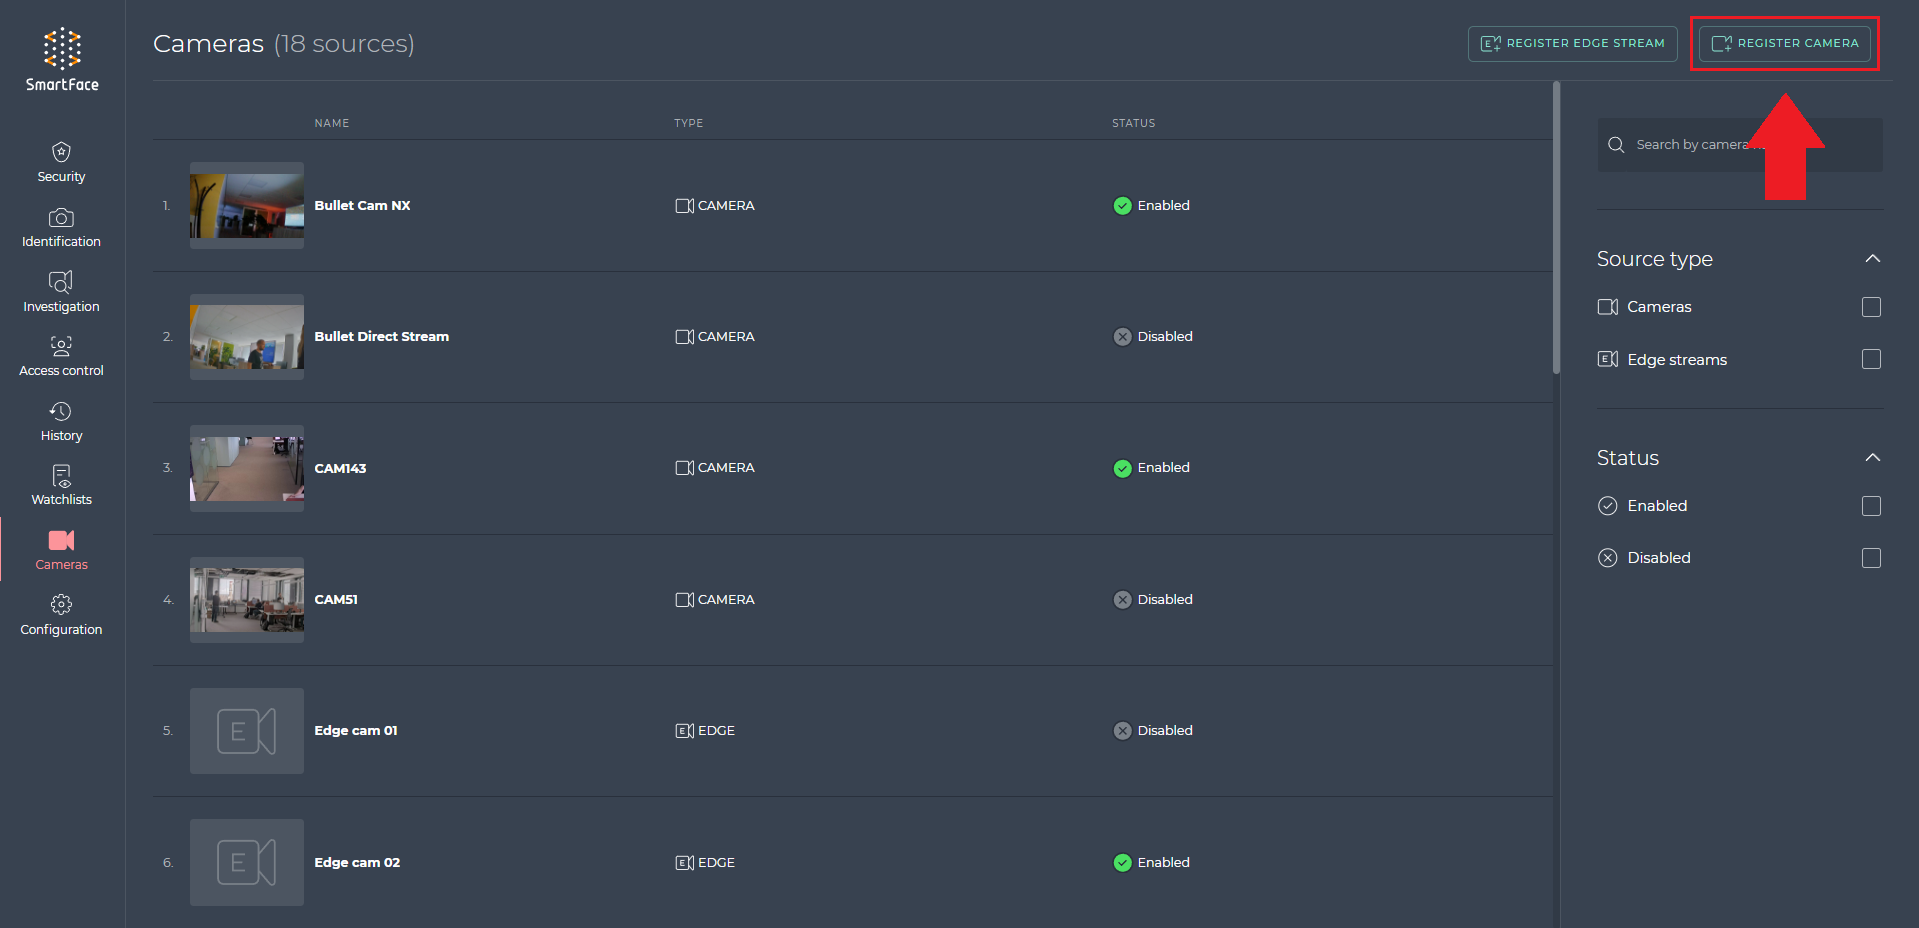
- Enter the Name and RTSP / Video source.

To create a new camera, click on ADD CAMERA.
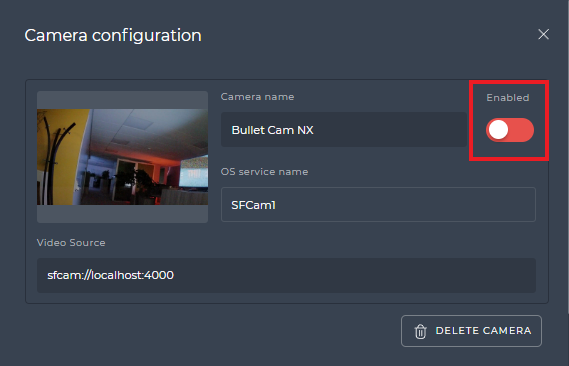
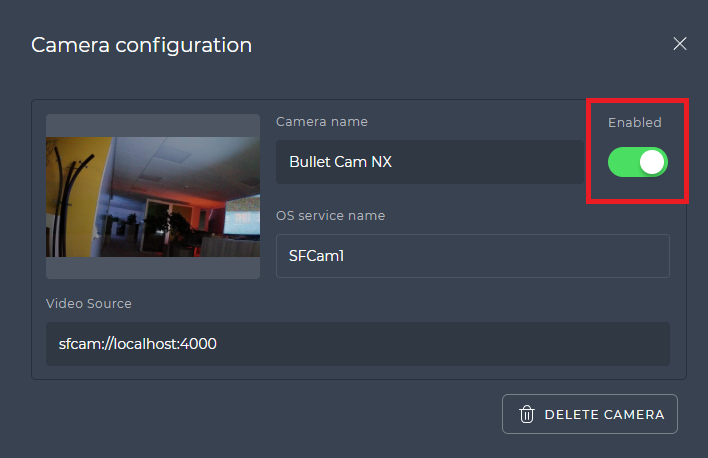
Click on the registered camera in the camera list to open the camera configuration.
In the camera configuration detail, you can enable the camera by clicking on the toggle switch Enabled.
Add an Edge Stream
- Click on Cameras in the left menu panel.
- Click on the button ADD EDGE STREAM.
- Enter the Camera Name and Client ID. Client ID has to be the same as the MQTT Client ID set on the SFE Stream Processor running on the camera
- To create a new edge stream, click on ADD EDGE STREAM.

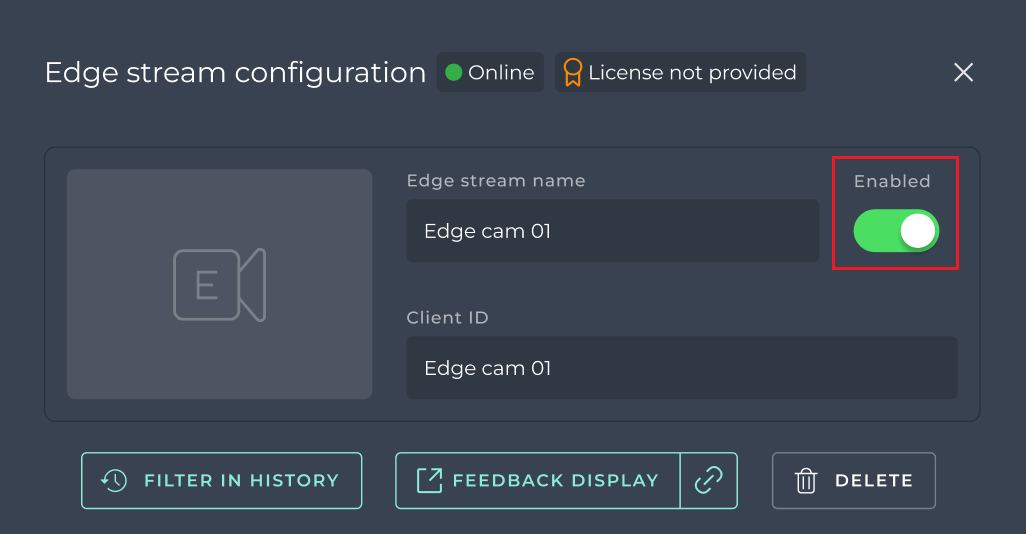
Click on the registered edge stream in the camera list to open the edge stream configuration.
In the edge stream configuration detail, you can enable the edge stream by clicking on the toggle switch Enabled.

Disabled edge stream
Enabled edge stream
Get the First Identification
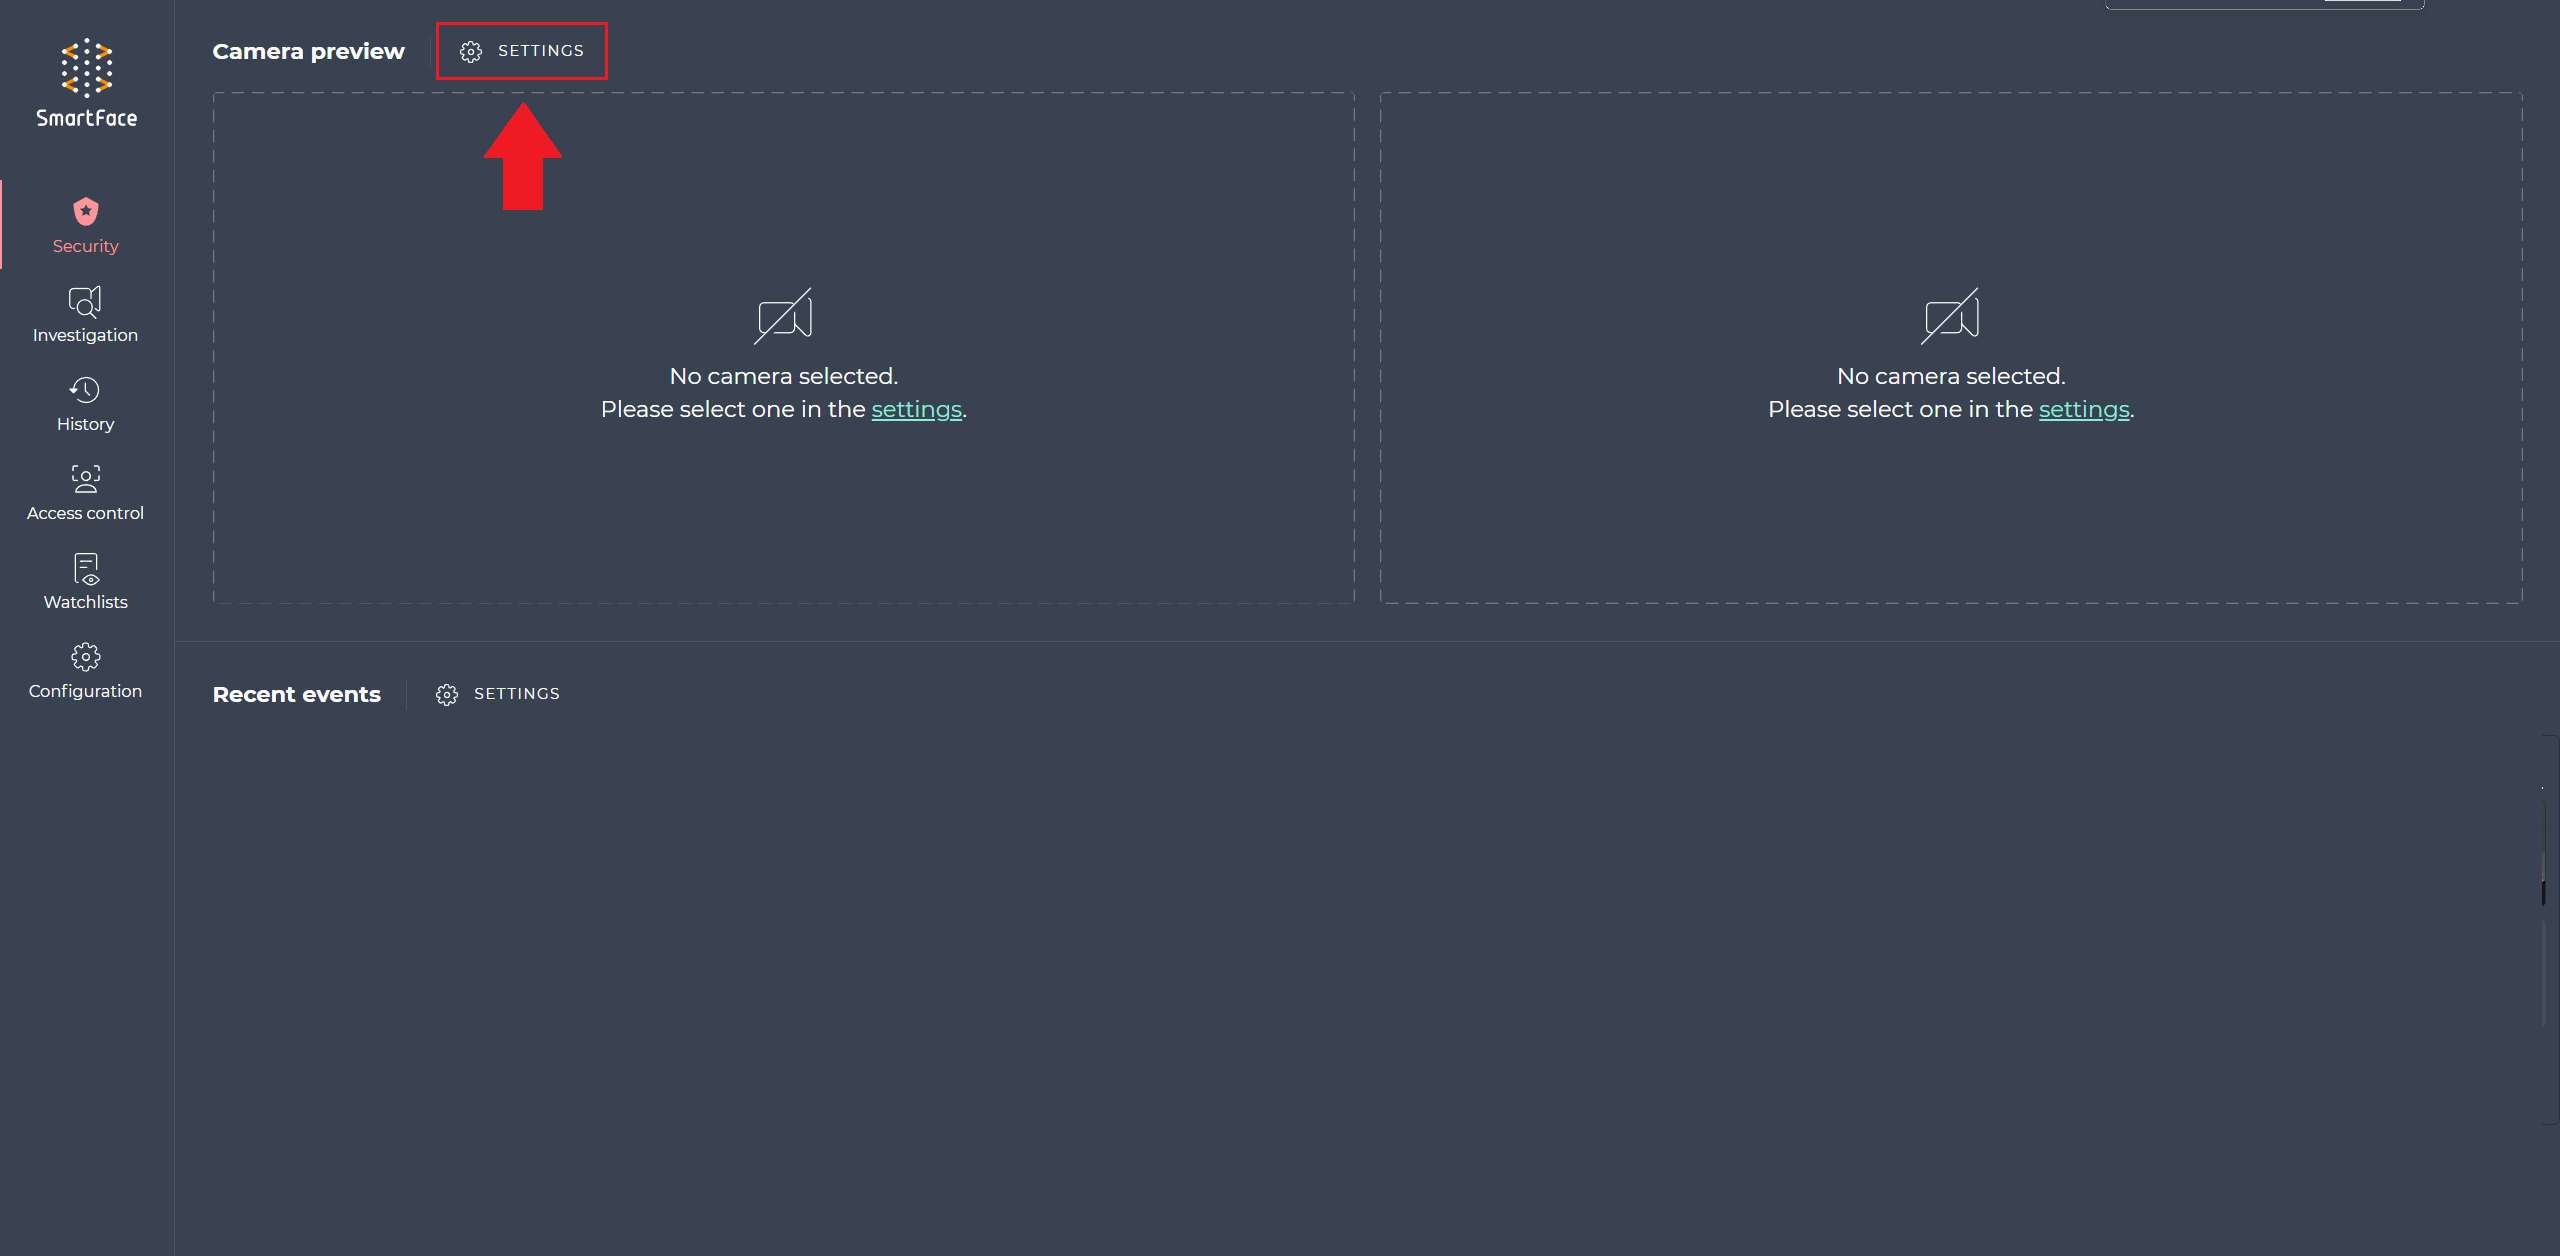
Go to the Security dashboard in the left menu.
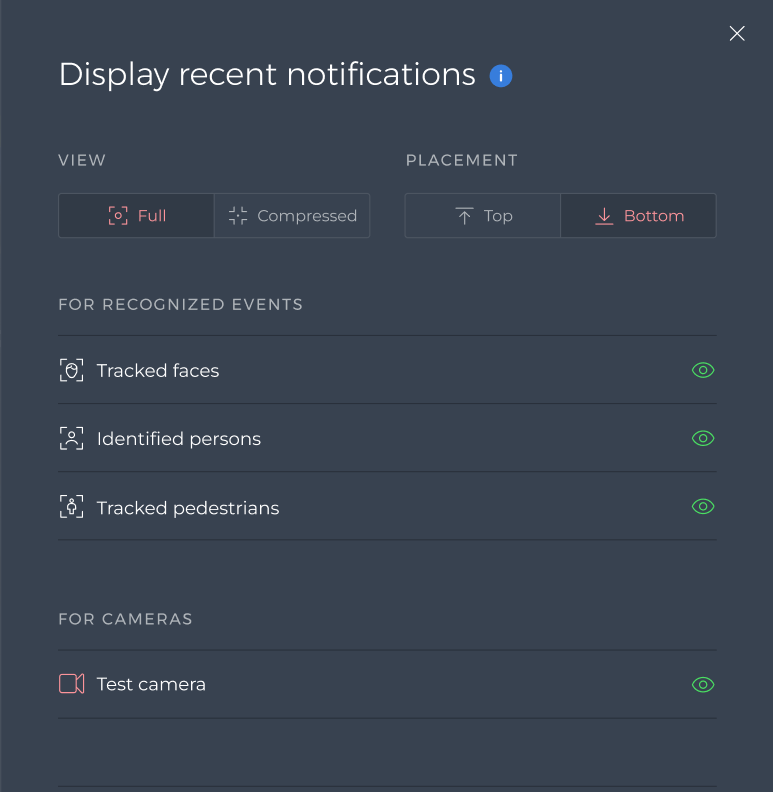
Click on Camera preview settings
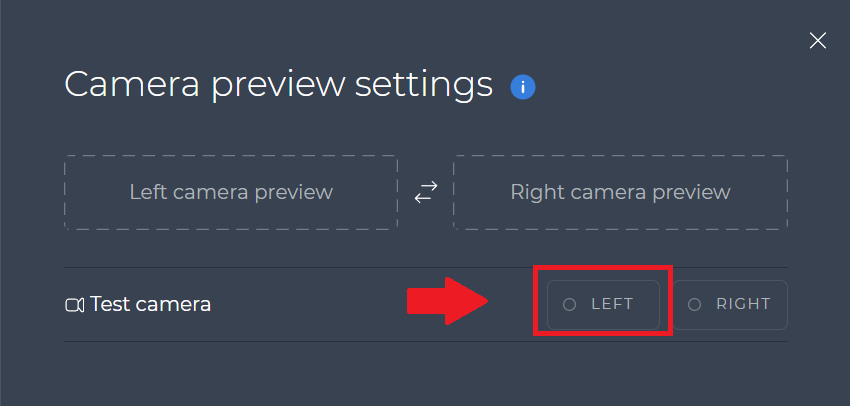
NOTE: Camera preview is supported only for RTSP cameras.
- For each camera, you can choose the left or right side, where the camera preview will be shown. For example the left side. For each side, only one camera can be shown at the same time. Then go back to the Security dashboard.

- Click on Recent event setting
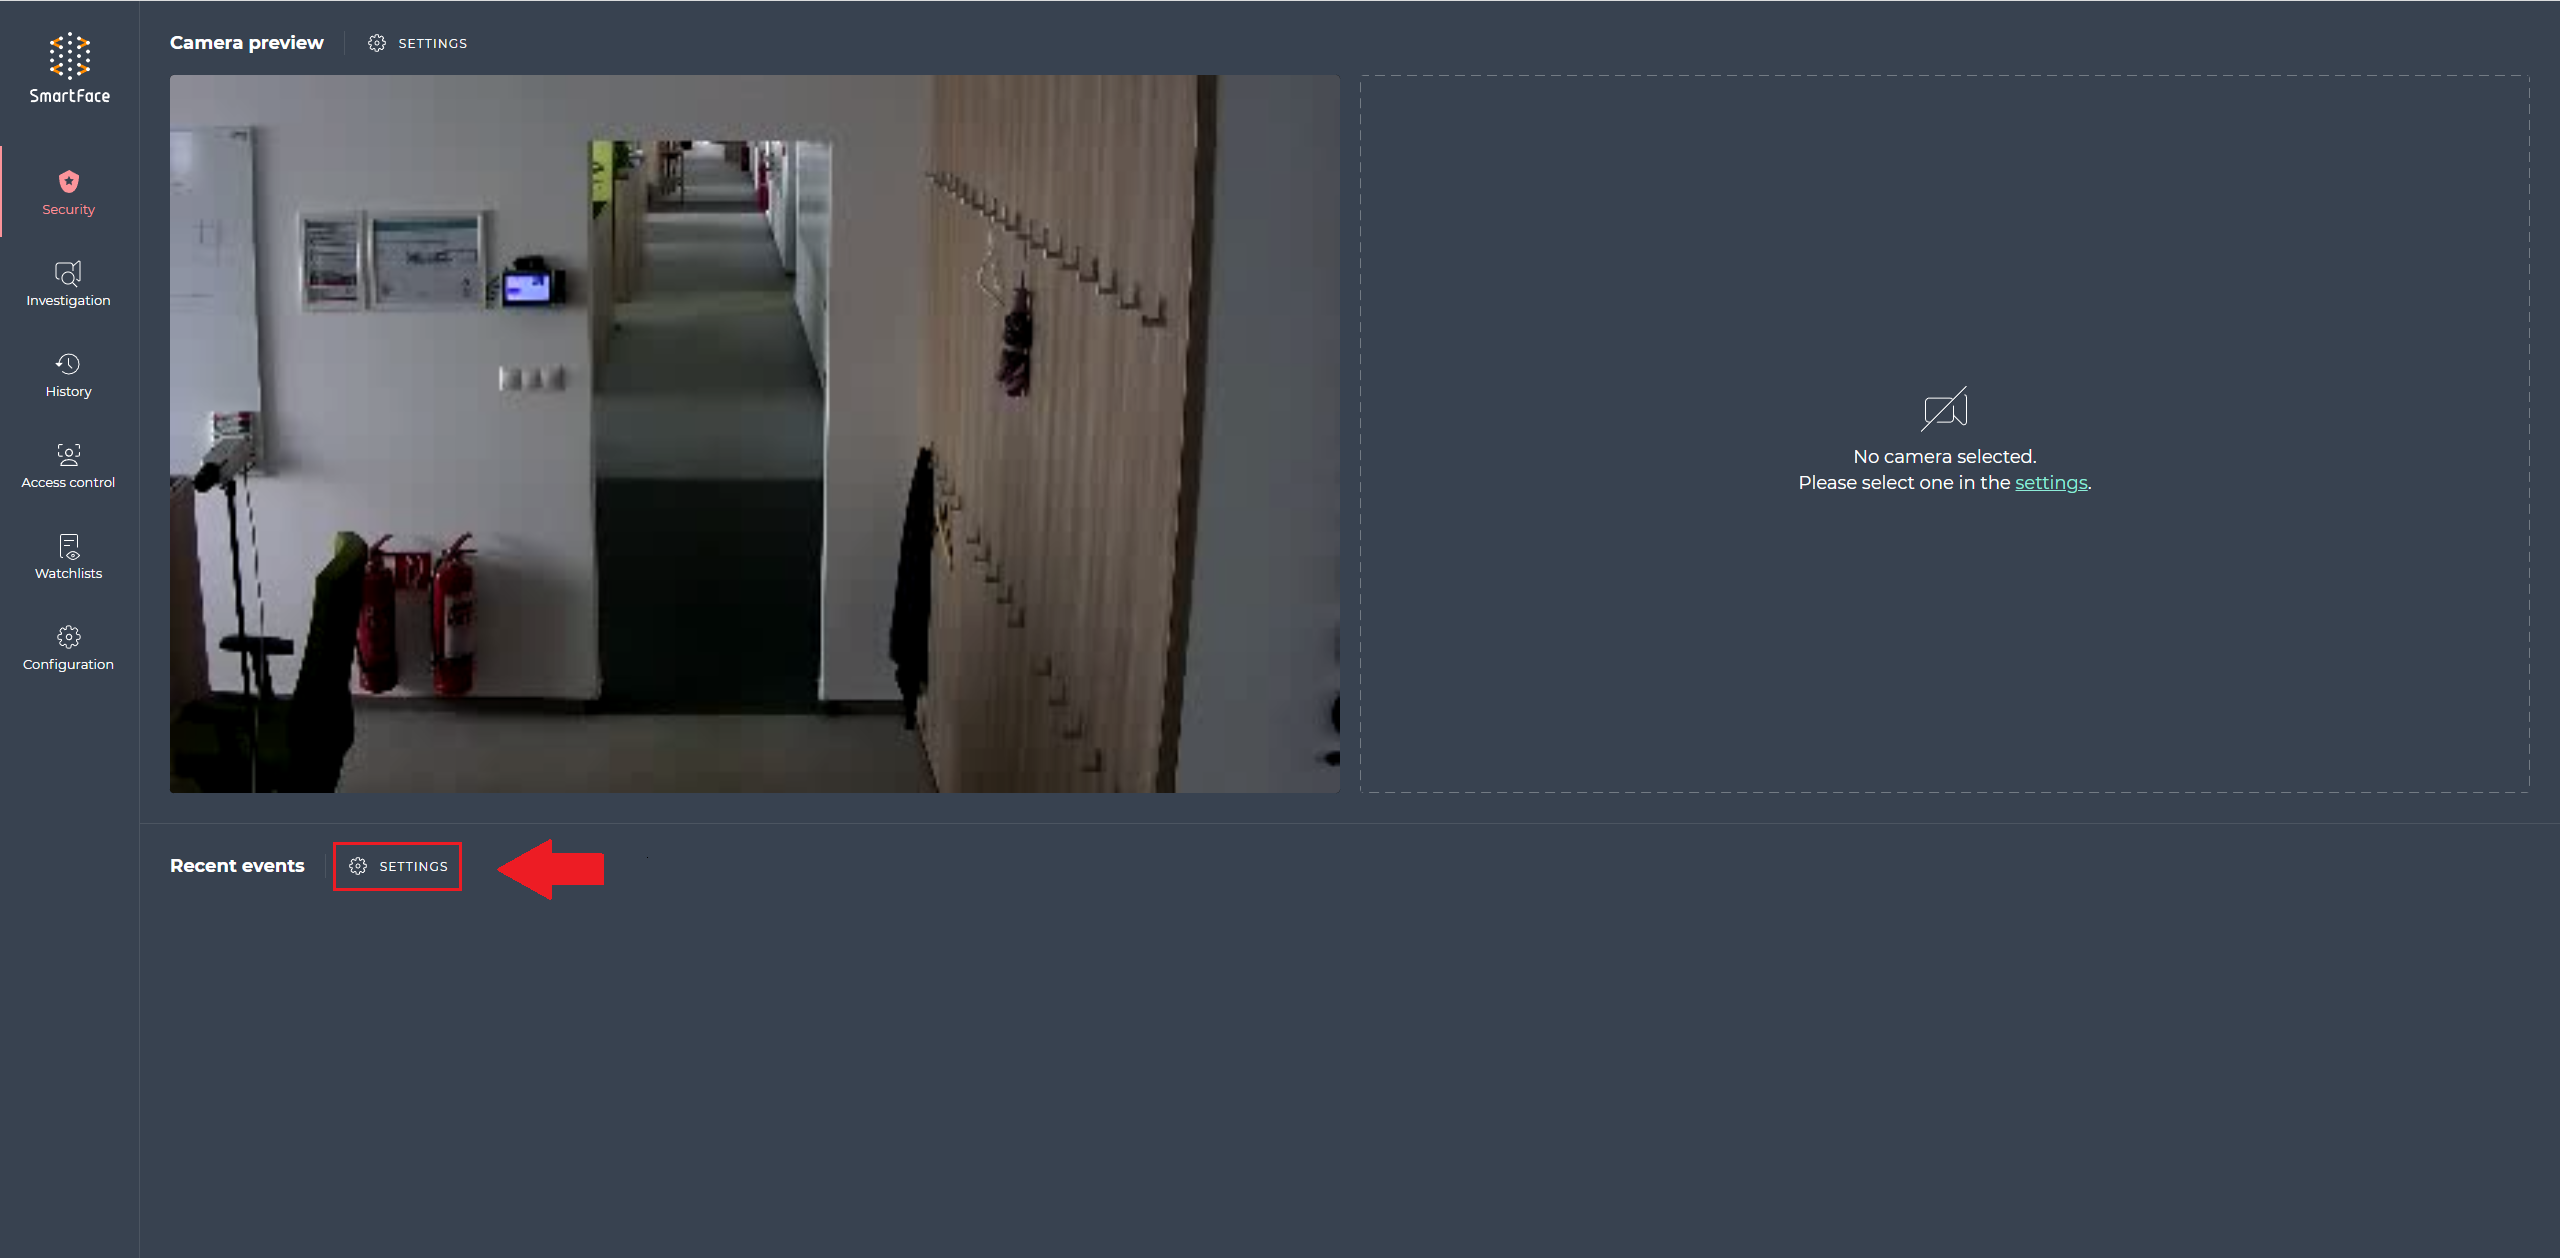
- Switch on your camera by clicking on the icon next to the name of your camera (it will appear green)

Go in front of your camera.
This is your first identification!
You are matched against to watchlist. Check out Video Processing Platform Station. The match notification you can see in the Security dashboard in the Recent event settings section and also on the History event page.
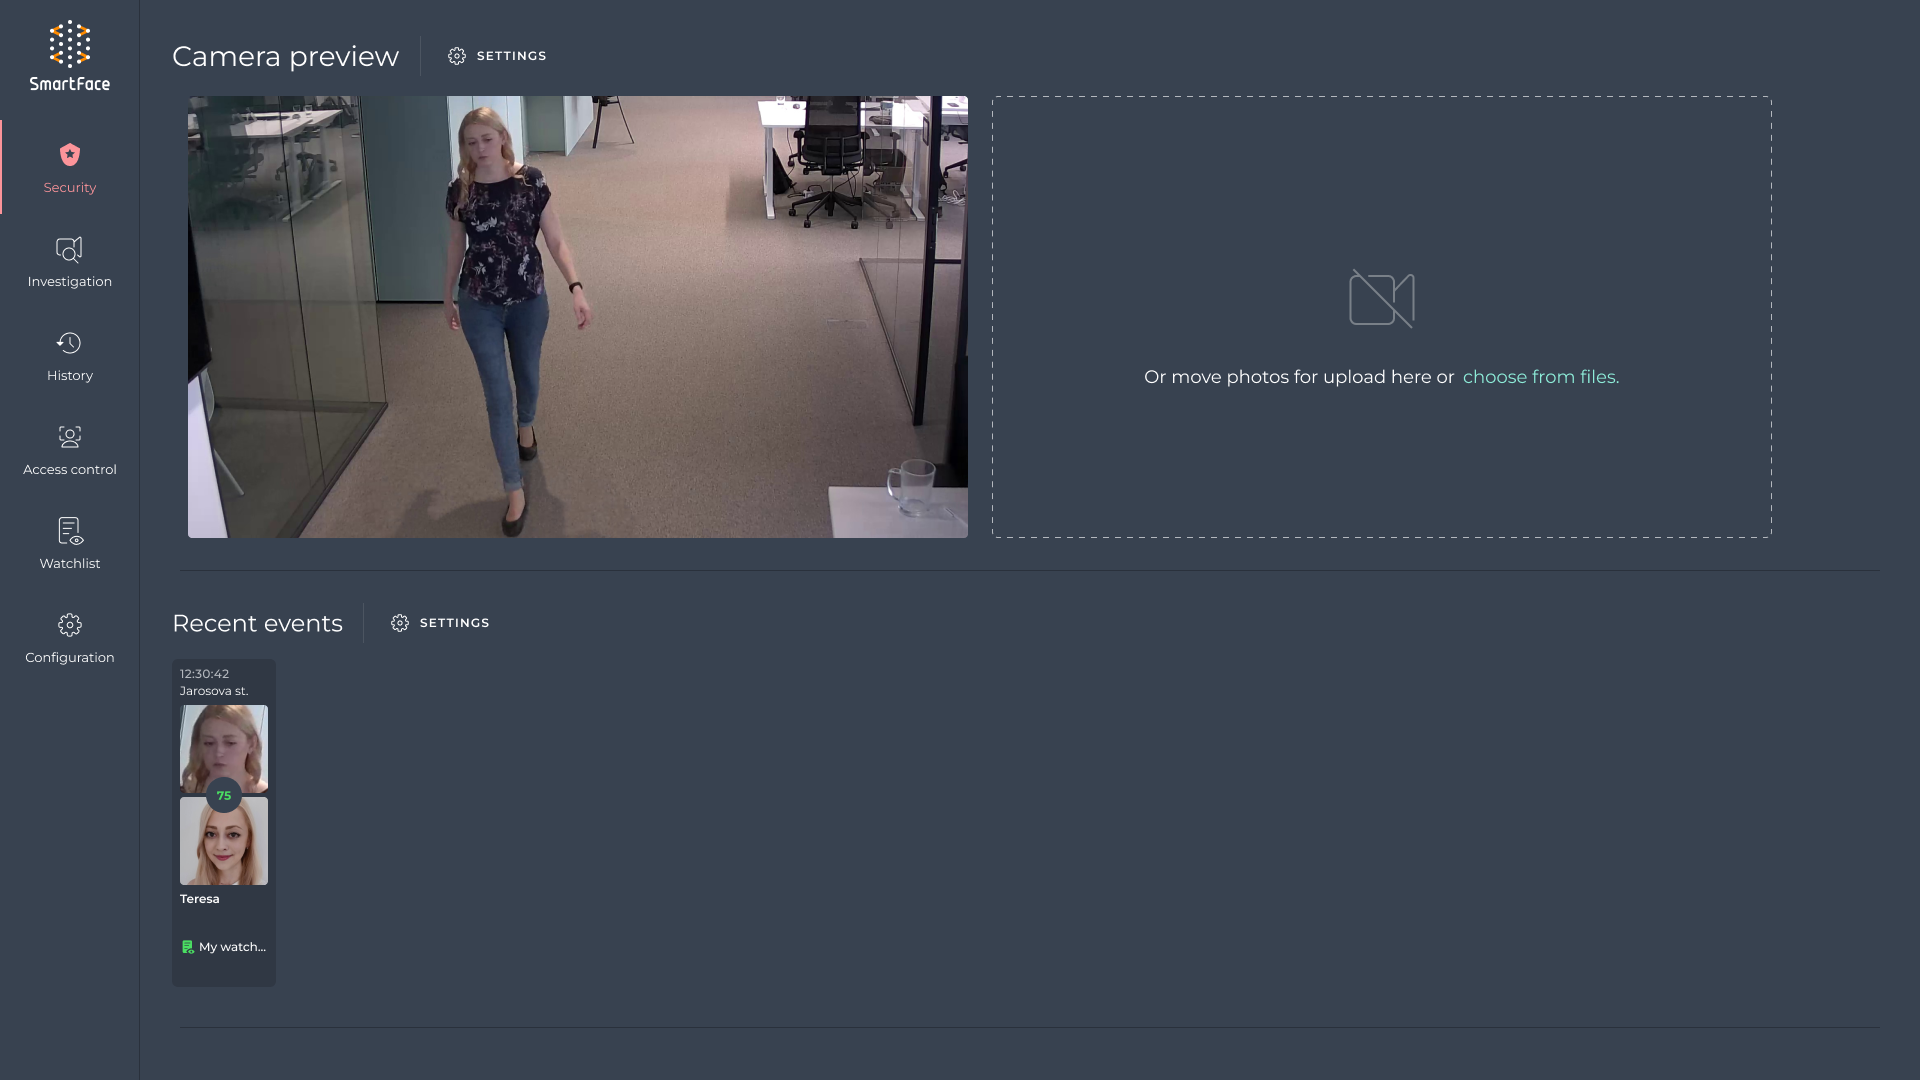
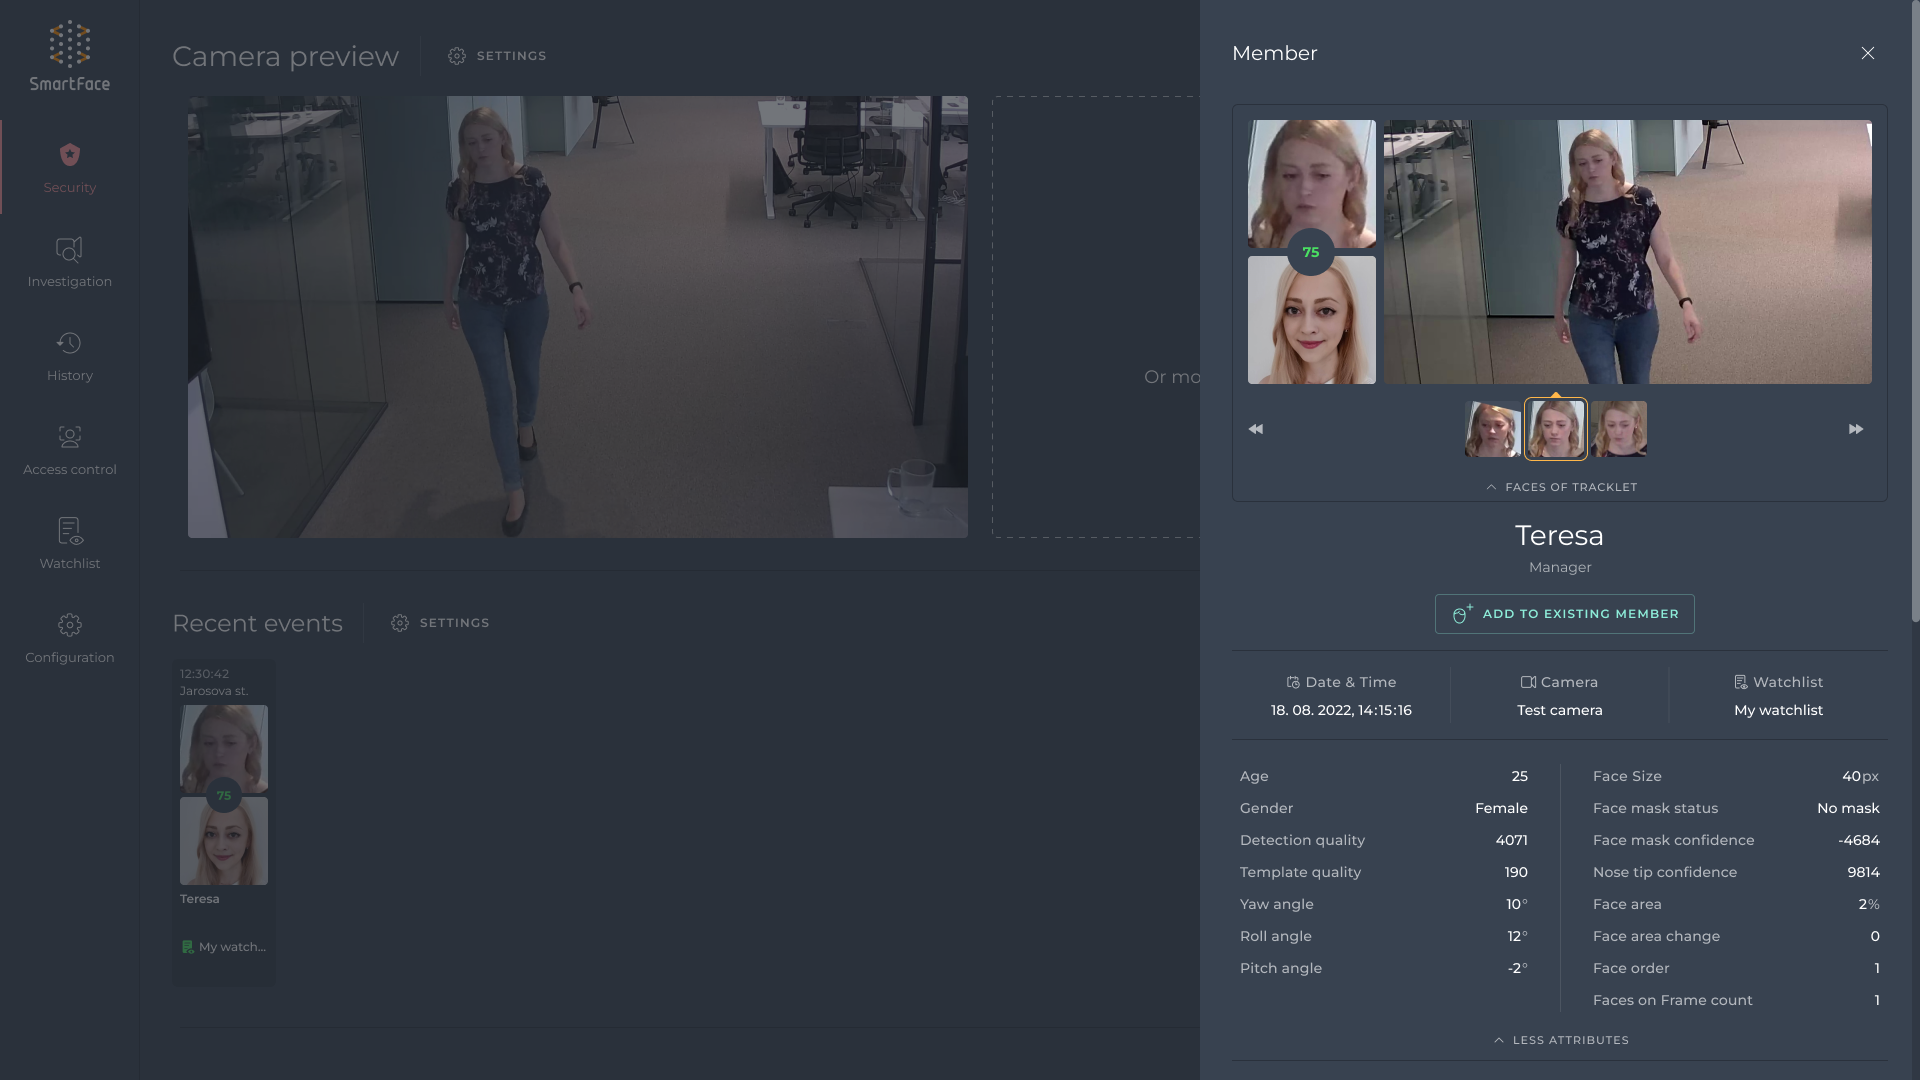
- You can display notification details by clicking on the notification.
Notification detail provides you with more details about watchlist members (in this case it is information about you), for example: name, notes, age, gender and many other attributes. More about notifications, you can find here.
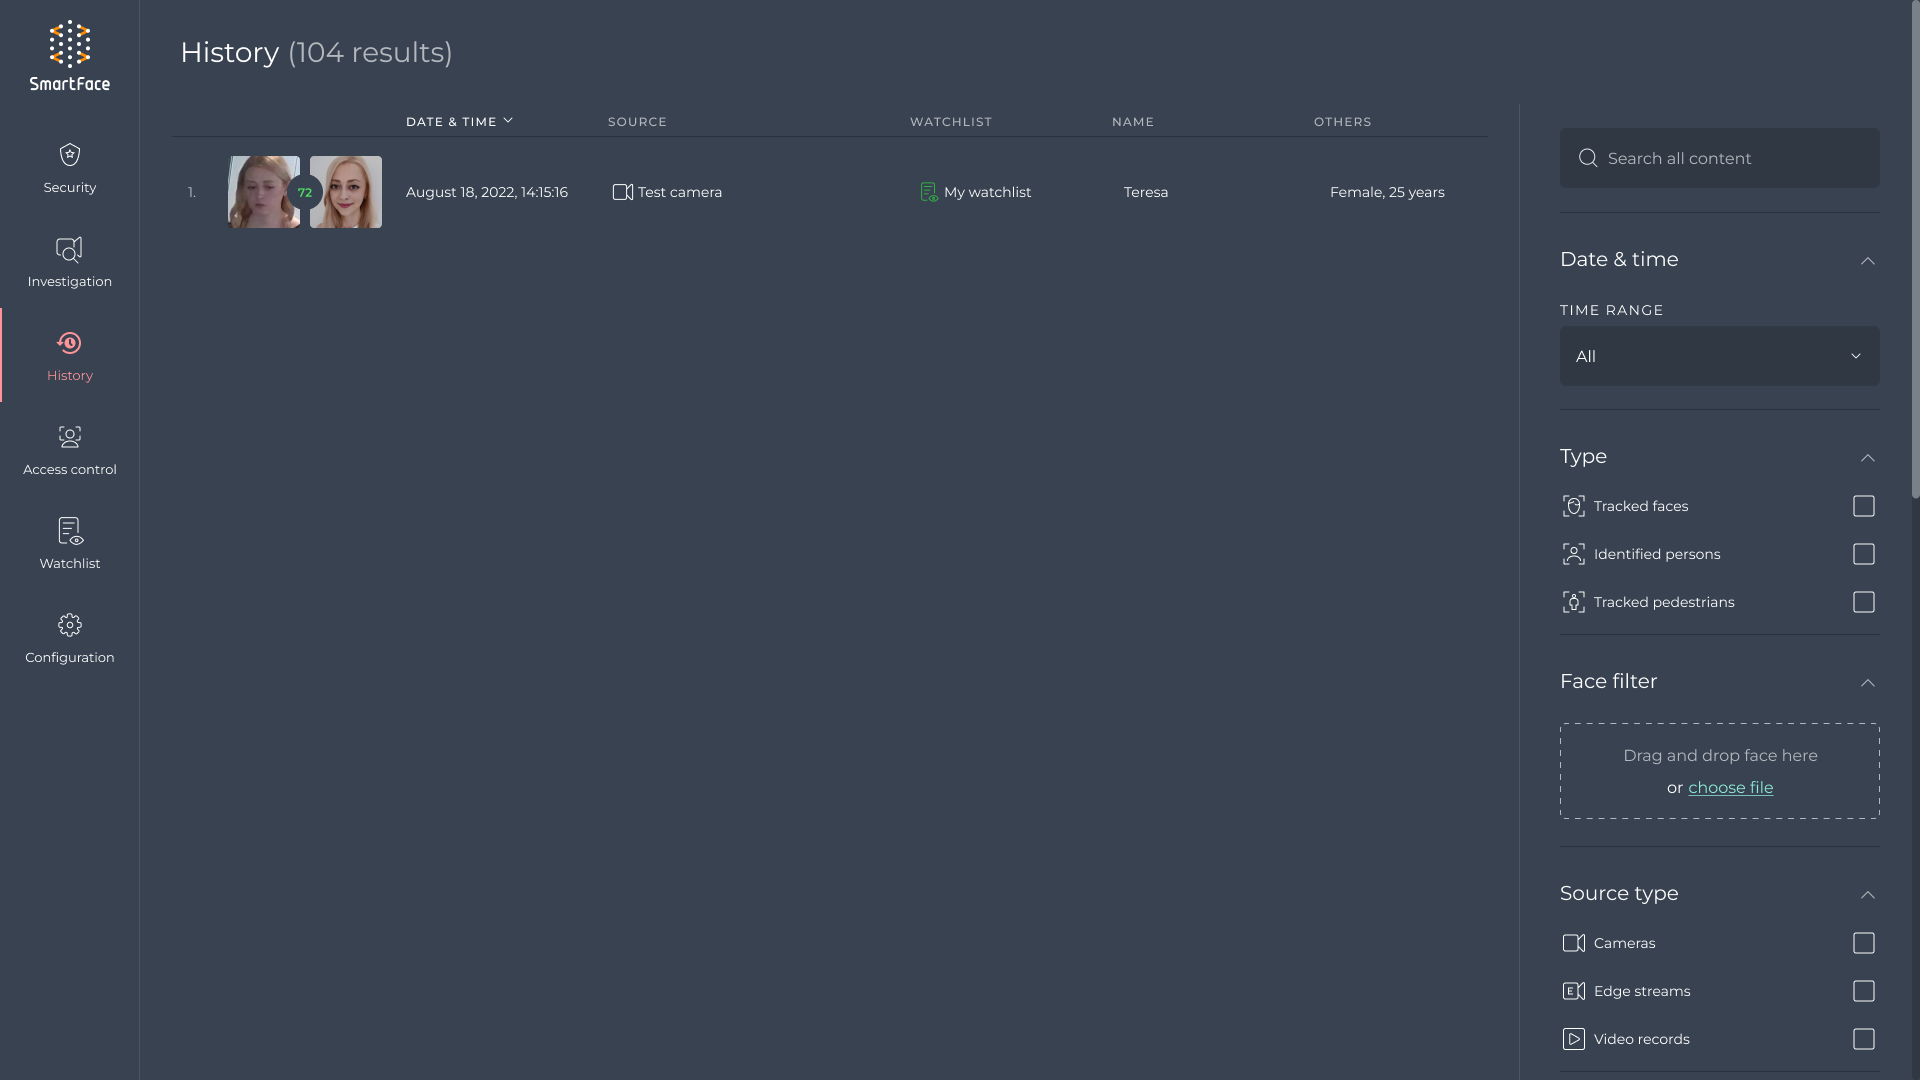
Your match result is also displayed on the History event** page.
Next steps
Congratulations! Your Video Processing Platform deployment is up and running.
- For more information about the Video Processing Platform and to reveal what functionality Video Processing Platform has, please visit the manuals.
- To find out complex use cases, please read the guides section offering in-depth information and step-by-step instructions.
- For developers and integrators, we recommend taking a look at the Integration section where you find out how to use our APIs, extended modules and hands-on knowledge about sample projects.
- For integration with NetworkOptix VMS, please follow the NX Witness Integration guide
- If you are using Edge streams, you can enable the synchronization of the WatchList Members from the Video Processing Platform to the SFE Stream Processor running on the camera. Please follow Watchlist synchronization